

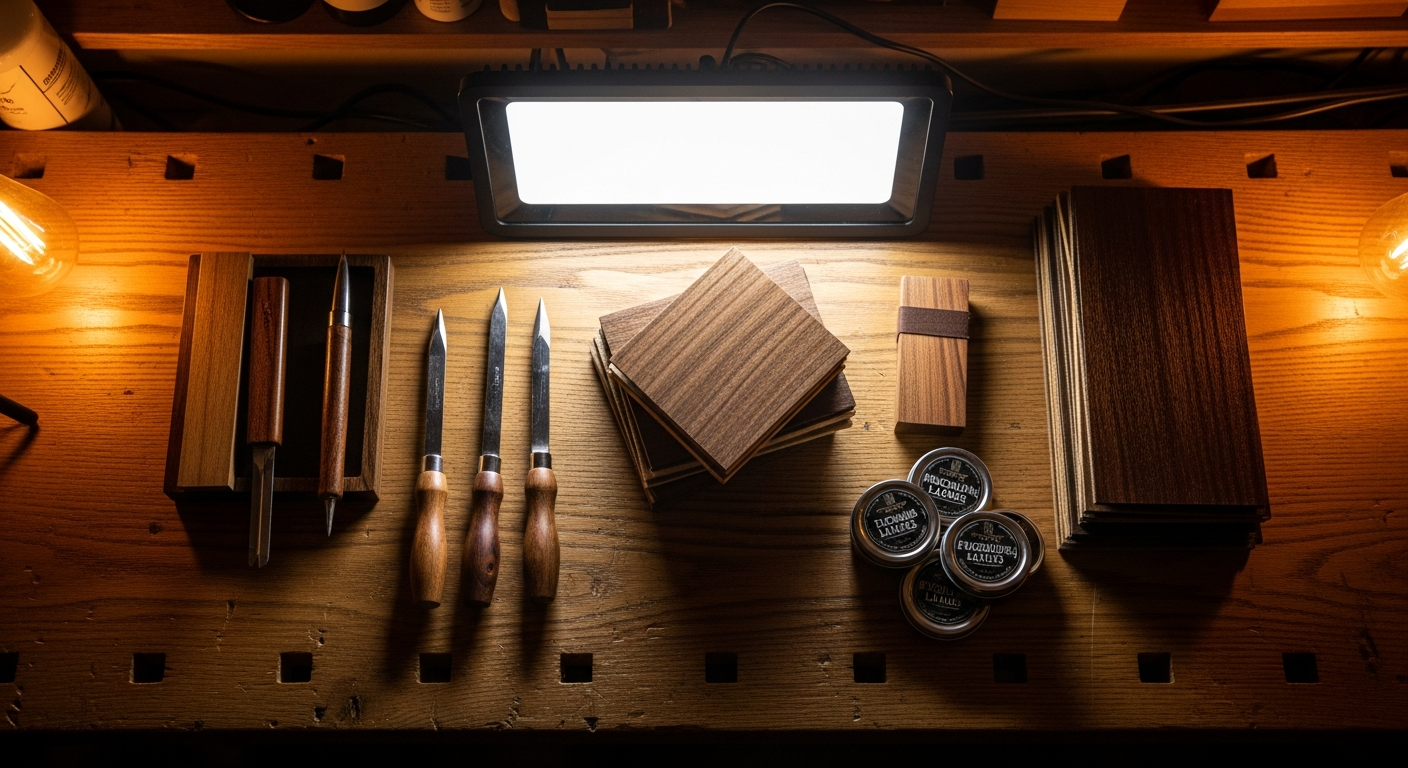
Guitar Router: Buying Guide
Let's face it, when it comes to DIY guitar building, there comes a point where the Dremel, as versatile as it is, is no longer enough. That moment when you look at a cavity for a pickup or a neck pocket and you understand that, to obtain a clean, precise and above all repeatable job, something more is needed. I'm talking about the router, the nightmare and salvation of every hobbyist luthier.
I still remember the first time I had to rout the cavity for a humbucker on a body I had almost finished. I was sweating cold. I had spent weeks gluing the pieces, shaping the body, sanding. One mistake with the router and I would have ruined everything. That fear, that block, is common to many of us who work in garages. And it's right, because the router is a powerful tool, spinning at thousands of revolutions per minute and can cause serious damage, both to the wood and to your fingers. But it is also the tool that opens the doors to a level of precision you could only dream of before. I'm not a professional, I've always said that. I learned to use the guitar router Through trial and error, and a few pieces of wood ending up directly in the fireplace. But precisely because of this, I know what it's like to approach this tool without a fully equipped workshop or years of experience. The goal here is to provide you with a practical guide that will make you feel less alone and more confident when it's time to fire up that beast.
Which type of router should you choose? It's not just a question of power.
[GRIGLIA FOTO]
The router is just a motor that spins a bit. The real magic is done by the router bit, or router bit. And here, I'll tell you right away, don't skimp on quality. A cheap router bit wears out quickly, burns the wood, makes a dirty cut, and makes you lose time and material. Essential router bit types for lutherie:
[BOX AFFILIAZIONE] 1. Straight Bit: The most common. Used to create cavities, grooves, rebates.
Advise: Get them in different sizes (e.g., 6mm, 10mm, 12mm) with an 8mm or 1/2 inch shank for the main router, and 6mm for the trim router. Router bits with carbide inserts last much longer.n2. Flush Trim Bit: It has a bearing on the bottom, aligned with the cutting diameter. Used to trim a piece following a template.
Advise: Essential. It allows you to perfectly copy the shape of a template onto the piece of wood. There are also ones with an upper bearing. I have a 12mm diameter one with a lower bearing and a 6mm one with an upper bearing for details.n3. Bearing Router Bit: Similar to the flush trim, but with a bearing of a different diameter than the router bit, to create decorative profiles on the edges (e.g., roundover, 45°).
Advise: Useful for chamfering the edges of the body or headstock. A roundover bit (e.g., R3mm or R6mm) is a good starting point.
Router bit materials:
HSS (High Speed Steel): Cheap, but wear out quickly on hardwood. I don't recommend them for precision work.Carbide (Tungsten Carbide):
The best. They last a long time, cut cleanly, and resist heat. They cost more, but pay for themselves in fewer frustrations and wasted wood.
Replaceable inserts: Some professional router bits have carbide inserts that you can replace when they wear out. A larger initial investment, but very economical in the long run. A mistake I made: At first, I bought a set of cheap router bits on Amazon. They lasted me for a couple of cavities, then they cut poorly, burned the wood, and vibrated. I realized that the router bit is like a razor blade: if it's dull, it ruins your skin. Better one good router bit than ten poor ones. Brands like CMT, Freud, or Bosch (the professional series) are a good starting point. Essential accessories: the true secret to precision
A router, however good, is useless without the right accessories. These are what transform a powerful machine into a precision tool for lutherie. 1. Templates
They are the key to repeatability and precision. Templates are shapes made of MDF, thick plywood, or acrylic that guide the router bit. For what: Pickup cavities, neck pocket, body shape, headstock.
My approach: I bought the first ones, then I learned to make them myself. CAD drawings, 1:1 print, glue onto 10-12mm MDF, cut with a band saw and trim with a trim router and a flush trim bit. It takes patience, but a good template lasts a lifetime and allows you to replicate perfect work.
A trick: If you make a template for a neck pocket, make sure the walls are perfectly perpendicular. Even a small error results in a neck that doesn't fit well.


2. Guide Bushings or Template Guides
They are metal rings that mount on the router base and protrude downwards. They slide along the edge of the template, guiding the router bit. How they work: The outer diameter of the bushing is what follows the template. The inner diameter is where the router bit spins. The difference between the two diameters (offset) determines how much the router bit will cut inside or outside the edge of the template.
Crucial: This offset needs to be calculated. If the bushing has an outer diameter of 20mm and the router bit is 10mm, the offset is 5mm per side. So the cavity will be 10mm larger (or smaller) than the template. It seems trivial, but it drove me crazy at first. You need a complete set of bushings and a precision caliper to measure them.
Advise: Get a set of good quality bushings, compatible with your router. Some routers already have a proprietary bushing system. 3. Clamps
It seems obvious, but securely clamping the workpiece and the template is FUNDAMENTAL. A piece that moves under the router bit is a guaranteed disaster. Type: C-clamps, bar clamps, quick-release clamps.
Where: Secure the body to the bench and attach the template to the body. Use non-slip mats or rubber strips to prevent marking the wood.
An anecdote: Once upon a time, milling a neck pocket, the template has moved slightly. Result? One side of the pocket It was wider than the other. I had to glue a piece of wood and re-mill everything. A waste of time and nerves on edge. Since then, I've fixed everything as if it were supposed to withstand an earthquake.
4. Dust Collection System
The router produces an incredible amount of chips and fine dust. Not only are they bad for cleaning, but they're also bad for your lungs and your ability to see what you're doing. Options: Many routers have a vacuum cleaner connection. A construction vacuum with a good filter is a great investment.
My experience: I started without one, and every time the garage looked like it had snowed. Then I bought a vacuum cleaner, and the difference was enormous. Less cleaning, more visibility, less dust in my lungs. Don't underestimate this aspect.
Enjoying this article? Subscribe to the newsletter: one email a week, zero spam.
Subscribe →Guitar Milling Techniques: Steps and Tricks
Now that we have the equipment, let's see how to use it. milling process It requires calm, method and respect for the tool.
1. Preparation of the piece and the jig
Fix the body: Use clamps to secure the body securely to the workbench. Make sure there are no vibrations.Position the template:
Align the template perfectly on the area to be milled. For pickup cavities or the neck pocket, precision is paramount. You can use sturdy double-sided tape (carpet tape, for example) or small nails/screws in the spots that will later be routed out or covered. I prefer double-sided tape to avoid holes, but if the piece is large and the routing is aggressive, a few screws aren't a bad idea.
Verify: Check and recheck the alignment. Measure the distances, use a set square. Every millimeter counts. 2. Choice of cutter and socket
Straight cutter: For cavities.
Copy milling cutter: To trim the edges of the body or copy a template.
Compass: If using a jig, fit the appropriate guide bushing and calculate the offset.
3. Setting the cutting depth
Multiple passes: NEVER attempt to rout the final depth in a single pass, especially on hardwoods or large cavities. This is one of the most common and destructive mistakes. The bit heats up, the wood burns, the router struggles, and the cut becomes messy.Golden rule:
not more than 3-5mm per pass. On hardwoods like maple or ebony, even less.
How to do: Set the first shallow pass (e.g., 3mm). Route. Then lower the cutter another 3mm and route again. Repeat until the desired depth is reached. This is especially true for plunge routers. 4. Milling direction (Climb Cut vs Conventional Cut)
This is a technical detail that makes a big difference. Conventional Cut (or Up-Cut): The router bit rotates clockwise and you move it counterclockwise (or vice versa, depending on how you look at the router). The bit bites into the wood. This is the most common and safest technique, because the router tends to push against the jig, giving you more control.
Climb Cut (or Down-Cut): The cutter rotates clockwise and you move it clockwise. The cutter "climbs" the wood. It is more aggressive and can cause tear-out (chips) and the router tends to “pull away” from your hands.
The trick of the trade (which I learned after chipping a bodysuit): Always take the first steps in conventional cut to rough out.
The last step, the finishing one, do it with a climb cut very light (less than 1mm of material to remove). This drastically reduces the tear-out and leaves a very clean surface. It works especially well on the edges of cavities where the wood is more prone to chipping.
Attention: The climb cut is dangerous. Practice on scraps. Hold the router with both hands and be ready to counteract the thrust. 5. Overheating management
Slow and constant routing: Don't force the router. Let the bit do its job. Move at a constant speed, not too fast to overheat the bit, not too slow to burn the wood.
Clean the bit: If you see burnt wood residue on the bit, clean it. There are specific products, but a little acetone or alcohol can also help.
Take breaks: If you're doing a long routing job, let the router and bit cool down.
Common mistakes and how to avoid them (my very personal collection of disasters)
Every hobby luthier has their graveyard of mistakes. I've done my part, and from those, I've learned more than from any tutorial. Here are the most frequent ones with the guitar router. 1. “I'm going all the way down in one go!”: The classic impatient beginner's mistake. Result: burnt bit, burnt wood, struggling router, crooked cavity.
Solution: Multiple passes, no more than 3-5mm at a time. It seems slow, but it's the only way for a clean job and to not ruin the tool.n2. Jig not properly secured: The jig moves during routing. Result: deformed cavity, ruined edges.
Solution: Sturdy clamps, quality double-sided tape, obsessive checking before turning on the router. If the jig is large, use multiple fastening points.n3. Dull bit: You don't notice it, but the bit no longer cuts like before. Result: burnt wood, smoke, jagged edges, excessive effort.
Solution: Regularly check your bits. If you see that they no longer cut cleanly or that the router is struggling, change them. Don't try to “finish the job” with a dull bit. It's a false economy.n4. Too much pressure or wrong speed: Push too hard or move the router too fast. Result: vibrations, tear-out, danger.
Solution: Let the bit do the work. Move calmly and steadily. The feed rate should be one that allows a clean cut without straining the machine. Many routers have adjustable speed: experiment on scraps to find the right one for the type of wood and bit.n5. I didn't calculate the bushing offset: I route following the jig and the cavity turns out larger or smaller than expected.
Solution: Precisely measure the outer diameter of the bushing and the diameter of the bit. The difference divided by two is the offset per side. If the jig is external to the cavity, the offset is added; if it is internal, it is subtracted. It seems like a puzzle, but once understood, it's mechanical.
Example: 12mm bit, 20mm bushing. Offset = (20-12)/2 = 4mm. If the jig is external (e.g., for a neck pocket), the cavity will be 4mm smaller than the jig per side. If the jig is internal (e.g., for a pickup cavity), the cavity will be 4mm larger than the jig per side. It's not immediate, I know, but it's fundamental to avoid mistakes.
Safety and maintenance: your skin and your tools will thank you
The router is a powerful tool. It's not a toy. Safety comes first. Eye protection: Always safety glasses. Wood chips and shavings fly.
Ear protection: The router is noisy. Noise-canceling headphones are a must, especially for long sessions.
Mask: Fine wood dust is carcinogenic. Use an FFP2 or FFP3 mask.
Hands: Keep your hands away from the rotating bit. Do not wear loose gloves that could get caught.
Unplug from power: Whenever you change a bit, adjust something, or perform maintenance, always unplug the router from the outlet.
Bit maintenance: Clean the bits after each use. Resin and burnt chips stick and reduce cutting effectiveness. Lightly oil the bits to prevent rust.
Check the router: Check that the bearings have no play, and that the locking mechanisms work correctly.
Remember that practice makes perfect. Don't expect the first neck pocket from a master luthier. Practice on wood scraps. It's the only way to get familiar with the machine, understand how the wood reacts, and refine your technique.
If you are thinking of modify a guitar that you already have, perhaps to add a pickup or change a bridge, the router could be your best friend. But only if used wisely and with awareness.
One last thing: when looking for information, don't stop at the first YouTube video. Look for lutherie forums and specialized websites. I've learned a lot from reading advice on Reddit, but also from sites like Stewart-MacDonald's, which is an inexhaustible source of information and tools for lutherie. For example, their guide on router bits is very detailed and gives you a clear idea of what to look for.
Ultimately, the router It's an investment, both in money and in the time it takes to learn how to use it. But it's an investment that will repay you with the satisfaction of creating clean, precise, and, above all, yours*. Don't be afraid to make mistakes, it's part of the process. The important thing is to learn from every mistake and keep trying. If I could do it, you can too.
See also
Build better. Subscribe for updates, guides and free ebooks.
Subscribe →Choosing the right router: models and features to evaluate
So far we have talked about router bits, templates and techniques, but we have not yet touched on a fundamental point for your buying guide: which router to buy? It's not just a matter of color or brand, but of characteristics that make a difference in lutherie work. When I started, I bought the first cheap router I found. It worked, but it was imprecise, noisy and depth adjustment was a nightmare. I realized that the initial cost is important, but spending a little more for the right tool saves you time, frustration and, ultimately, money (because you ruin less wood).
Plunge Router vs. Fixed-Base Router
These are the two main types of portable routers, and each has its pros and cons for us luthiers.
Plunge Router (Plunge Router)
This type of milling machine è the most common and versatile. The motor and the router bit slide vertically on columns, allowing you to “plunge” the router bit into the wood to a preset depth without having to tilt it or turn it on in contact with the workpiece.
- Pros: Ideal for cavities (pickup, electronics, neck pocket), grooves and blind holes. Depth adjustment is usually precise, often with a stepped turret for multiple passes.
- Against: It can be more cumbersome and heavy, which makes working on edges or complex curves less easy without a robust jig. Sometimes the base is less stable for trimming work.
- My experience: It's my workhorse for almost all cavities. I've used it for everything, from neck pocket to the electronics compartment. The ability to lower the router gradually is invaluable to avoid chipping and overheating.
Fixed-base router (Fixed-Base Router)
With this model, the motor is locked in a fixed position relative to the base. Depth adjustment is made by acting directly on the motor or on a micrometric screw.
- Pros: More compact and lighter, excellent for trimming work on the edges of the body, chamfers, and for being mounted under a router table. It offers greater lateral stability.
- Against: Less suitable for deep cavities that require the progressive immersion of the cutter, unless you make preliminary holes with the drill.
- My experience: I have a small trimmer (often called trim router or laminate trimmer) which is essentially a fixed-base router. It's great for precision trimming, for copying body or headstock templates, and for light work. It's a great complement to the plunge router.
Power and variable speed: a winning combination
The power of the engine of a router It is measured in Watts (W) or horsepower (HP). For lutherie, especially if you work on hardwoods like maple or ebony, I recommend a motor with at least 1200-1500W. This will give you the necessary power to cut without the machine struggling, maintaining a clean cut. But power alone is not enough: variable speed is crucial. Larger bits, or those with complex profiles, must run at lower speeds to avoid overheating, burning the wood, or, worse, breaking the bit. Smaller bits, on the other hand, require higher speeds for a clean cut. A good router should have electronic speed control that keeps it constant even under load.
Collets: don't underestimate the diameter
The clamp (collet) is the element that holds the cutter still. The most common diameters are 1/4 inch (approx. 6.35mm), 8mm and 1/2 inch (approx. 12.7mm).
- 1/4″ (6.35mm) and 8mm: Common on smaller or mid-range routers. Suitable for small-sized cutters.
- 1/2″ (12.7mm): It is the diameter I recommend you look for. 1/2 inch shank bits are more robust, vibrate less and allow deeper and cleaner cuts, especially on hardwoods. If your router only accepts 1/4″ bits, look for a model that has at least the option for 8mm or, even better, for 1/2″. Many quality routers come with interchangeable collets for different diameters.
A thicker shank means less cutter deflection and, consequently, a more precise and safer cut.
Ergonomics and controls: comfort makes the difference
Do not underestimate the importance of good design. Comfortable grips, a balanced center of gravity and easily accessible controls make the use of the router less tiring and safer.
The fine adjustment of the depth is another crucial aspect. Some routers have a micrometric wheel that allows adjusting the depth with millimeter precision, fundamental for delicate work such as the recess of the binding or edge profiling.
Buying tips: from budget to serious hobbyist
Since we are not all professionals with an unlimited budget, here are some tips based on my experience and what I've seen around.
1. Entry-Level Range (50-150€)
If you’re just starting out and want to try it, or if you need a router for occasional and not too demanding jobs, you can consider brands like Einhell, Tacklife, or other generic brands you find on Amazon or in large DIY stores.
- What to expect: They are often plunge routers with powers around 1200W-1500W. They have variable speed and come with some basic accessories.
- Pros: Cheap, they allow you to start without a large investment.
- Against: Accuracy can be a problem. The materials are less robust, the depth locking mechanisms may have play and the collets might not be perfect. Durability is limited. I advise you to immediately change the cutters you find supplied, they are almost always of poor quality.
- My advice: If you really must, use it for roughing. But don't expect surgical precision. Plan to replace it with something better as soon as you get the hang of it.
2. Mid-Range Tier (150-350€)
Here we enter the territory of the serious hobbyist, one who wants a reliable and precise tool without breaking the bank. Brands like Bosch (green series for hobbyists, blue for professionals), Makita, DeWalt, or Triton offer excellent solutions.
- Models to consider:
- Bosch POF 1200 AE / POF 1400 ACE: Excellent plunge routers, with good power and electronic speed control. The 1400 ACE also has an LED light and a more convenient cutter changing system. They are robust and precise for their price. I have seen them used in many hobby workshops with excellent results.
- Makita RT0700C (or variants): It's not a “full-size” router, but an exceptional trim router. It's small, handy, powerful, and incredibly versatile thanks to the interchangeable bases (fixed base, plunge, tilting). Perfect for trimming, small recesses, edging. A must-have as a second router.
- Triton TRA001: Often recommended for use on a router table, but it is also an excellent freehand router. Very powerful (2400W), with micrometric adjustment from above and the possibility to lock the base directly. It's a bit bulkier, but very robust.
- Pros: Excellent value for money, good precision, superior durability, quality accessories and easily available spare parts. Many of these models accept 1/2 inch shank bits.
- Against: They might not have all the refinements of professional models, but for hobby lutherie, they are more than sufficient.
- My advice: If you can, aim for this range. You'll be rewarded in precision and reliability. I use a Makita RT0700C for trimming and a Bosch POF 1400 ACE for larger cavities, and I'm very happy with them.
3. High-End Range (350€+)
Here we are talking about professional machines. Festool, for example, is a brand that many craftsmen dream of, with routers like the OF 1010 or the OF 1400. These are exceptional machines, with unparalleled precision and build quality.
- Pros: Extreme precision, perfect ergonomics, integrated dust extraction systems, almost eternal durability, very wide range of dedicated accessories.
- Against: The price. They are a significant investment, often justified only for those who use them professionally daily.
- My advice: If you have the budget and the ambition of a professional luthier, go for it. Otherwise, for a hobbyist, the mid-range offers excellent performance for our purpose.
To get a more precise idea of the technical specifications and to compare models, you can take a look at the product sheets on the manufacturers' official websites. For example, the Bosch Professional website offers a detailed overview of their routers, with all the technical information you might need.
Bench router or handheld router? When to use what
Another aspect to consider is the use of the router: will you always use it freehand, or will you mount it under a router table? Both configurations have their advantages and are complementary for guitar builders.
Handheld Router
This is the most traditional and versatile use of the milling machine. Hold the router with both hands and move it over the piece of wood, guided by a template or simply by hand.
- When to use it:
- Cavity routing: For pickup cavities, electronics, the neck pocket, the freehand plunge router is ideal. It allows you to control depth and feed with precision.
- Shaping the body and headstock: After cutting the rough wood with a band saw, you use a flush trim bit with a bottom bearing to trim the body following a template.
- Truss rod slots: With a template and a straight bit, you can create the slot for the truss rod on the neck.
- Chamfers and edging: To soften the edges of the body or headstock with roundover or 45-degree bits.
- Advantages: Flexibility, direct control over movement, possibility to work on large and bulky pieces that would not fit on a router table.
- Disadvantages: Requires greater stability and control from the operator, the dust extraction system may be less effective if not well designed.
Router Table
A router table is essentially a router mounted upside down under a workbench, with the bit protruding from the top. It has a parallel fence and sometimes a miter gauge for angled cuts.
- When to use it:
- Working on small parts: Perfect for small pieces like headstocks, wood blocks for bridges, or for routing the profile of pickguards.
- Precise edge profiling: To create decorative profiles, round over edges of necks or fretboards, make inlays for binding with extreme precision.
- Grooves and rebates: To create longitudinal grooves (e.g., for neck reinforcements) or rebates on long and narrow pieces, where a manual guide would be difficult to maintain.
- Fretboard slotting: With a template and a thin bit, it is possible to cut the slot for the frets on a fretboard, although specific jigs exist for this that are even more precise.
- Advantages: Greater stability and precision for repetitive work and on small pieces. Hands are further away from the bit, increasing safety. Dust extraction is usually more efficient.
- Disadvantages: Limits the size of workable pieces. The initial investment can be higher (or requires time for good self-construction). Less flexible for deep cavities.
- My approach: I started without one, but after a while, I built a simple router table by mounting my plunge router. The difference for edging work and small pieces was enormous. If you can, consider having both options, even if the table is self-built.
In summary, there isn't an absolute 'best' choice between the two. They are complementary tools. To start, a good plunge router will give you maximum versatility. If your passion then grows, a small trim router and/or a self-built router table will enormously expand your capabilities.
Remember, the key is practice and attention to detail. Every piece of wood you work on teaches you something new about your router and its possibilities. Don't be afraid to experiment on scraps and refine your technique step by step. The world of lutherie is vast, and the router is one of your best allies to explore it.
FAQ on guitar router
What is the main difference between a router and a trim router?
A traditional router is generally larger and more powerful, often a plunge router, and is used for heavier work such as creating deep cavities. A trim router (or trim router) is smaller, lighter, and less powerful, usually with a fixed base. It is ideal for precision finishing, edging, small inlays, and copying templates, thanks to its maneuverability.
Can I use a cheap router to start building guitars?
Yes, you can start with an inexpensive router, but with some caveats. The included bits are often of poor quality and should be replaced immediately. Precision and durability will be lower compared to mid-range models, so you'll need to be more careful and patient. Keep in mind that you might want to replace it with a better model once you gain more experience.
Download the Luthier Survival Kit
Free PDF with checklist, problem-cause table and project card template.
 English
  Italiano
Stuck on your build?
If you ran into the same problem or have a question, drop it in the comments. I read and reply to every one.
Write a comment