

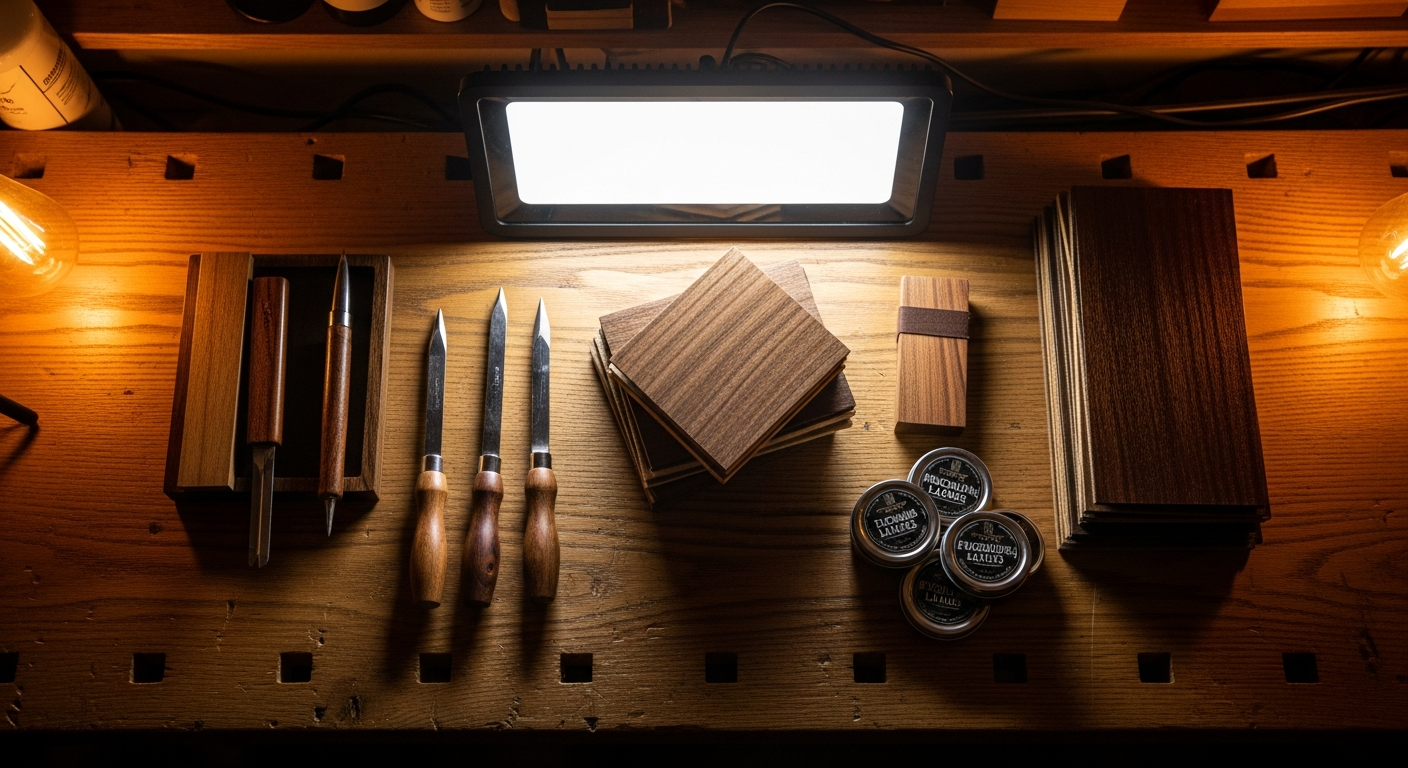
Guitar Inlay: Choice of Materials
Ok, let's get comfortable. Let's talk about one of those things that, when you see them done well, make your eyes widen and you think: “Wow, how did they do that?”. I'm talking about inlay on the guitar, those small works of art that decorate the fingerboard or headstock and give a unique character to the instrument.
It looks like professional luthier stuff with thousands of euros worth of tools, right? Well, in part, it is. But I assure you that, with the right patience, suitable materials, and some tricks learned by making mistakes (and trust me, I've made quite a few), you too can achieve results that will give you immense satisfaction. You won't be Jimmy Page, but you'll have a guitar with your own unique touch.
Why an inlay? Beyond simple aesthetics
Before diving into the materials, let's take a step back. Why should we even think about adding an inlay to our guitar? Of course, aesthetics play a huge role. A beautiful design can transform an anonymous instrument into a piece of art.
But there's more. The inlays are not just decorations in themselves. On the fretboard, for example, they have a fundamental practical function: they serve as position markers. They help us quickly orient ourselves on the neck, especially on frets 3, 5, 7, 9, 12, 15, 17, 19 and 21.
Even if many manufacturers use simple plastic dots, a well-made inlay, with a material that contrasts well with the wood of the fretboard, can improve readability and the player's experience.
Then there's the "customization" factor. Build or modify a guitar it's a personal journey. Adding a unique inlay is like signing your work. Every time you look at it, you know that detail is the result of your work and your vision.
I don't hide that my first attempts were a bit clumsy. I tried to inlay a symbol I love, a small lightning bolt, on the headstock of an old Squier. The cut wasn't perfect, the filling a disaster. But I learned a lot from that mistake. The satisfaction of seeing the final result, even with its imperfections, is priceless.
The Classic Materials: Mother-of-pearl and Abalone


When talking about materials for inlay on guitar, the mind immediately turns to them: mother-of-pearl and abalone. They are the undisputed kings, used for decades by the best luthiers for their iridescent splendor and durability. But they are not all the same and, as often happens, the devil is in the details.
Madreperla (Mother of Pearl)
Mother-of-pearl is an organic material, obtained from the inner layer of the shells of some mollusks. Its main characteristic is that silvery-white color, with opalescent reflections that vary depending on the angle of the light. It is a timeless classic, discreet but elegant.
Pros:
- Classic aesthetics: It matches practically any type of wood and finish, giving a refined and traditional look.
- Durability: It is a rather hard and wear-resistant material, ideal for position markers that are frequently touched.
- Workability: With the right tools (Dremel with diamond burrs, specific files), it cuts and sands relatively well. However, be careful with the dust, it is irritating and must be vacuumed.
- Cost: Relatively accessible for standard shapes (points, blocks).
Against:
- Fragility: Although hard, it can easily chip or break if not handled with care during cutting, especially in complex or thin shapes.
- Color variations: Being a natural product, the color may vary slightly from piece to piece. Do not expect perfect uniformity.
- Dust: Mother-of-pearl powder is very fine and irritating to the respiratory tract. Always work with an FFP2 or FFP3 mask and protective glasses, in a well-ventilated environment.
In my workshop, mother-of-pearl was my first real challenge. I started with simple dots, then I tried to make blocks for a rosewood fretboard. The contrast was beautiful. I learned that it's essential to have sharp cutters and go slowly, making light passes. Once I forced too much and ruined an almost finished piece. Frustrating, but that's how you learn.
Abalone
Abalone, or sea ear, is another organic material obtained from the inside of marine gastropod shells. Its beauty is more “wild” and flamboyant compared to mother-of-pearl. It features a play of iridescent colors ranging from green to blue, pink to purple, with shifting shades that spectacularly catch the light.
There are several species of abalone, and the most common for inlays are the Green Abalone (Haliotis fulgens) and the Paua Abalone (Haliotis iris), the latter typical of New Zealand and famous for its intense blues and greens. The Paua Abalone is often considered the most valuable for its vibrancy.
Pros:
- Breathtaking aesthetics: If you are looking for a “wow” effect, abalone is the right choice. Its vibrant colors make every inlay unique.
- High contrast: It stands out very well on dark fingerboards like ebony or rosewood, but also on maple if you are looking for a bold contrast.
- Symbol of luxury: Often associated with high-end instruments, it gives an unmistakable touch of prestige.
Against:
- Cost: Generally more expensive than mother-of-pearl, especially for high-quality Paua Abalone or for large pieces.
- Extreme fragility: Abalone is even more fragile than mother-of-pearl. Its natural veins make it prone to breaking or chipping during cutting and processing. It requires a lot of delicacy.
- Color variations: Here too, nature takes its course. Finding perfectly matched pieces of abalone for a complete inlay set can be a challenge.
- Dust: As with mother-of-pearl, the dust is dangerous. Adequate protection is essential.
I used abalone for the headstock of one of my custom Stratocasters. I wanted something truly eye-catching. I remember buying a sheet of Paua Abalone, and just holding it in my hand was an emotion. The cutting was a nightmare: I broke two complicated shapes before realizing I had to use an even smaller router bit and go at a reduced speed, almost caressing the material. But the final result was spectacular, it was worth it.
Synthetic Alternatives: For those who don't want compromises (or have a limited budget)
Not everyone has the budget or the desire to deal with the delicacy of natural materials. Fortunately, the industry offers us some synthetic alternatives for inlays which, over the years, have reached truly remarkable levels of realism and practicality. They are perfect for beginners or for those looking for a specific aesthetic without the headaches of natural materials.
Pearloid and Celluloid
Pearloid is perhaps the most known and widespread synthetic alternative. It is a type of plastic (often celluloid) that imitates the appearance of mother-of-pearl or abalone. We commonly find it on pickguards, but it is also an excellent candidate for inlays.
Celluloid is a historical material, used since the early '900s for many purposes, including inlays. It has a warm appearance and good depth, but it is flammable and can yellow or shrink slightly over time.
Pros:
- Cost: Definitely cheaper than natural materials. Ideal for projects with a reduced budget or for practice.
- Ease of processing: It cuts and sands with extreme ease using normal woodworking tools or a Dremel with standard bits. Less risk of chipping.
- Uniformity: Being a manufactured product, the color and pattern are much more consistent from one piece to another, which facilitates the creation of complete sets.
- Variety: Available in a wide range of colors and patterns, not just mother-of-pearl/abalone imitations.
Against:
- Aesthetics: Although much improved, an expert eye will always distinguish the imitation from the natural material. It lacks that unique depth and iridescence.
- Durability: It is less resistant to abrasion than mother-of-pearl. Over time and with intensive use, pearloid inlays can show signs of wear, scratches, or become dull.
- Aging (celluloid): Celluloid, in particular, can be unstable over time. I have seen aged pickguards that have warped, but for small inlays the problem is less evident.
- Flammability (celluloid): Beware of high temperatures and open flames.
I used pearloid for the dots of a guitar I gave to my nephew. I wanted it to be beautiful but not expensive, and above all, that it would be resistant to a teenager's use. The pearloid did an excellent job. It cut like butter and the final effect, on a walnut fretboard, was more than decent. For me, it's an excellent solution for an unbeatable quality/price ratio.
Acrylics and Composites
Acrylics, often called “acrylic plastic” or PMMA (polymethyl methacrylate), are another synthetic option. They are available in sheets of various thicknesses and colors, including those that imitate mother-of-pearl or abalone, but also solid, transparent, or fluorescent colors. Composites, on the other hand, are more advanced materials, sometimes with incorporated mineral powders to improve appearance or strength.
Pros:
- Versatility: The range of colors and finishes is almost unlimited. You can find acrylics that imitate stones, metals, or simply vibrant colors.
- Ease of processing: Like pearloid, acrylics are easy to cut, mill, and sand. With good polishing, they can achieve a mirror finish.
- Stability: They are very stable, do not shrink, do not yellow (unless exposed to prolonged UV rays for some types) and are not flammable like celluloid.
- Resistence: Good resistance to impact and abrasion, even if inferior to real mother-of-pearl.
Against:
- Aesthetics “plastic”: Even the best iridescent acrylics can seem a bit 'flat' compared to natural materials. That depth and unique play of light are missing.
- Feel: Some musicians perceive a difference to the touch compared to natural materials, even if for small inlays it è almost imperceptible.
- Cost: While simple acrylic is inexpensive, “fancy” versions or special composites can have an intermediate cost, between basic pearloid and mother-of-pearl.
I experimented with black acrylics to make inlays on a maple fretboard. The contrast was sharp and modern. I also tried a “pearlescent” acrylic for an 80s style guitar. The result was clean and professional, without the worry of ruining expensive material. For me, acrylics are an excellent solution for a modern look or for those who want to experiment with non-traditional colors without spending a fortune.
Exotic and Unconventional Materials: To dare a little
If you are already familiar with inlays and want to push beyond the boundaries of the traditional, the world of exotic and unconventional materials offers endless possibilities. Here we enter the realm of pure creativity, where the only limit is your imagination (and a bit your budget, let's face it).
Woods and Metals
The use of different woods for inlays is an ancient practice, not only in lutherie. It can create very particular contrast or harmony effects. Metals, on the other hand, offer a unique luster and durability, but require a different approach in processing.
Exotic Woods
Imagine an ebony inlay on a maple fretboard, or wengé on rosewood. The effect is subtle, elegant, often warmer and more organic compared to glossy materials.
Pros:
- Natural aesthetics: It integrates perfectly with the guitar, creating a harmonious and refined look.
- Variety: There are hundreds of wood species with different colors, grains, and densities.
- Workability: If you already have experience with woodworking, cutting and sanding small pieces will not be a problem.
- Cost: Often, scraps from other projects can be used, making it very economical.
Against:
- Contrast: Unless choosing very dark woods on light ones (or vice versa), the contrast might not be sufficient for a clear marking function.
- Durability: Softer woods can wear out more quickly than hard materials like mother-of-pearl. Oily woods (e.g., rosewood) can be more difficult to glue.
- Risk of shrinkage/expansion: Wood is hygroscopic, it can move with changes in humidity, although in such small pieces the problem is minimal if well glued.
I made walnut burl inlays on a maple fretboard, and the result was of a sober beauty. It wasn't flashy, but it gave the instrument incredible elegance. The key is to choose very stable and well-seasoned woods.
Metals (Brass, Aluminum, Silver, Copper)
Metal inlays are less common but can create a truly unique effect, almost industrial or steampunk. Brass and copper, in particular, oxidize over time, developing a patina that adds character.
Pros:
- Unique aesthetics: Luster and reflections that no other material can give.
- Extreme durability: Very resistant to wear and impact.
- Weight: They add a bit of mass, which some claim can influence sustain (although for small inlays the effect is minimal).
- Workability: With metal-suitable bits (tungsten carbide) and a bit of lubrication, precise cuts can be achieved.
Against:
- Cost: Silver is obviously expensive. Brass and copper are more accessible, but still more expensive than plastic.
- Complex processing: Requires specific tools for metals, which are more expensive and wear out faster with metal. Filing and polishing take longer.
- Oxidation: Brass and copper oxidize. If you like the patina, it's a pro. If you want constant shine, you'll need to polish regularly or apply a protective.
- Weight: Too many metal inlays can weigh down the neck.
Once, for a friend who wanted a guitar with an “industrial vintage” look, I made brass inlays. I used a fret saw for the larger cuts and then a Dremel for the details. The filing was long, but the final effect, with the mirror-polished brass on the dark rosewood fretboard, was incredible. Over time, it developed a patina that gave it even more character.
Semi-precious Stones and Epoxy Resins
These materials are the pinnacle of customization and require a certain mastery, but the results can be spectacular and truly unique.
Semi-precious Stones (Turquoise, Malachite, Lapis Lazuli, etc.)
The use of real stones for inlays is an art in itself. Often, stone fragments (chips) filled with epoxy resin are used, but solid pieces can also be cut and inlaid.
Pros:
- Luxurious aesthetic: Each stone has a unique color and grain, giving a touch of value and originality.
- Durability: Many stones are extremely hard and wear-resistant.
- Uniqueness: Each inlay will be a unique piece, impossible to replicate exactly.
Against:
- Cost: Semi-precious stones can be very expensive, especially in sheets or blocks to be cut.
- Very difficult processing: Requires specific diamond cutters, a lot of patience, and a steady hand. Stones are extremely fragile and can chip or break with the slightest thing.
- Risk of breakage: An error during milling or gluing can ruin the entire piece.
I tried to make a turquoise inlay on a maple fretboard. I bought small flakes and mixed them with clear epoxy resin. The process was delicate, but the result, a vivid blue stain that contrasted beautifully with the light maple, was truly gratifying. It's an option I only recommend to those who already have good experience with precision milling and resins.
Epoxy Resins (with pigments, glitter, or inclusions)
Epoxy resins offer maximum creative freedom. They can be pigmented in any color, mixed with glitter, metallic powders, wood fragments, stones, or even small objects. They are poured directly into the routed cavity.
Pros:
- Creative freedom: Color, transparency, inclusions… the possibilities are endless.
- Relative ease: Once the cavity is routed, the pouring process is relatively simple.
- Durability: Good quality epoxy resins are very hard and wear-resistant.
- Cost: The resin itself is not excessively expensive, although additives can drive up the price.
Against:
- Finish: Requires careful polishing to obtain a perfectly smooth and shiny surface.
- Air bubbles: Bubbles can be a problem during pouring. It is necessary to use a heat gun or a lighter to eliminate them, or a vacuum chamber for professional results.
- Drying time: Epoxy resins require several hours (or days) to fully cure.
- Modern aesthetic: May not appeal to those looking for a traditional look.
Epoxy resin has become one of my favorites for bolder projects. I made an inlay on the headstock of a “space-themed” guitar, using black resin with blue and silver glitter to simulate a galaxy. It was meticulous work, but the final result was crazy. Always remember to seal the bottom of the cavity well to prevent resin leaks.
Durability and Maintenance of Inlays: It's not just a matter of beauty
An inlay is not just a decorative element; it is an integral part of the fretboard or headstock, subject to wear and external agents. Its durability is as important as its initial beauty. Over time, I have seen inlays get ruined, become dull, or even detach, and this has taught me a lot about how to choose and care for materials.
Wear and Abrasion
Fretboard inlays, in particular, are constantly in contact with fingers and, sometimes, with strings. This continuous abrasion can wear down softer materials.
- Mother of Pearl and Abalone: They are extremely hard and abrasion-resistant. They hardly wear out with normal use. However, they can scratch if subjected to contact with metallic or abrasive objects. Their shine may fade slightly over time, but a light polish can restore it.
- Pearloid and Acrylics: They are softer. With intense use, especially if playing with an aggressive touch or long nails, they can show signs of wear, become dull, or scratch more easily. Pearloid, in particular, tends to lose its brilliance before mother-of-pearl.
- Woods: Durability varies enormously depending on the species. A hardwood like ebony or rosewood will be much more resistant than maple or walnut. However, any wood will wear out more quickly than mother-of-pearl.
- Metals: They are extremely durable and abrasion-resistant. Brass and copper will develop a patina, which is a natural process and not a defect. Silver can oxidize but maintains its hardness.
- Semi-precious Stones and Epoxy Resins: Stones are generally very hard. Quality epoxy resins are also very abrasion-resistant, comparable to harder acrylics.
Aging and External Agents
Sunlight, humidity, hand sweat, cleaning products: all these factors can affect the appearance and stability of inlays.
- Mother of Pearl and Abalone: They are very stable. They do not yellow
and do not shrink. Sweat can dull them slightly, but regular cleaning with a soft, dry (or slightly damp) cloth is sufficient. - Pearloid and Celluloid: Celluloid is known to yellow and, in extreme cases, shrink or deform over time and exposure to heat/light. Modern acrylic pearloids are more stable.
- Acrylics and Composites: They are generally stable. They do not yellow easily (unless low-quality acrylics exposed to intense UV) and maintain their shape.
- Woods: They can darken or change color slightly with exposure to light and air. It is a natural process that often enhances their charm.
- Metals: Oxidation is the main factor. Brass and copper form a patina. Silver can blacken. If not desired, the patina can be removed with specific metal products, but be careful not to damage the surrounding wood.
- Semi-precious Stones and Epoxy Resins: Stones are inert. Quality epoxy resins are stable and resistant to common chemicals, but avoid aggressive solvents.
Maintenance Tips
Regardless of the material, good care extends the life and beauty of your inlays:
- Regular cleaning: Use a soft, dry cloth to remove sweat and dirt after playing.
- Specific products: For deep cleaning, use specific fretboard products. Avoid aggressive or abrasive solvents that could damage the inlay or the surrounding wood.
- Polishing: For mother-of-pearl, abalone, or dulled acrylics, a fine polishing paste (like those for car bodies or non-abrasive metal polishes) can restore shine, but use it sparingly and gently.
- Bonding check: Occasionally, check that the inlays are firmly set. If you notice slight movement, it might be time for a small re-gluing intervention with epoxy glue or cyanoacrylate, but only if you know what you're doing.
The Quality/Price Ratio: My "garage" approach
We come to the crucial point for those who, like me, learned to work in a garage: how to spend your money well? The choice of inlay materials is not just a matter of aesthetics or skill, but also of budget and long-term expectations. Here's my guide, based on years of trial and error.
Low Budget (First Experiments / "Battle" Guitars)
If you're a beginner or want to customize an inexpensive guitar without investing too much, synthetic options are your best friend.
- Clear advice: Pearloid or Acrylics. They are easy to work with, forgiving of errors, and have a negligible cost. You can buy large sheets and make many attempts. The aesthetics are good, even if they don't reach the depth of natural materials. Durability is sufficient for normal use.
- Average cost: A few euros for sheets sufficient for dozens of inlays.
- Real durability: Good, but they can dull or scratch before natural materials.
- Why choose them: To learn cutting and gluing techniques, to add a personal touch without performance anxiety.
I remember my first experiments with pearloid: I felt almost like a magician cutting those shapes with the Dremel. I learned to rout the cavities, use epoxy glue, and sand until I got a smooth surface. Those inlays are still there after years, perhaps a little less brilliant, but solid.
Medium Budget (More Serious Projects / Mid-Range Instruments)
You already have some experience and want something more refined, but without breaking the bank. Here you can start looking at natural materials or high-quality synthetic solutions.
- Clear advice: Standard Mother-of-pearl or Mid-range Abalone. They are classics, offering timeless elegance and excellent durability. They require more attention in cutting, but the result is rewarding. Alternatively, you can consider exotic woods or mixed inlays (for example, a mother-of-pearl outline with a resin center).
- Average cost: From 10 to 50 euros for a set of standard inlays (dots or small blocks). Larger sheets or complex shapes can cost more.
- Real durability: Excellent for mother-of-pearl and abalone. Hardwoods are very good but require more care.
- Why choose them: For a significant aesthetic upgrade, to approach professional quality, to learn how to handle more delicate materials.
When I decided to use mother-of-pearl for a guitar I was building from scratch, I felt the pressure. But the difference, once polished, was evident. That depth, that luminosity... it was another level. I spent a little more, but the perceived value of the instrument increased exponentially.
High Budget (Personal Masterpieces / Luxury Instruments)
If you have no budget limits (or almost) and want to create something truly unique, here the doors open to the most audacious experimentation.
- Clear advice: High-quality Paua Abalone, Semi-precious stones, Noble metals or Custom epoxy resins with inclusions. These materials offer the maximum in terms of aesthetics, uniqueness, and prestige. The processing is complex and requires specific tools and a lot of patience, but the final result can be a work of art.
- Average cost: From 50 to several hundred euros, depending on the material and design complexity.
- Real durability: Extreme for metals and many stones. Excellent for Paua Abalone and quality resins.
- Why choose them: To create an instrument that is an extension of your personality, to push boundaries, to realize an aesthetic dream.
My most ambitious project was an inlay on the headstock of an acoustic guitar, with a complex design combining Paua Abalone and a thin silver wire. I spent hours cutting, routing, and gluing. The cost of the materials was not insignificant, but every time I see that guitar, I know it's a unique piece, the result of hours of passion and dedication. It's not just an inlay, it's my signature.
In summary, there's no single answer. Evaluate your skill level, the type of instrument you're working on, and, most importantly, how willing you are to 'get your hands dirty' and learn. Each material has its own story, its pros and cons. The most important thing is to enjoy the process and the satisfaction of creating something beautiful with your own hands.
Conclusions
We've taken a nice tour through the fascinating world of guitar inlays and their materials. From the classic splendor of mother-of-pearl and abalone, to the practicality of synthetic alternatives, to the boldness of woods, metals, and resins, each option brings with it a universe of creative possibilities and technical challenges.
My advice, as a 'garage tinkerer' who has seen it all, is to start small. Don't immediately aim for the most complex inlay with the most expensive material. Get a sheet of pearloid, a Dremel, and try making simple dots. Learn to rout with precision, to glue without smudges, to sand until you get a perfect surface. Every mistake will be a lesson, every success a push to do more.
Remember that the value of an inlay is not measured only by the price of the material, but by the care and passion you put into it. A guitar with an inlay made by you, even if simple, will always have a special value that no production instrument can ever match. So, choose your material, sharpen your bits, and start creating your work of art.
FAQ – Frequently Asked Questions
What is the best method for gluing inlays?
For most inlays, two-component epoxy glue is the best choice. It offers a strong hold, fills gaps well, and once cured can be sanded without problems. For very small inlays or quick fixes, cyanoacrylate (Super Glue) can also be used, but be careful with the setting speed.
Can I do inlays if I don't have a Dremel or a CNC router?
Yes, it's possible, but much more difficult and laborious. For simple shapes like dots, sharp chisels and files can be used to create the cavities. For complex shapes, without a precision router (whether a Dremel with a base or a CNC), it's almost impossible to achieve clean and precise results. Investing in a good Dremel with a routing base is an excellent starting point for anyone wanting to dedicate themselves to inlays.
Download the Luthier Survival Kit
Free PDF with checklist, problem-cause table and project card template.
 English
  Italiano
Stuck on your build?
If you ran into the same problem or have a question, drop it in the comments. I read and reply to every one.
Write a comment