

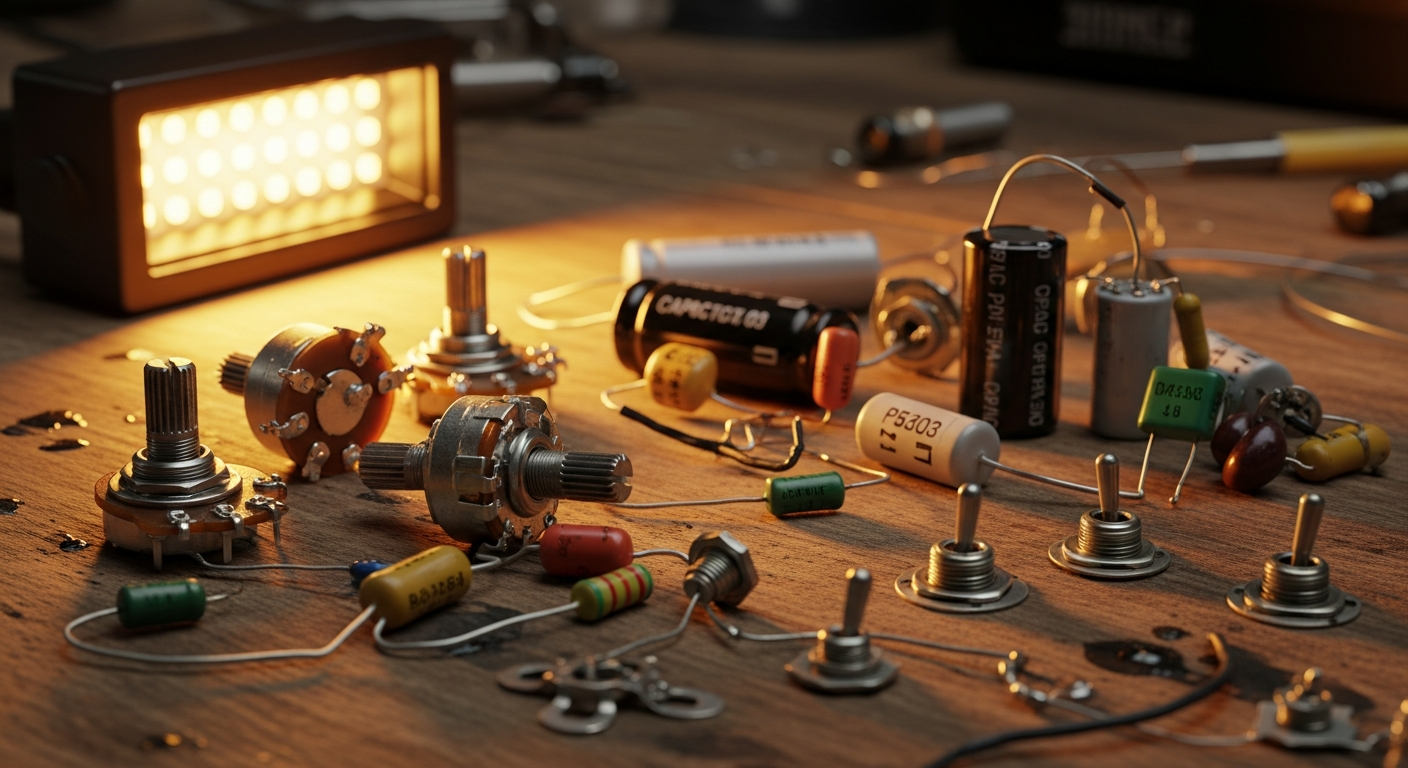
Treble bleed: which capacitor and resistor to choose
How many times has it happened to you to lower the volume of your guitar and feel that the sound became muddy, dark, without that brilliance you like so much? To me, the first few times, it seemed like the guitar was turning off, not just in volume. I thought it was normal, an inevitable compromise. Then I discovered the treble bleed, un piccolo, ma potentissimo circuito che risolve proprio questo problema. Un componente che, messo nel punto giusto, ti cambia la vita e il suono. Non sono un liutaio professionista, lo sai. Sono uno che, come te, ha passato ore nel garage a smontare, rimontare, saldare e dissaldare. Ho bruciato qualche potenziometro, ho fatto qualche saldatura fredda che mi ha fatto impazzire, ma alla fine ho imparato. E il treble bleed è una di quelle modifiche che, una volta provata, ti chiedi come hai fatto a suonare senza. Il bello è che non costa nulla e si fa in dieci minuti. Quindi, mettiti comodo. Oggi ti spiego non solo as to put a treble bleed, but above all why how it works and which combination of capacitor and resistor to choose for your guitar. Because, trust me, there isn't a one-size-fits-all solution. And, as always, I'll also tell you about my mistakes, so you won't make them.
Why does volume steal high frequencies? The physics of the potentiometer


Partiamo dal problema, quello che ci fa imprecare quando abbassiamo il volume. Quando giri la manopola del volume della tua chitarra, in realtà stai agendo su un potenziometro, che è una resistenza variabile. Questo componente controlla quanta parte del segnale del tuo pickup arriva all’amplificatore. Il punto è che i pick-up della chitarra non sono semplici generatori di corrente, ma hanno una loro induttanza. Le corde vibrano, creano un campo magnetico che viene convertito in segnale elettrico. Un segnale complesso, fatto di tante frequenze diverse: le basse, le medie e le alte. Quando il potenziometro del volume è a fondo corsa, cioè al massimo (posizione 10), il segnale passa quasi indisturbato. Ma quando inizi ad abbassarlo, la resistenza del potenziometro aumenta la sua opposizione al passaggio del segnale. E qui entra in gioco la fisica. Il tuo circuito chitarra-cavo-amplificatore non è perfetto. Il cavo, per esempio, ha una sua capacità parassita. I pick-up, come dicevo, hanno induttanza e resistenza. Il potenziometro stesso ha una resistenza. Tutti questi elementi insieme formano un filtro RC (Resistenza-Capacità) o RLC (Resistenza-Induttanza-Capacità) che, quando la resistenza del potenziometro aumenta (cioè abbassi il volume), inizia a tagliare le frequenze più alte. È un po’ come se le alte frequenze, più “fragili” e meno potenti, facessero più fatica a passare attraverso quella resistenza aggiuntiva, mentre le basse, più “robuste”, riescono a farsi strada meglio. Il risultato? Un suono più cupo, meno definito, che ti fa perdere l’attacco e la chiarezza che avevi a volume massimo. E questo è proprio quello che vogliamo evitare con un treble bleed.
What is a Treble Bleed and how it works (in practice)
The treble bleed è un piccolo circuito, composto da un condensatore e, spesso, una resistenza, che viene saldato tra i terminali di input e output del potenziometro del volume. Il suo scopo è semplice: permettere alle alte frequenze di “bypassare” la resistenza del potenziometro quando lo abbassi, mantenendo così la brillantezza del suono. Immagina un fiume. Il potenziometro è una diga che, quando chiude, rallenta il flusso dell’acqua (il segnale). Le barche più grandi (le basse frequenze) riescono comunque a passare, anche se più lentamente. Le barche più piccole (le alte frequenze) invece si bloccano. Il treble bleed è un piccolo canale laterale, un bypass, che permette alle barche piccole di continuare a scorrere senza problemi, anche quando la diga principale è chiusa. Elettronicamente parlando, un condensatore ha la proprietà di lasciar passare più facilmente le alte frequenze rispetto alle basse. È un “filtro passa-alto”. Quando lo saldi in parallelo al potenziometro, le alte frequenze, invece di incontrare la resistenza variabile che le bloccherebbe, trovano la strada più facile attraverso il condensatore. Le basse frequenze, invece, continuano a seguire il percorso del potenziometro, venendo attenuate normalmente. Il risultato? Abbassi il volume, ma la tua chitarra mantiene il suo “twang” o la sua definizione, senza diventare una coperta bagnata. È una modifica semplice, reversibile e che, una volta provata, ti farà chiedere perché non l’hai fatta prima. E ti dirò, le prime volte che ho saldato questi componenti, tremavo un po’. Ma poi ho capito che è più facile di quanto sembri. L’importante è avere un saldatore decente e un po’ di pazienza.
The three main approaches to Treble Bleed: capacitor only, Kinman and Duncan
In the field, I have seen and tried several configurations of treble bleed. There isn't an absolute “best”, but there are different philosophies, each with its pros and cons. Understanding the differences will help you choose the right one for you and your guitar.
1. The Treble Bleed with only the capacitor
This is the simplest approach, the one many try first. It involves soldering a capacitor directly between the input pin (where the signal from the pickup arrives) and the output pin (which goes to the switch or jack) of the volume potentiometer. How it works: The capacitor creates a preferential path for high frequencies, allowing them to bypass the potentiometer's resistance when the volume is lowered. Advantages: Extremely simple to install, requires only one component. It's inexpensive. Disadvantages: Often, with only the capacitor, the sound can become too bright or even “piercing” and thin when the volume is very low. It's as if the bypass channel is too wide and lets too many high frequencies pass through, unbalancing the sound. Furthermore, it can alter the potentiometer's response curve, making it seem “all or nothing” in the lower part of its travel. Typical values: Si usano solitamente condensatori da 1000 pF (0.001 µF) a 2200 pF (0.0022 µF). Io ho provato con un 1000 pF su una Stratocaster e mi sono ritrovato con un suono troppo “acidulo” a volume basso. Non era quello che cercavo. Se vuoi provare questo metodo, ti consiglio di iniziare con valori bassi e aumentare gradualmente. Magari fai delle prove “volanti” con dei coccodrilli prima di saldare definitivamente.
2. The “Kinman Style” Treble Bleed (capacitor and resistor in parallel)
This configuration is very popular, made famous by Chris Kinman, a well-known pickup manufacturer. It consists of soldering a resistor in parallel with the capacitor, and then the entire “package” in parallel to the pins of the volume potentiometer. How it works: The additional resistance serves to “dampen” the effect of the capacitor on high frequencies, preventing them from becoming too shrill. Furthermore, it helps maintain a more linear response of the potentiometer throughout its travel, which doesn't always happen with just the capacitor. In practice, the resistance acts as a brake for high frequencies passing through the capacitor, balancing the flow. Advantages: It offers a more balanced and natural sound compared to just the capacitor. It better maintains the feel of the potentiometer throughout its travel. Disadvantages: It requires two components. The choice of values is crucial to obtain the desired result. Typical values: A common starting point is a 1000 pF (0.001 µF) or 1200 pF (0.0012 µF) capacitor in parallel with a 150 kΩ resistor. Kinman himself often recommends 1200 pF + 130 kΩ. I tried this combination on my Les Paul with humbuckers and I must say the result was excellent. The sound remained defined without becoming shrill.
3. The Treble Bleed “Duncan Style” (capacitor and resistor in series)
Another common configuration, often associated with Seymour Duncan, involves soldering the capacitor and resistor in series with each other, and then this block in parallel with the volume potentiometer. How it works: Here too, the resistance serves to balance the effect of the capacitor. But, being in series, it has a slightly different impact on the filter's slope and its interaction with the potentiometer. This configuration tends to maintain a very transparent sound and is less prone to “boosting” high frequencies. Advantages: Many guitarists find this configuration to be the most “transparent”, meaning it alters the guitar's original sound the least, merely preventing the loss of high frequencies without adding new ones. It is very effective in maintaining sustain and attack. Disadvantages: Here too, the choice of values is fundamental. Typical values: Una combinazione classica è un condensatore da 680 pF (0.00068 µF) a 1000 pF (0.001 µF) in serie con una resistenza da 100 kΩ a 220 kΩ. Ad esempio, 680 pF + 220 kΩ è una combinazione popolare. L’ho usata su una Telecaster con potenziometri da 250k e il risultato era molto naturale, quasi impercettibile finché non abbassavo il volume, ed è proprio quello che cercavo per quella chitarra. Come vedi, ci sono differenze sottili ma importanti tra queste configurazioni. Il “Kinman style” tende a dare un po’ più di brillantezza, il “Duncan style” è più neutro. Il solo condensatore è un po’ più imprevedibile. La scelta dipende molto dal tuo gusto personale e dalla tua strumentazione.
Choosing the right values: capacitor and resistor
Now let's get into the heart of component selection. It's not just about knowing whether to add resistance or not, but also which values to use. And here, I assure you, a world of trial and error opens up, but also of satisfactions.
The capacitor: the key to high frequencies
The capacitor is the heart of the circuit treble bleed. Its value, expressed in picofarads (pF) or nanofarads (
F), determines how many high frequencies will bypass the potentiometer.
Lower values (e.g. 470 pF – 680 pF): Fewer high frequencies will pass. The sound will be more delicate, less “harsh” at low volume. Excellent for those who want a subtle, almost imperceptible effect, or for guitars that are already very bright.
Medium values (e.g. 1000 pF ― 1200 pF): This is the most common range and a good starting point. It offers a good balance, maintaining brightness without overdoing it. It works well with most pickups and configurations.
Higher values (e.g. 2200 pF ― 3300 pF): Faranno passare più alte frequenze. Il suono risulterà più brillante e “aperto” a volume basso, quasi con un leggero boost. Può essere ottimo per chitarre che tendono a suonare cupe, o per chi cerca un effetto più pronunciato. Attenzione però, perché si rischia di avere un suono troppo sottile o stridulo.
Il tipo di condensatore (ceramico, poliestere, a film, ecc.) ha un’influenza minima sul suono in questo contesto. Quello che conta davvero è il suo valore. Io di solito uso i ceramici per i treble bleed, they are cheap and do their job excellently.
The resistor: the sound balancer
The resistor, if you decide to use it (and I highly recommend it, unless you want a very specific effect), serves to “shape” the capacitor's effect. Its value, expressed in kilo-ohms (kΩ), influences how the treble bleed interacts with the potentiometer and the overall sound.
Lower values (e.g. 100 kΩ – 130 kΩ): The resistor has a weaker “damping” effect. The sound will be brighter, but still more controlled than with just the capacitor.
Higher values (e.g. 150 kΩ – 220 kΩ): La resistenza ha un effetto di “smorzamento” più forte. Il suono sarà più naturale, meno brillante, ma con una perdita minima di alte frequenze. Questo è il range che molti trovano più equilibrato, specialmente con pickup humbucker o potenziometri da 500k.
Ricorda che la resistenza, oltre a smorzare l’effetto del condensatore, influenza anche la taper (the response curve) of the potentiometer. With higher resistance values, the potentiometer will tend to maintain a more linear response, which is often desirable.
Interaction with potentiometers and pickups
The choice of values is not independent of the rest of your guitar's circuit.
Potentiometer value:
250 kΩ: Typically used with single coils, it tends to darken the sound a bit. A treble bleed with slightly higher capacitor values or lower resistance can help maintain brightness.
500 kΩ: Used with humbuckers, it is already brighter. You might want to use a capacitor with a lower value or higher resistance to avoid an excessively harsh sound.
1 MΩ: Rare, but sometimes used to maximize brightness. Here a treble bleed very delicate is a must.
Pickup type:
Single Coil: They tend to be brighter by default. A treble bleed thinner (smaller capacitor, higher resistance) might be preferable.
Humbucker: They tend to be 'fatter' and less bright. A treble bleed più pronunciato (condensatore più grande, resistenza più bassa) potrebbe aiutare a mantenere la chiarezza.
Non ti preoccupare troppo se all’inizio sembra un labirinto. L’importante è capire che non c’è una “ricetta magica” uguale per tutti. La bellezza del fai da te è proprio quella di poter sperimentare e trovare la your solution.
The Treble Bleed Calculator by Biafax: your ally in the garage
Ora che abbiamo capito la teoria, passiamo alla pratica. So bene che scegliere i valori “a occhio” può essere frustrante. Io stesso ho comprato pacchi di condensatori e resistori di ogni tipo, saldando e dissaldando finché non trovavo il suono giusto. È un processo, è vero, ma si può rendere più semplice. Per questo, su Biafax.it, ho creato un Treble Bleed Calculator gratuito. È uno strumento che ti permette di inserire alcuni parametri della tua chitarra (tipo di pickup, valore del potenziometro) e ti suggerisce dei valori di partenza per il condensatore e la resistenza, sia per la configurazione Kinman che per quella Duncan. Non è una bacchetta magica che ti dà la soluzione perfetta al primo colpo, ma è un ottimo punto di partenza per limitare le prove e gli errori. Ti dà un’idea di quali valori sono più indicati per la tua configurazione, basandosi su dati e sull’esperienza di molti chitarristi.
How to use it (and why it's useful):
1. Enter your data: Seleziona il tipo di pickup (single coil o humbucker) e il valore del potenziometro del volume (250k, 500k, 1M). 2. Get suggestions: Il calcolatore ti mostrerà i valori consigliati per il condensatore e la resistenza, sia per il circuito Kinman (parallelo) che per il Duncan (serie). 3. Experiment: Prendi questi valori come base. Ordina qualche condensatore e resistore con valori simili (magari leggermente più alti e leggermente più bassi) e fai delle prove. Il vantaggio di usare un calcolatore è che ti fornisce una base razionale per iniziare. Evita di partire completamente alla cieca e ti indirizza verso soluzioni che, statisticamente, hanno dato buoni risultati ad altri. Io l’ho sviluppato proprio pensando a quante ore ho perso a cercare “il valore giusto” su forum e tutorial, senza una guida chiara. Ricorda: il calcolatore ti dà un punto di partenza. Il tuo orecchio e le tue preferenze sono l’ultima parola.
Practical installation: soldering the Treble Bleed without fear
Ok, you have chosen your components. Now it’s time to get your hands on the soldering iron. Don’t be scared! Soldering è a skill acquired with practice. If I ’ve learned it, you can learn it too.
What you need:
Soldering iron: A 30-40W one is perfectly fine. You don’t need professional stuff to start. Pond:With flux core, good qualità. I use the 0.8 mm one. Desoldering pump or desoldering braid: To correct any errors. Long-nose pliers and wire cutters: Useful for handling components and cutting wires. Third hand (optional but recommended): It holds the components steady while you solder, a real blessing. Goggles: Always, you never know. A damp sponge: To clean the tip of the soldering iron. Patience and a bit ’ of calm.
The steps for installation:
1. Open the guitar: Svita le viti del battipenna o del coperchio posteriore, a seconda del modello. 2. Identify the volume potentiometer: È quello che controlla il volume generale. 3. Locate the pins: A potentiometer has three pins. Pin 1 (on the left, looking at the potentiometer from below with the pins facing you) is usually ground. Pin 2 (center) is the output, which goes to the switch or jack. Il pin 3 (a destra) è l’ingresso, che riceve il segnale dal pickup. Tu devi lavorare tra il pin 2 e il pin 3. 4. Prepare the Treble Bleed circuit: Capacitor only: You only need one capacitor. Kinman Style (parallel): Solder the resistor to the capacitor leads. You will have a single component with two “legs” (one from the capacitor, one from the resistor). Duncan Style (series): Saldare un capo della resistenza a un capo del condensatore. Avrai un “pacchetto” con una zampa libera del condensatore e una zampa libera della resistenza. 5. Solder the Treble Bleed: Connect one end of your Treble Bleed circuit to pin 2 (middle) of the potentiometer and the other end to pin 3 (right). Heat the potentiometer pin with the soldering iron tip, apply solder until a small shiny “pool” forms. Insert the component leg into the solder “pool”, remove the soldering iron and wait a couple of seconds for the solder to solidify. Do the same for the other end of the component. Assicurati che le saldature siano lucide e solide, non opache o “fredde”. Se una saldatura è brutta, rifalla. Non avere paura. 6. Verify: Una volta saldato, controlla visivamente che non ci siano cortocircuiti o fili che toccano dove non dovrebbero. 7. Close the guitar: Reassemble everything carefully.
Garage tips:
Clean the soldering iron tip: Every now and then, wipe it on the damp sponge. A clean tip solders better. Do not overheat:Potentiometers and capacitors don't like excessive heat. Be quick and decisive with the soldering iron. If you see white smoke, that's fine. If you see the component melting, you've overheated it. Do some tests with alligator clips: Before soldering permanently, you can connect the components with small cables with alligator clips. It allows you to try different combinations without desoldering every time. It's a trick that has saved me a lot of time and components. Document: Fai una foto prima di iniziare, in modo da sapere come ricollegare tutto se ti perdi. Non è un’operazione difficile, ma richiede un po’ di attenzione. La prima volta che ho saldato un treble bleed, it took me an hour and a half, sweating cold. Now I do it in ten minutes. Practice makes perfect.
Treble Bleed and potentiometer taper: a delicate relationship
We talked about how the treble bleed maintains high frequencies, but there's another important aspect to consider: how it influences the taper del potenziometro. La taper è la curva con cui il potenziometro reagisce al movimento della manopola. Esistono due tipi principali di potenziometri: Logarithmic (Audio Taper): They are the most common for guitar volume. They are designed to compensate for how the human ear perceives volume. The resistance does not change linearly, but logarithmically, so that the volume seems to increase and decrease in a more “smooth” and gradual way. Linear (Linear Taper): La resistenza cambia in modo proporzionale al movimento della manopola. Sono più usati per i controlli di tono o per il volume in alcune applicazioni specifiche, ma come volume possono far sembrare che il suono passi da spento a fortissimo in pochi gradi di rotazione. Quando installi un treble bleed, specialmente con il solo condensatore, potresti notare che la taper del potenziometro cambia. Il volume potrebbe sembrare che si abbassi molto velocemente nella prima parte della corsa, e poi rimanga quasi costante nella parte finale. Questo succede perché il condensatore, bypassando le alte frequenze, altera la percezione del volume su tutta la corsa del potenziometro. È qui che la resistenza nel circuito treble bleed becomes fundamental. Adding a resistance, as in Kinman or Duncan configurations, helps to “linearize” the potentiometer's response a bit. It doesn't transform it into a linear one, but it makes the response more gradual and predictable, avoiding that “all or nothing” effect that can be annoying.
My practical advice:
If you use a logarithmic potentiometer (99% of the time it's like this for volume), experiment with a treble bleed that includes a resistance. It will give you finer control and a more natural feel when you lower the volume. I have tried both solutions, and with only the capacitor, on some potentiometers, it seemed like I only had two positions: all or nothing. With the resistance, volume modulation became a pleasure again.
Treble Bleed FAQ
To conclude, here are some questions I am often asked about the treble bleed.
Can I put a treble bleed on any guitar?
Yes, in principle you can install a treble bleed on any electric guitar that has a volume potentiometer. It works with both single coils and humbuckers, and with any potentiometer value. The important thing is to choose the right values for the components based on your configuration. I've put it on Strat, Tele, Les Paul, and even on a bass.
Does the treble bleed change the sound at maximum volume?
or, if installed correctly, the treble bleed it should not alter the sound of your guitar when the volume potentiometer is at full travel (position 10). Its effect only manifests when you start to lower the volume. If you notice a change at maximum volume, there’s something wrong with the installation (a short circuit, a bad solder joint, or faulty components).
Are there any contraindications to using a treble bleed?
The contraindications are minimal. The main risk is choosing values that don’t suit your taste, making the sound too bright or too dark at low volume. For this reason, it’s important to experiment and use a calculator like Biafax’s as a starting point. The only true “contraindication” is that once you get used to it, you won’t be able to do without it!
What type of capacitor should I use?
For the treble bleed, the type of capacitor is not as critical as for tone. Ceramic, polyester, or film capacitors are perfectly fine. The sonic difference, if any, is so minimal as to be almost imperceptible. Focus on the value in pF or
F, that’s what matters. Personally, I use ceramic ones for their affordability and small size.
Conclusions: don’t be afraid to experiment
I hope this guide has taken away some of your fear and given you the tools to understand and install a treble bleed sulla tua chitarra. Non è una magia nera, è solo un po’ di elettronica applicata, e il risultato può davvero migliorare la tua esperienza di suono. Ricorda, il mondo del fai da te è fatto di prove, errori e piccole vittorie. Io ho imparato così, e ogni volta che saldavo un componente e sentivo il miglioramento, era una soddisfazione immensa. Non aver paura di prendere il saldatore in mano, di provare configurazioni diverse e di fidarti del tuo orecchio. Usa il nostro Treble Bleed Calculator as a starting point, but then explore, adapt, and customize. Your guitar, your sound, your rules. And if you make a mistake, desolder it and do it again. It’s part of the game. Premier Guitar has an excellent article that further explores the topic for those who want to read more from an authoritative source.
Related free tool: Treble Bleed Calculator — calculate the values of the treble bleed circuit for your guitar online.
Download the Luthier Survival Kit
Free PDF with checklist, problem-cause table and project card template.
 English
  Italiano
Stuck on your build?
If you ran into the same problem or have a question, drop it in the comments. I read and reply to every one.
Write a comment