

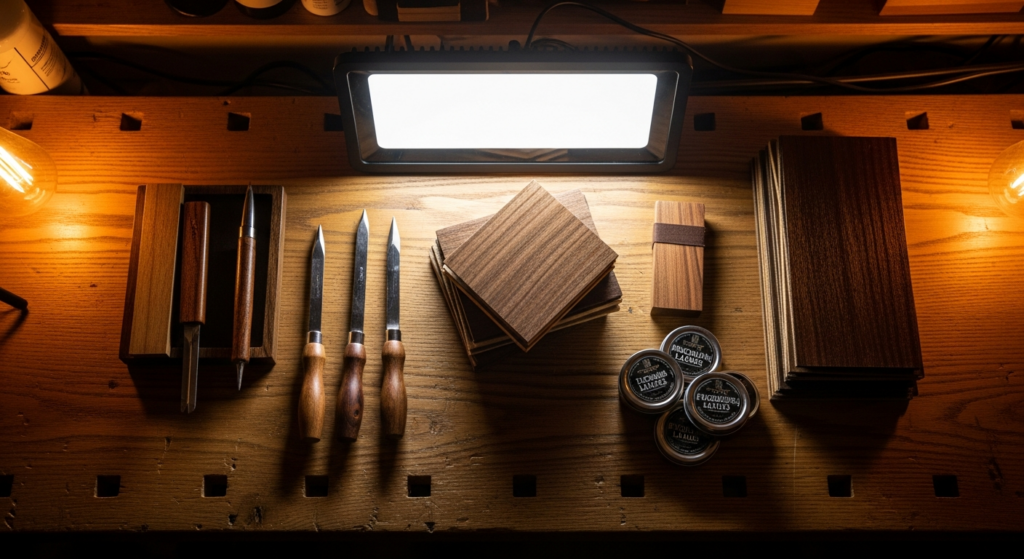
Luthier tools: essential guide
When I started tinkering with guitars and wood in my garage, the first hurdle wasn't so much understanding how to make a body or a neck. No, that came later, calmly and with a lot of mistakes. The real anxiety, at first, was: “But what luthier's tools do I need? Do I have to empty my bank account to buy professional stuff I don't even know how to use?”. I've seen a lot of people get stuck before starting, precisely because of this fear. They think they need to have a super-equipped workshop, with very expensive machines and tools that only a master luthier knows how to handle. Wrong. Completely wrong. The truth is that to build or even just modify an electric guitar, you don't need a professional arsenal. You need the right tools for the job, those that allow you to do the work with precision and without too much hassle. And the good news is that many of these tools you already have, or you can find them at reasonable prices. The important thing is to know what to look for and, above all, why you need. In this article, I will guide you through the essential equipment that I have learned to consider indispensable after breaking, making mistakes, redoing, and, finally, understanding what really works in a DIY context. Don't expect an endless list, but a reasoned selection of luthier tools that make the difference.
The basic toolbox: the bare essentials
Let's start from the foundations, from those tools that every home has, or that can be bought for a few euros. These are your luthier's tools first level, those that allow you to do the first setups, small repairs and start to familiarize yourself with the guitar. Do not underestimate the importance of having these elements at hand. Often, an apparently complex problem is solved with the right screwdriver or wrench.
Screwdrivers and Allen wrenches
They may seem trivial, but they are the daily bread for anyone who works on a guitar. You will need both Phillips head and flathead screwdrivers, of various sizes. From small watchmaker's screwdrivers for pickup or saddle screws, to the more robust ones for pickguards or tuning machine mechanisms. Allen wrenches, or Allen keys, are equally essential. You will need both metric and imperial sizes, because bridges, truss rods, and sometimes the saddles of Floyd Rose or similar bridges, use different standards. A good set with all the most common sizes will save you a lot of frustration.
Pliers, wire cutters, and wire strippers
When it comes to electronics, these are your best friends. Good flush cutters will allow you to cut wires without fraying them. Long-nose pliers (needle-nose pliers) are perfect for bending component leads or retrieving screws dropped in tight spaces. Wire strippers, then, are indispensable. Forget using your teeth or scissors to strip cables; a quality wire stripper will give you a clean and precise cut, without damaging the copper strands. This is crucial for clean and reliable electrical connections.
Soldering iron and multimeter tester
If you intend to touch electronics, even just to change a pickup or a potentiometer, a soldering iron is a must. To start, a 30-40 watt pencil-style soldering iron with a fine tip is also fine. There's no need to spend a fortune on a professional soldering station, at least at first. Just remember to use good quality solder and work in a well-ventilated area. The multimeter, or tester, is the eye that sees the invisible. It allows you to check circuit continuity, measure the resistance of pickups (to understand if they are in phase or if there's a problem), and quickly diagnose electrical faults. Here too, a basic digital model for 15-20 euros is more than sufficient for a hobbyist's needs. I spent hours looking for a problem that was solved in a second with a simple continuity check: trust me, it's a lifesaver.
Basic measuring tools
A good steel ruler, a vernier caliper (even digital, the economic models are surprisingly precise) and a tape measure are essential for every type of measurement. From scale length to bridge placement, from hole depth to nut sizing. Precision here is everything.
Safety first
Never forget safety glasses and gloves. Wood chips, welding fumes, sanding dust are real dangers. No guitar is worth damage to your sight or lungs.
Precision tools for setup and adjustment


Once you have the basic toolbox, it's time to move on to those luthier's tools that allow you to do a proper setup. Here we start talking about more specific tools, but still absolutely within reach of a limited budget, and that make an abysmal difference in the playability of your guitar. A good setup can transform an inexpensive guitar into a much more enjoyable instrument to play, and an expensive guitar into a true gem.
Feeler Gauges
Feeler gauges are sets of calibrated metal shims. They are essential for measuring the string height at the nut, the neck relief (the slight concavità desired to avoid string buzzing) and, in some cases, the saddle height. Having the right measurement allows you to adjust the truss rod and the action with a precision that is impossible by eye. There are models with imperial and metric measurements. I recommend having both, or at least a set that includes the most common conversions. The MusicNomad or D’Addario models are excellent and don’t cost a fortune.
Radius Gauges
These small tools allow you to identify the curvature radius of the fretboard (fretboard radius) and, consequently, to correctly set the radius of the bridge saddles. Many modern guitars have a compound radius (compound radius), but for most guitars, a set of radius gauges will help you understand if the bridge is set correctly. They are available in metal or plastic. Those made of metal are more precise and durable. Without them, setting up the saddles is an operation done 'by feel', often with suboptimal results.
String Action Ruler
A precision ruler, often graduated in 64ths of an inch or in tenths of a millimeter, is specifically designed to measure the string height at the 12th fret (or 17th). This allows you to achieve low action without fret buzz. Some models also include notches for measuring pickup height or nut slot depth.\n\nIt is one of the luthier's tools most used for setups, and a good model, like those produced by StewMac or MusicNomad, is an investment that pays for itself immediately in terms of precision and avoided frustrations.
Nut Files
Ah, the nut files. These are the only tool in this section that can require a more significant investment, but they are crucial. An incorrectly filed nut is the number one cause of intonation problems, strings that buzz poorly, and annoying open string noises. Specific nut files have a calibrated thickness for each string gauge. Do not use generic files or hacksaws: you risk widening the slots too much or making them too deep, ruining the nut. If the budget is tight, you can start with a very fine triangular file for the thinner slots and a round file of appropriate diameter for the thicker ones, but the precision will never be that of a dedicated set. StewMac produces excellent ones, but brands like Hosco or MusicNomad also offer good quality sets at more accessible prices.
Fret Rocker and Straightedge
The Fret Rocker is a small metal bar with four sides of different lengths, used to identify “high frets” that cause buzzing. By placing it on three frets at a time, if it rocks, it means that the middle fret is higher than its neighbors and needs to be leveled. The Straightedge, on the other hand, is a perfectly straight (or rectified) metal bar used to check the fretboard flatness or to control the neck relief. It is a simple but incredibly effective tool for diagnosing fretting problems. You can also build a homemade one with a good quality aluminum ruler, provided that it is perfectly straight.
Quality Capo
with any capo, but a robust one that applies uniform pressure. It serves to hold the strings still during fret leveling, to block the strings while working on the bridge or nut, or simply to test the intonation at different positions. A good capo is a small but precious ally.
Truss rod wrenches
Almost every guitar has a specific wrench for the truss rod. Make sure you have the right one for your guitar (often included). Measurements vary: hexagonal (metric or imperial), socket, or even Phillips. Never use the wrong wrench or force the truss rod adjustment, as you could cause irreparable damage to the neck.
For woodworking: when passion calls
If your project goes beyond simple setup and starts to include building a body, modifying a neck, or creating cavities for pickups, you will need luthier's tools more specific for woodworking. Here we enter the world of “advanced DIY”, where precision and patience are even more crucial.
Rasps, files, and sandpaper
These are the basic tools for wood modeling. Coarse-grit rasps allow you to quickly remove material for general shapes, while finer-grit files (like sweet-cut wood files) are perfect for refining curves and contours. Sandpaper, in a wide range of grits (from 80 to 2000 or more), is indispensable for sanding and preparing for finishing. Don't skimp on sandpaper quality: good abrasive paper lasts longer and leaves a more uniform surface. Sanding blocks, both rigid and flexible, will help you achieve perfect flat or curved surfaces.
Chisels and gouges
A good set of sharp chisels is a must. They are used to create precise cavities for pickups, bridges, electronics compartments, or for making inlays. Sharpening is crucial: an unsharpened chisel is dangerous and useless. You can start with a basic woodworking set, but make sure you learn how to sharpen them correctly. For gouges, if you want to create more complex shapes or carve curves, a small set can be useful. Once again, steel quality and sharpening are key.
Hand planes
A hand plane, even a small block plane, is incredibly useful for flattening surfaces, chamfering edges, or precisely reducing wood thickness. Traditional planes require some practice to be used effectively, but the satisfaction of seeing a paper-thin shaving emerge from the wood is priceless. To start, a small block plane and a smoothing plane are an excellent starting point.
Clamps (Clamps)
You will never have enough clamps. C-clamps, bar clamps, spring clamps: of all sizes. They are used to hold pieces in place while the glue dries, to block pieces during milling or drilling, or to fix jigs. Invest in good quality clamps that grip firmly without damaging the wood.
Router and bits
This is the machine that opens up a world of possibilities for you. A router, or router, is indispensable for creating pickup cavities, electronics compartments, neck pockets, or for precisely trimming the edges of a body. To start, a small trim router (or trimmer) is more than sufficient and much more manageable than a large router. You will need a set of router bits of different shapes and sizes: straight bits, radius bits, chamfer bits. And, crucially, precise templates to guide the router. You can buy them or build them yourself with MDF.
Attention: The router is a powerful and potentially dangerous tool. Always wear safety glasses, hearing protection, and keep your hands away from the moving cutter. Take the time to learn how to use it safely. To learn more about the safe use of routers, I recommend consulting reliable resources such as those offered by Wood Magazine.
Drill Press
While a hand drill may be fine for some holes, a drill press offers unparalleled precision and repeatability. It is essential for drilling holes for tuners, potentiometers, jacks, or for bridge screws, ensuring they are perfectly perpendicular to the surface. Even a small benchtop model is a valuable investment for lutherie.
Electronics and wiring: the beating heart
Let's deepen the luthier's tools specific for electronics. If you plan to do more than a simple pickup change, having the right tools will make the job much cleaner, more reliable and, honestly, less frustrating.
Temperature-controlled soldering station
If the basic soldering iron is fine to start with, a temperature-controlled soldering station è a significant upgrade. It allows you to set the exact temperature for the type of solder and component you are soldering, reducing the risk of overheating components or getting cold solder joints. The fine tip and constant temperature are crucial for clean and durable work.
Desoldering pump or desoldering braid
To err is human, and in electronics, it's the norm. The desoldering pump (or “solder sucker”) or desoldering braid are your tools for correcting errors. They allow you to remove excess solder or completely desolder a component without damaging the printed circuit board or other components. Don't start soldering without having one handy.
Heat shrink tubing and electrical tape
To insulate electrical connections, heat-shrink tubing is much more professional and safer than electrical tape. It shrinks with heat, firmly wrapping the joint and protecting it from short circuits and humidity. Having an assortment of diameters is a good idea. Electrical tape, however, remains useful for temporary wiring or for grouping cables.
Magnifying glass with light
When working with small components and thin wires, a good magnifying glass with integrated light is a blessing. It allows you to clearly see the details and make precise solders, reducing eye strain. Many models also have a stand to hold circuits or wires.
Precision wire strippers
For the thin and delicate wires of pickups or shielded cables, a precision wire stripper with different gauge notches is indispensable. It allows you to remove the insulation without cutting or damaging the tiny copper strands, which are extremely fragile.
Potentiometer wrench
A small socket wrench or a specific wrench for potentiometer and switch nuts will help you tighten them securely without scratching the guitar's finish. These are often uncommon metric or imperial sizes, so a small set of precision socket wrenches can be very useful. If you want to delve deeper into the topic of electronics and wiring, I recommend checking out our article on how to modify your guitar, where you will find more specific details on components and techniques.
Durability matters: choose well to save (and not curse)
Now that we have seen what are the luthier's tools essentials, it's time to talk about how to choose. It's not just about having the right tool, but about having the right tool for you, that lasts over time and gives you the necessary precision without costing an arm and a leg. I learned the hard way that a cheap tool that breaks after two uses is not a saving, but a waste of time and money.
Quality vs. Price: where to cut and where not to
Not all tools need to be professional quality, but for some, it's not worth compromising.
- Low Budget (under 100€):
- What to buy: Focus on basic setup tools. A good set of feeler gauges, an action ruler, decent quality screwdrivers (a Stanley set or similar), a cheap multimeter, a soldering iron. For files, you could opt for a generic set of modeling files, but with the awareness that they are not ideal for nuts.
- What to avoid: Complete sets of “luthier tools” for 30€ on Amazon. Often they are of abysmal quality, with metals that bend or break, and imprecise tolerances. That 10 euro screwdriver set that seems like a bargain? Its tips strip at the first firm tightening, and the Allen keys wear out immediately.
- Real durability: Basic tools will last, but low-cost specific ones might disappoint. Screwdriver tips get damaged, cheap files clog or wear out quickly.
- Average Budget (100-300€):
- What to buy: Here you can start getting serious. A temperature-controlled soldering station (like Weller or Hakko), a set of metal radius gauges, a good fret rocker, a basic set of quality nut files (even just those for the most common gauges), a decent trim router (Bosch, Makita, DeWalt have excellent entry-level models). Brands like MusicNomad and D’Addario offer excellent setup kits.
- What to avoid: Still buying super cheap tools if you have a higher budget. Focus on upgrading those you use the most or that require greater precision.
- Real durability: Tools in this range offer excellent value for money. They last a long time with proper care and maintain their precision. My Makita trim router, bought years ago, is still a workhorse.
- High Budget (300€+):
- What to buy: At this level, you can invest in specialized and high-quality tools. Complete sets of StewMac nut files, a precision drill press, planes from renowned brands (Lie-Nielsen, Veritas), a complete set of high-quality chisels (Narex, Two Cherries), a professional soldering station (like a Hakko FX-888D), and all the specific luthier's tools that StewMac offers for every stage of the work (e.g., fret presses, inlay tools).
- What to avoid: Buying tools you'll never use just because they are “professional”. Every purchase must be justified by the actual use you will make of it.
- Real durability: These are tools made to last a lifetime, often with solid guarantees. Their precision and ergonomics make work easier and results better.
The importance of maintenance
Even the best tools get damaged if not cared for. Regularly clean your tools, sharpen chisels and planes, lubricate moving parts, and store everything neatly. A well-maintained tool not only lasts longer, but also works better. Remember, true value is not in the lowest price, but in the tool's ability to do its job well, for a long time, and without causing you problems. Sometimes, spending a little more at the beginning saves you a lot of time and frustration in the future.
Conclusion
Ultimately, the journey into the world of DIY lutherie does not require a multi-million euro workshop. It requires the right mindset, a bit of courage, and a reasoned selection of luthier's tools. Start with the basics, understand what you really need, and then expand your collection as your skills and projects grow. There's no rush, and every guitar you build or repair will be a valuable lesson. The satisfaction of playing an instrument you've cared for with your own hands is priceless, and with the right tools, it's within everyone's reach.
FAQ
What is the most important tool to start DIY lutherie?
If I had to choose just one tool, I'd say the multimeter. It allows you to diagnose electrical problems, check pickups, and ensure your wiring is correct, avoiding hours of frustration. Immediately after, a good set of Allen wrenches and screwdrivers, and a ruler for the action, are essential for basic setups.
Can I use generic woodworking tools for lutherie?
Yes, many generic woodworking tools are perfectly usable, such as rasps, files, chisels, clamps, and even the drill press or router. However, for some operations that require high precision specific to the guitar (such as nut files or the fret rocker), specific luthier tools are indispensable to achieve professional results and prevent damage.
Related free tool: Fret Slot Calculator — calculate online the fret distance of your guitar.
Download the Luthier Survival Kit
Free PDF with checklist, problem-cause table and project card template.
 English
  Italiano
Stuck on your build?
If you ran into the same problem or have a question, drop it in the comments. I read and reply to every one.
Write a comment