


How to calculate fret distance: practical guide
Ricordo ancora la prima volta che ho dovuto affrontare il calcolo delle distanze dei tasti per un manico di chitarra. Avevo già assemblato un paio di Stratocaster partcaster, ma si trattava sempre di manici già pronti, con i tasti al loro posto. L’idea di dover fresare le scanalature su una tastiera grezza mi faceva sudare freddo. Era la fase del “punto di non ritorno”, quella dove un errore di un millimetro può rovinare ore di lavoro e, peggio ancora, compromettere l’intonazione di uno strumento. Questa paura non è solo mia, credetemi. È il pain point di molti hobbisti che si avvicinano alla liuteria fai da te. L’intaglio delle scanalature dei tasti è un momento cruciale, e la precisione è tutto. Ma non è un’arte oscura per pochi eletti. È matematica, e con gli strumenti giusti e la pazienza necessaria, chiunque può farlo. Se ci sono riuscito io nel mio garage, con un po’ di legno e qualche attrezzo, potete farcela anche voi. In questo articolo, voglio demistificare il processo. Vedremo insieme la teoria dietro la guitar fret distance, the magic formula that governs it, and I will give you all the practical advice I have learned by making mistakes and redoing. You don't need to be a math genius, but you need to understand the “why” behind the “how”.
The Heart of the Matter: The Formula of Equable Temperament


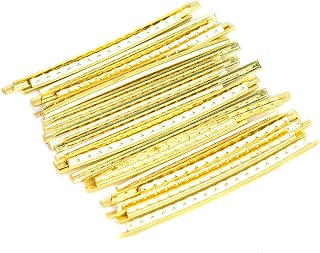


Let's start from the beginning. Why do guitar strings have to be divided in a certain way? The answer lies in the concept of equable temperament. Senza entrare troppo nei dettagli della teoria musicale, immaginate di dover dividere un’ottava (l’intervallo tra una nota e la stessa nota più alta o più bassa) in dodici semitoni uguali. Se lo facessimo con una divisione aritmetica semplice, la chitarra suonerebbe stonata man mano che saliamo sulla tastiera. Invece, il temperamento equabile distribuisce matematicamente queste dodici divisioni in modo che ogni semitono abbia lo stesso rapporto di frequenza rispetto al precedente. Questo rapporto è la radice dodicesima di 2, ovvero circa 1.0594635. È un numero fisso, una costante universale per tutti gli strumenti a tasti moderni.
The Magic Number: 17.817
Da quel rapporto deriva il nostro “numero magico”: 17.81702. Questo valore è il risultato di 1 diviso per (1 – 1/1.0594635). In pratica, ci dice che per trovare la posizione del tasto successivo, dobbiamo dividere la lunghezza della corda rimanente per questo numero. È una costante che semplifica enormemente la vita del liutaio. La formula base per calcolare la distanza di ciascun tasto dal ponte (o meglio, dalla selletta del ponte, il punto di contatto della corda) è la seguente:
Key distance
= Scale Length / (1.0594635 ^
)
Where:
- Scale Length (or Diapason) is the vibrating length of the string, measured from the nut (or zero fret) to the bridge saddle.
- is the number of the key we want to calculate (1 for the first key, 2 for the second, and so on).
- 1.0594635 is the factor of an even temperament.
Or, and this is the method I prefer for its practicality in the garage, we can calculate the distance of each fret from the nut (or from the zero fret) in sequence, or the distance between one key and the next.
The Scale Length: The Basis of Everything
Before doing any calculations, we must decide the scale length (scale length) of our guitar. This value, often called scale length, is the distance between the nut (or nut) and the bridge saddle (saddle). È il cuore vibrante dello strumento e determina la tensione delle corde, il timbro e, ovviamente, la spaziatura dei tasti. Le lunghezze di scala più comuni sono:
- 25.5 inches (approximately 647.7 mm): Typical of Fender Stratocaster and Telecaster. It offers good string tension, a bright attack, and sustain.
- 24.75 inches (approximately 628.65 mm): Typical of Gibson Les Paul and SG. It provides slightly lower tension, a warmer sound, and easier string bending.
- 25 inches (approximately 635 mm): Used by PRS and other brands, a compromise between the two.
on ci sono regole ferree. Puoi scegliere la lunghezza di scala che preferisci, anche una non standard, ma devi essere consapevole delle implicazioni su tensione e intonazione. La cosa fondamentale è essere precisi al millimetro nella sua definizione iniziale, perché ogni calcolo successivo dipenderà da questo valore. Un errore comune, che ho fatto anch’io le prime volte, è confondere la lunghezza totale del manico con il diapason. Il diapason è solo la parte vibrating part of the string. Make sure to measure from the exact point where the string rests on the nut to the point where it rests on the bridge saddle.
Let's Get to Work: A Practical Step-by-Step Example
Now that we have understood the theory, let's move on to practice. Let's take a common scale length, for example 25.5 inches (647.7 mm), e calcoliamo insieme le posizioni dei primi tasti. Useremo il metodo più comune e intuitivo per il fai da te: calcolare la distanza di ogni tasto dal capotasto. Per i nostri calcoli, useremo il valore preciso di 17.81702. Tenete a portata di mano una calcolatrice scientifica o, meglio ancora, un buon foglio di calcolo.
Step 1: The Scale Length and the First Measurement
Il nostro diapason è 647.7 mm. Il capotasto è il punto di partenza, lo 0 sulla nostra scala di misurazione. Per trovare la distanza dal capotasto al primo tasto, applichiamo la formula:
Distance from the nut to fret 1 = Scale length / 17.81702
Fret 1 Distance = 647.7 mm / 17.81702 ≈ 36.353 mm
This means that the center of the first fret slot must be 36.353 mm from the edge of the nut.
Step 2: On to the Second Fret
Now, for the second fret, the vibrating string length remaining is the scale length minus the distance of the first fret from the nut.
Remaining length after fret 1 = Scale length – Distance Fret 1 from the nut = 647.7 – 36.353 = 611.347 mm
Now we calculate the distance between the first and second fret:
Distance Fret 2 from Fret 1 = Remaining length after fret 1 / 17.81702 = 611.347 mm / 17.81702 ≈ 34.312 mm
So, the total distance from the nut to the second fret will be:
Distance Fret 2 from the nut = Distance Fret 1 from the nut + Distance Fret 2 from Fret 1 = 36.353 mm + 34.312 mm = 70.665 mm
See? Each calculation is based on the length of the string that remains from the previous fret. It's an iterative process.
Step 3: We Continue Up to the 22° Fret
We repeat the same process for all frets. Here I show you a table with the first frets and then the key frets to give you an idea of how the distances progressively reduce. We will always use a scale length of 647.7 mm.
- Fret 1: 36.353 mm from the nut
- Fret 2: 70.665 mm from the nut (34.312 mm from Fret 1)
- Fret 3: 103.056 mm from the nut (32.391 mm from Fret 2)
- Fret 4: 133.626 mm from the nut (30.570 mm from Fret 3)
- Fret 5: 162.476 mm from the nut (28.850 mm from Fret 4)
- Fret 6: 189.707 mm from the nut (27.231 mm from Fret 5)
- Fret 7: 215.419 mm from the nut (25.712 mm from Fret 6)
- Fret 8: 239.712 mm from the nut (24.293 mm from Fret 7)
- Fret 9: 262.684 mm from the nut (22.972 mm from Fret 8)
- Fret 10: 284.431 mm from the nut (21.747 mm from Fret 9)
- Fret 11: 305.048 mm from the nut (20.617 mm from Fret 10)
- Fret 12: 323.850 mm from the nut (18.802 mm from Fret 11)
otate il 12° tasto: è esattamente la metà del diapason (647.7 mm / 2 = 323.85 mm). Questo è un controllo fondamentale. Se il 12° tasto non è esattamente a metà, qualcosa non va nei calcoli precedenti. E andiamo avanti fino al 22° tasto, che è una configurazione comune per molte chitarre:
- …
- Fret 21: 549.998 mm from the nut
- Fret 22: 559.816 mm from the nut
As you can see, the distances between the frets progressively decrease as you move away from the nut. This precision is vital. An error of even just 0.1 mm on a fret can affect the intonation, and the effect becomes more evident on higher frets, where the distances are smaller and the percentage error is greater.
Practical Tip: Keep the Decimals
Quando fai i calcoli, non arrotondare troppo presto. Mantieni almeno 3-4 decimali per tutti i calcoli intermedi. Solo alla fine, quando hai la misura definitiva per ogni tasto, puoi arrotondare a 2 o 3 decimali per la marcatura, a seconda della precisione dei tuoi strumenti di misura. Io, di solito, mi fermo al centesimo di millimetro, che è la precisione massima che riesco a ottenere con il mio calibro digitale. Un errore comune che facevo all’inizio era arrotondare troppo presto, magari al millimetro. Questo può sembrare insignificante, ma quando si sommano gli errori su 22 tasti, la chitarra finisce per suonare stonata. È come costruire un muro: se la prima pietra è storta, tutte le successive lo saranno ancora di più.
Beyond Basic Calculation: Advanced Considerations for a Perfect Neck
Calculating distances è a great start, but there are other factors that influence the precision of intonation and the playability of the neck. They are not directly related to the calculation of fret distances, but they are aspects that every hobbyist builder should know.
Bridge Compensation
You will have noticed that the bridge saddles are never perfectly aligned. This is not a manufacturing error, but a necessary feature called compensation. Le corde, quando vengono premute sul tasto, non vibrano esattamente alla lunghezza teorica. La tensione aumenta leggermente, e questo fa sì che la nota suoni un po’ più alta. Per compensare, la lunghezza della corda viene allungata leggermente al ponte. Ogni corda ha bisogno di una compensazione leggermente diversa a causa del suo spessore e della sua tensione. Le corde più spesse e quelle avvolte (come il MI basso) richiedono una compensazione maggiore rispetto alle corde lisce più sottili. Questo è il motivo per cui le sellette di un ponte Tune-o-matic o di un ponte Stratocaster sono regolabili individualmente. Quando calcoliamo il diapason, lo facciamo dal capotasto al punto di intonazione ideale della selletta, che è un punto medium or theoretical. The fine adjustment of intonation will occur After when the guitar è assembled and the strings are mounted, by moving the saddles forward or backward. For us who cut the frets, the important thing è that the initial scale length è correct.
The “Zero Fret” (Zero Fret)
Some guitars, especially vintage or more modern designs, use a zero fret, ovvero un tasto posizionato esattamente dove di solito si trova il capotasto. In questo caso, il capotasto ha solo la funzione di spaziatore delle corde lateralmente, ma non influisce sull’altezza o sulla lunghezza vibrante della corda. Se la vostra chitarra ha uno zero fret, il calcolo delle distanze dei tasti diventa ancora più semplice, perché il punto di partenza per la misura del diapason è esattamente il centro dello zero fret stesso. Non dovrete preoccuparvi della compensazione del capotasto (che è un’altra cosa, ma ne parleremo un’altra volta). Per un hobbista, lo zero fret può semplificare un po’ la vita.
The Fretboard Radius (Fretboard Radius)
The fretboard radius (fretboard radius) is the curvature of the fretboard surface. It does not affect the) è the curvature of the fretboard surface. It does not affect the guitar fret distance longitudinale, ma è fondamentale per il comfort e la suonabilità. Un raggio più piccolo (es. 7.25″) è più curvo e tipico delle chitarre vintage, ottimo per gli accordi ma meno comodo per i bending. Un raggio più grande (es. 12″ o 16″) è più piatto, ideale per i bending e per uno stile moderno. Molte chitarre moderne usano un compound radius, where the radius gradually changes from the nut to the bridge, becoming flatter as you go up the fretboard. Although not directly related to the calculation of distances, it è an aspect to consider when designing the neck. A well-matched fretboard with the right radius è a pleasure to play.
Multi-scale Necks (Fanned Frets)
For the more adventurous, there are necks multi-scale, or fanned frets. Qui, la lunghezza della scala non è fissa, ma varia da corda a corda. Le corde basse hanno un diapason più lungo (per una maggiore definizione e tensione), mentre le corde alte hanno un diapason più corto (per un bending più facile). In questo caso, il calcolo delle distanze dei tasti diventa molto più complesso, perché ogni corda ha il suo set di distanze, e i tasti non sono paralleli tra loro, ma “a ventaglio”. Non è un progetto per principianti, ma il principio di base del temperamento equabile rimane lo stesso per ogni singola corda. È un esempio di come la matematica di base si adatti a configurazioni estreme. Io stesso ho un progetto in cantiere per un multi-scala, ma non è ancora il momento di parlarne.
Precision is Everything: The Impact of Errors
I cannot stress it enough: precision is crucial. An error of 0.1 mm on a single guitar fret distance può sembrare trascurabile, ma si somma. Se il primo tasto è leggermente fuori posto, tutti i tasti successivi lo saranno ancora di più. Il risultato finale sarà una chitarra che, pur accordata, suonerà stonata in alcune posizioni. Ho avuto una chitarra con un manico che avevo fretato in fretta e furia, pensando che “tanto un millimetro più o meno non fa differenza”. Sbagliato. Quando l’ho provata, ogni accordo suonava leggermente “spento”, e gli assoli sulle posizioni alte erano un incubo. Ho dovuto rifare tutto il lavoro, e credetemi, è molto più doloroso che fare le cose per bene la prima volta.
Your Digital Ally: The Biafax Fret Slot Calculator
Understanding the formula is fundamental, but manually calculating all the fret distances per 22 o 24 tasti, mantenendo la precisione dei decimali, è un lavoro lungo, noioso e ad alto rischio di errori. È qui che entra in gioco la tecnologia. Per questo motivo, qui su Biafax abbiamo sviluppato un free Fret Slot Calculator. It's a tool I created precisely because I was tired of doing calculations by hand or looking for Excel sheets online that didn't always work as I wanted.
How Our Fret Slot Calculator Works
Using it is very simple:
- Go to the page of the Biafax Fret Slot Calculator.
- Enter the scale length (diapason) you have chosen for your project (in millimeters or inches, the calculator converts).
- Indicate the number of frets what you want on your neck (e.g. 21, 22, 24).
- Click on “Calculate”.
The calculator will return a detailed table with:
- The distance of each fret from the nut.
- The distance of each fret from the previous fret.
- The distance of each fret from the bridge.
All with the highest possible precision, using the exact value of 17.81702 and keeping all necessary decimals. You can print the table and use it as a reference on your workbench.
Why Use a Digital Calculator?
Speed: Get all measurements in a few seconds.
Precision: You eliminate the risk of manual calculation errors and premature rounding.
Reliability: Our calculator has been tested and validated on numerous projects. I have used it myself for my necks, and it has never let me down.
Consideratelo un assistente virtuale che fa il lavoro pesante e noioso, lasciandovi liberi di concentrarvi sulla parte manuale e creativa del vostro progetto. È un esempio di come gli strumenti digitali possano semplificare la vita del liutaio fai da te, rendendo accessibili a tutti processi che un tempo richiedevano competenze matematiche avanzate o l’acquisto di costosi righelli pre-calcolati. Una volta che hai il manico fretato e le scanalature pronte, il prossimo passo è l’installazione dei tasti stessi, un’altra fase che richiede attenzione e gli strumenti giusti. Ma non finisce qui: una volta che hai il manico fretato, potresti voler approfondire come regolare al meglio la tua chitarra. Dai un’occhiata alla nostra guida completa su how to modify your guitar to optimize every aspect, from action to intonation.
Essential Tools for Marking
Once you have your numbers, you need to transfer them to the fretboard. And here, the precision of the tools is as crucial as the precision of the calculations.
Precision Digital Caliper: It's your best friend. A good digital caliper allows you to measure with precision to the hundredth of a millimeter. Forget tape measures or school rulers. A decent caliper costs little, and it will pay you back in accuracy and fewer frustrations.
Precision Carpenter's Square: To draw perfect perpendicular lines on the fretboard. A good square is essential to ensure that the frets are straight and not fanned (unless it's an intentional multi-scale project!).
Marking Point (Scriber): Much better than a pencil. A fine metal point engraves a thin and precise line, without the variable thickness of a graphite lead. This is fundamental to avoid marking errors.
Sturdy metal ruler: To be used with the marking point. It must be straight, without flexing, and preferably with a beveled edge for greater precision.
I remember trying to use a pencil for the first fretboard. The result? Thick, imprecise lines, and a mess of graphite everywhere. Since then, only a scribing tool. It's a small investment that makes a big difference.
Common Mistakes and How to Avoid Them (Mimmo's Lessons)
I've made every conceivable mistake, so let me share some of my “lessons learned” to help you avoid the same frustrations.
Mistake 1: Wrong Scale Length at the Base
The problem: Measuring the scale length from the wrong point, or not being precise. Perhaps measuring to the edge of the bridge, instead of the center of the theoretical saddle. Or rounding the initial measurement too much.
Mimmo's lesson: First of all, precisely decide your scale length. If it's 25.5 inches, convert it to millimeters (647.7 mm) and use it with that precision. If you use a Tune-o-matic bridge, consider the ideal intonation point of the saddle as a reference for the total scale length, not the outer edge of the bridge. When you mark the nut line, make sure it is your absolute zero point.
Mistake 2: Excessive Rounding During Calculations
The problem: Rounding intermediate results to a few decimal places or, worse, to the nearest whole millimeter. This introduces progressive errors that accumulate.
Mimmo's lesson: Use our Fret Slot Calculator! If you absolutely must do the calculations by hand, keep at least 3-4 decimal places for all intermediate steps. Only at the end, when you have the definitive measurement for each fret from the nut, can you round to two decimal places for marking on the fretboard. I've seen guitars that sounded “almost right” for this reason. Don't fall into the same mistake.
Mistake 3: Imprecise Measuring Tools
The problem: Using a construction tape measure, a flexible plastic ruler, or a low-quality caliper with poor precision.
Mimmo's lesson: Invest in a good digital caliper (even an inexpensive one for 20-30 euros is fine, as long as it's precise to a hundredth of a millimeter) and a quality carpenter's square. These are your most important tools at this stage. If the tools are not precise, even perfect calculations will be useless. It's like wanting to make a perfect espresso with a broken moka pot: impossible.
Mistake 4: Imprecise Marking on the Fretboard
The problem: Using a thick pencil, drawing crooked or not well-defined lines.
Mimmo's lesson: Use a scribing tool (scriber) and a straight metal ruler. Engrave a thin, clean line on the fretboard. Be careful to position the ruler exactly on the calculated measurement. I sometimes use a piece of thin adhesive tape to mark the exact point on the ruler before scribing, to have an even clearer visual reference. The line must be deep enough to guide the saw blade, but not so much as to damage the wood.
Mistake 5: Lack of Patience
The problem: Rushing the process, especially when you are tired or frustrated.
Mimmo's lesson: Take your time. This is not a job to be rushed. Every measurement, every marking, every cut must be done calmly and carefully. If you feel frustrated, take a break. Go get a coffee, take a walk, and come back with a clear mind. Remember, it's much easier to redo a calculation than to redo an entire neck. Patience is your best friend in lutherie.
One last tip: the rule of 18
Molti liutai, specialmente in passato, usavano la “regola del 18” (o “regola del 17.817”). In pratica, per trovare la distanza del primo tasto, si divide il diapason per 17.817. Per il secondo tasto, si divide la lunghezza rimanente per 17.817, e così via. È un’ottima approssimazione e un buon modo per capire il concetto, ma per la massima precisione, il nostro calcolatore o la formula completa sono insostituibili. La regola del 18 è una “scorciatoia” pratica per avere un’idea, ma non per la lavorazione finale. Per chi volesse approfondire ulteriormente la teoria del temperamento equabile e la sua applicazione nella liuteria, consiglio di dare un’occhiata a questo articolo di StewMac, una delle risorse più autorevoli nel campo: StewMac Fret Calculator Page. It's not just a calculator, but also a reliable source of technical information.
Conclusion: The Satisfaction of a Job Well Done
Calculating the guitar fret distance può sembrare una montagna da scalare all’inizio, lo so. Ma come avete visto, con la giusta comprensione della formula del temperamento equabile, gli strumenti adatti e un pizzico di pazienza, è un’operazione alla portata di ogni hobbista. Non lasciatevi intimidire dai numeri o dalla paura di sbagliare. Ricordate la mia storia: anch’io ho avuto i miei momenti di frustrazione, ho fatto errori e ho dovuto rifare le cose. Ma è proprio da questi errori che si impara di più. E la soddisfazione di suonare una chitarra che hai costruito tu, sapendo che ogni nota è intonata perché hai calcolato e tagliato i tasti con precisione, è impagabile. Quindi, armatevi di calibro, del nostro Fret Slot Calculator, e mettetevi al lavoro. Il prossimo manico perfetto potrebbe essere il vostro!
FAQ: Common Questions about Fret Distance
Can I use the “rule of 18” for all my projects?
The rule of 18 is an excellent approximation, useful for understanding the principle or for less critical projects. However, for impeccable intonation, especially on higher frets, it is always better to use the complete formula or a digital calculator that uses the exact value of 17.81702. For a serious project, do not rely solely on approximation.
What happens if I miss the position of a fret by half a millimeter?
Half a millimeter may seem small, but over the entire length of the scale, especially on higher frets where distances are smaller, it can cause perceptible intonation problems. The guitar might sound “out of tune” even if tuned, making the playing experience frustrating. Precision is fundamental, especially on frets subsequent to the error, where inaccuracy accumulates.
Do I need to consider the fret thickness when calculating its position?
o, the calculated distances refer to the center of the fret slot. The thickness of the fret wire (fret wire) is irrelevant for its longitudinal position. It is the position of the contact point of the string that matters. What matters is that the slot is cut with the correct width for the fret wire you will use, but this does not affect its position.
Related free tool: Fret Slot Calculator — calculate online the fret distance of your guitar.
Download the Luthier Survival Kit
Free PDF with checklist, problem-cause table and project card template.
 English
  Italiano
Stuck on your build?
If you ran into the same problem or have a question, drop it in the comments. I read and reply to every one.
Write a comment