


Fanned frets: designing a multiscale fretboard
The first time I saw a guitar with the “fanned” fretboard, what they call fanned frets o multiscale, ho pensato fosse roba da liutai spaziali. Sembrava complicatissimo, quasi una sfida alle leggi della fisica applicate alle corde. E vi dirò, un po’ lo è, ma non nel senso che non potete farcela. È una di quelle cose che, una volta capito il trucco e avendo gli strumenti giusti (anche semplici, eh!), diventa accessibile. Non vi nascondo che i primi tentativi sono stati… interessanti. Diciamo che ho imparato molto dagli errori, tipo quando ho stampato il template con la scala sbagliata e ho segato i tasti su un bel pezzo di palissandro che poi è finito dritto nella spazzatura. Ma è proprio da lì che è nata la voglia di capire Really come funziona, per evitare che altri facciano gli stessi miei sbagli. Se siete qui, probabilmente avete già qualche guitar made in the garage, maybe you've already tried to modify an electric guitar or you've built your first neck. This is the next step, and I assure you that the satisfaction of playing an instrument with a multiscale fretboard made by you is priceless. You don't need a CNC router or machinery worth thousands of euros. You need patience, precision and, above all, to understand the basic concepts.
Why complicate your life with multiple scales?


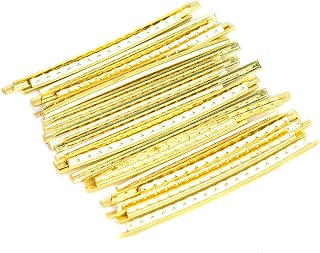

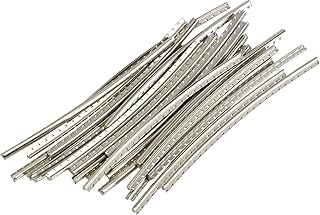

Excellent question. When talking about fanned frets, non è solo una questione estetica, anche se ammetto che l’aspetto è decisamente figo. La vera ragione è puramente funzionale, e risponde a un’esigenza che molti chitarristi, soprattutto quelli che si avventurano in accordature basse, conoscono bene. Pensateci un attimo: una chitarra standard ha una sola lunghezza di scala. Questo significa che la corda del Mi basso e quella del Mi cantino hanno la stessa lunghezza, e di conseguenza, con la stessa muta di corde, avranno tensioni diverse. Se poi accordate la chitarra in Drop-D o addirittura più in basso, il Mi basso diventa una corda floscia, difficile da intonare e con un sustain scarso.
The concrete advantages of a multiscale fretboard
Optimized string tension: This is the focal point. With a multiscale fretboard, the lower strings (the E and A, to be clear) have a longer scale. This increases tension, making them more stable, with better intonation, a more decisive attack, and less “floppy” even with very low tunings. Imagine no longer having to fight with that low E that looks like it's made of spaghetti! Improved intonation:The length of the string is directly related to its intonation. With different scales, it is possible to optimize intonation across the entire range of the instrument, especially in the most extreme registers where standard guitars tend to struggle more. Ergonomics for bending and chords: The higher strings (G, B, high E) have a shorter scale. This makes them easier to bend and, in general, more comfortable for solos and complex chords in the higher positions of the neck. The feeling is that of having the best of two worlds: the power of long scales and the playability of short scales. Sonic clarity: La maggiore tensione e stabilità delle corde basse contribuisce a una migliore definizione del suono, specialmente in contesti ad alto guadagno. Meno fango, più punch. Quando ho assemblato la mia prima multiscale guitar, I remember tuning it to Drop-C. The low E (or rather, the low C) was a rock. There was no comparison with the same tuning on a single-scale guitar. The difference is not subtle, it's a completely different sound experience that, once tried, is hard to give up.
Understanding the logic behind multiple scales
Ok, we get it why we should want to build a multiscale fretboard. Now let's see as it works, without getting too bogged down in advanced mathematics, but with the right amount of theory to understand what we are doing.
What is a scale? A quick review
Per chi si fosse perso qualche passaggio o per rinfrescare la memoria, la lunghezza della scala di una chitarra è la distanza tra il capotasto e il centro del dodicesimo tasto, moltiplicata per due. Oppure, più precisamente, la distanza vibrante della corda dal capotasto al ponte. Le scale più comuni sono 25.5 pollici (Fender) e 24.75 pollici (Gibson), ma ce ne sono molte altre. In una chitarra standard, tutti i tasti sono paralleli tra loro e perpendicolari all’asse del manico. Ogni corda ha la stessa lunghezza di scala. Semplice, no?
The concept of “perpendicular fret” (perpendicular fret)
Here things get interesting. In a multiscale fretboard, the frets are not parallel. They are angled, forming a “fan”. But there is a point, a specific fret, that remains perpendicular to the axis of the neck, just like on a traditional guitar. This is the perpendicular fret.
Il perpendicular fret it's your anchor point. It's the point where the scale of the shortest string (usually the high E string) and the scale of the longest string (usually the low E string) intersect and, in a sense, temporarily "align". All other frets will be angled relative to this point.
If the perpendicular fret is at the nut (0th fret): all frets will be angled, with the fan opening towards the bridge. The lower strings will have their maximum scale length, the higher strings their minimum scale length, and the angle will be distributed along the entire fretboard.
If the perpendicular fret is at the bridge (24th fret, for example): the fan will be concentrated towards the nut. This configuration is less common and may be less ergonomic.
The most common (and sensible) choice: most luthiers and manufacturers place the perpendicular fret tra il 7° e il 9° tasto. Questo bilancia bene l’angolo su tutta la tastiera, rendendola comoda sia per gli accordi al capotasto che per gli assoli sulle posizioni alte. Quando suonate, la mano tende a “ruotare” naturalmente attorno a quel punto, quindi un tasto dritto lì rende tutto più intuitivo.
La prima volta che ho dovuto scegliere il perpendicular fret, ero in crisi. Non capivo l’impatto. Ho provato a immaginarmi le mani che suonavano. Se lo metti al 12°, il fan è più gentile e distribuito. Se lo metti più in basso, diciamo al 5°, l’angolo al capotasto sarà più pronunciato, e quello al ponte meno. Per il mio primo progetto, ho scelto l’ottavo tasto, un buon compromesso che mi ha dato subito un buon feeling.
The angle of the frets: how it originates and how it varies
Imagine two parallel lines representing the two scales, one for the lowest string and one for the highest string. The perpendicular fret è il punto dove queste due scale sono “allineate” trasversalmente. Via via che ci si allontana da questo punto (verso il capotasto o verso il ponte), i tasti si inclinano.
L’angolo di ogni tasto non è casuale: è determinato dalla differenza tra le due scale e dalla posizione del tasto perpendicolare. Più grande è la differenza tra la scala lunga e la scala corta, e più il perpendicular fret è lontano dalle estremità del manico, più pronunciato sarà l’angolo dei tasti.
Non spaventatevi: non dovrete fare calcoli trigonometrici complessi. Per fortuna, c’è chi ha già pensato a software e generatori online che fanno tutto il lavoro sporco per noi. E fidatevi, usare un generatore è l’unico modo sensato per ottenere una precisione sufficiente per questo tipo di lavoro.
Designing your multiscale fretboard: the numbers that matter
Now that we have understood the theory, let's move on to the practical part: how do you actually design a fanned fret fretboard? This is the phase where the decisions you make will have a direct impact on the final result.
Choosing the scales: don't go randomly!
La prima cosa da decidere sono le due lunghezze di scala: quella per la corda più bassa e quella per la corda più alta. Non c’è una “scala perfetta” per tutti, dipende dal tipo di chitarra che state costruendo, dall’accordatura che userete e dal vostro stile di suono.
Ecco qualche combinazione comune e le relative considerazioni:
25.5" – 26.5" (1 inch difference): A moderate fan, great for those approaching multiscale for the first time. It allows for a bit more tension on the low strings without overly disrupting ergonomics. Perfect for standard tunings or a semitone down.
25.5" – 27" (1.5 inch difference): A very popular combination, it offers a good balance. The low strings benefit from a decidedly longer scale, ideal for tunings like Drop-D, Drop-C or even more extreme ones.
26″ – 28″ or 27″ – 29″ (2 inches or more difference): Questi sono fan più estremi, pensati per chitarre a 7 o 8 corde e accordature molto, molto basse (tipo F standard). L’angolo dei tasti sarà significativo, e potrebbero richiedere un po’ di adattamento ergonomico. Per un primo progetto, ve lo sconsiglio.
Il mio consiglio spassionato, se è la vostra prima volta, è di non esagerare. Un fan di 1 o 1.5 pollici è più che sufficiente per apprezzare i benefici senza rendere il progetto inutilmente difficile o l’ergonomia troppo aliena. Ricordate, l’obiettivo è costruire una chitarra che suoni bene e che sia comoda da suonare!
Locating the perpendicular fret: your fixed point
As we said, this is the fret that remains straight. Its position is crucial because it determines how “open” the fan will be on both sides.
Fret 0 (nut): The fan is maximum at the bridge. The angle at the nut is zero. It makes open chords simpler, but the fan can be very pronounced in high positions.
Fret 12: The fan is distributed equally between the nut and the bridge. This creates a gentler angle across the entire fretboard, but it might not be ergonomically ideal if you play open chords a lot.
Fret 7-9: Questa è la scelta più comune per un motivo. La mano sinistra, quando suona accordi o scale, tende a ruotare in modo naturale attorno a questa zona. Avere un tasto dritto qui rende la chitarra incredibilmente comoda da suonare, sia per gli accordi al capotasto (dove il fan è moderato) sia per gli assoli sulle posizioni alte (dove il fan è anch’esso gestibile).
Per i miei progetti, scelgo quasi sempre l’ottavo tasto. Mi sono trovato bene, e l’angolo che si crea è abbastanza “gentile” da essere quasi impercettibile dopo pochi minuti di pratica, ma abbastanza pronunciato da dare tutti i benefici del multiscale.
Calculating fret positions: the magic of the generator
Ora, la parte che potrebbe farvi sudare freddo: calcolare la posizione di ogni singolo tasto, tenendo conto delle due scale e dell’angolo. Teoricamente, si può fare a mano con formule trigonometriche e un sacco di precisione. Praticamente… è un incubo. Le probabilità di errore sono altissime, e un errore anche minimo su un tasto compromette l’intonazione di tutta la chitarra.
Fortunatamente, viviamo nel 21° secolo. Non serve una laurea in ingegneria o un software da migliaia di euro. Esistono strumenti online, gratuiti e incredibilmente precisi, che fanno tutto il lavoro per voi.
Il mio preferito, e quello che uso per tutti i miei progetti, è il Multi-Scale Generator by Biafax. It's a fantastic tool that allows you to enter your two scales, the number of frets, and the position of the perpendicular fret. In a few seconds, it generates a detailed diagram with all the measurements and angles you need. Not only that, it also allows you to print a 1:1 scale template, ready to be glued onto the wood.
How to use it best:
This generator saves you hours of work and, above all, guarantees you a precision that would be almost impossible to achieve by hand. È your best friend in this project.
From design to wood: preparing the template and cutting the keys
We have our printed template, precise to the millimeter (I hope you checked the print!). Now we need to transfer this information onto the keyboard wood. This è the phase where patience and precision are everything.
Create the physical template
The sheet of paper, however precise, è not sufficient to cut the slots. We need to create a più robust template.
When I made my first template, I glued it with liquid glue. Result? Air bubbles and paper that swelled, ruining the precision. Since then, only quality adhesive spray. It's a small detail, but it makes a huge difference.
Transfer the lines onto the fretboard
Now we have our wooden template. It's time to use it on the actual fretboard.
Cutting the fret slots: the moment of truth
Questa è la parte più delicata e, se fatta male, la più difficile da correggere. Avete bisogno di una sega per tasti (fret saw) con la giusta larghezza di taglio (kerf) per il fretwire che userete. Di solito, 0.023 pollici (0.58mm) o 0.025 pollici (0.63mm) sono le misure più comuni.
Il vero problema è mantenere l’angolo e la profondità costante.
Un trucco che ho imparato dopo aver rovinato un paio di tastiere: fate sempre dei tagli di prova su un pezzo di scarto dello stesso legno della tastiera. Questo vi permette di settare la profondità della sega e di prendere confidenza con l’angolo prima di lavorare sul pezzo “buono”. È un piccolo spreco di legno, ma vi salva da potenziali disastri.
Ricordatevi che ogni tasto ha il suo angolo specifico. Il Multi-Scale Generator it will also give you these angles, which you can use to set your guide.
It's too narrow.
Practical considerations and tips from “battlefield”
So far we've talked about design and cutting, but there are a lot of other details that can make the difference between a well-made multiscale guitar and an ergonomic disaster. These are the “secrets” you only learn by getting your hands dirty.
Materials: don't underestimate wood
Per la tastiera, scegliete un legno stabile e denso. L’ebano e il palissandro sono scelte classiche e affidabili. L’acero offre un suono brillante, ma richiede una finitura più resistente per proteggerlo. La stabilità del legno è fondamentale, perché le tensioni delle corde sono diverse e una tastiera che si muove può compromettere l’intonazione.
Per il manico, un buon pezzo di acero o mogano, magari con rinforzi in grafite o due strisce di noce, aiuterà a mantenere la stabilità. Il manico di una multiscale deve resistere a forze di tensione leggermente più complesse rispetto a un manico tradizionale.
Truss rod: the heart of stability
With multiple scales, the truss rod is even more important. A double-action truss rod is almost a must. It will give you much more flexibility in adjusting the neck relief and compensating for different string tensions. Position it carefully, making sure it doesn't interfere with the fret slots.
Bridge and nut: the special parts
This is where you might need specific hardware.
Bridge: A traditional bridge won't work. You need individual saddles for each string, which can be angled and intonated separately. Many manufacturers offer specific bridges for fanned fret guitars (like Hipshot, for example). If you are building a headless, individual bridges are perfect. For a first project, a bridge with individual “monorail” saddles can be a more economical and versatile solution, allowing you to angle the saddles as needed.
Capo: The nut is not straight either. It must be cut at an angle that reflects the angle of the first fret. This is a delicate job that requires precision. You can do it by hand with special files, or get help from a jig. My technique is to mark the string positions, then use a small fret saw to make angled guide cuts, and finally finish with files.
Ergonomics: the acid test
Once you have mounted the neck and fretboard, take some time to “feel” the ergonomics. The angle of the frets may seem strange at first, but your hand adapts surprisingly quickly.
Hand position: You will notice that your left hand naturally adapts to the angle. For chords at the nut, the fan will be minimal and almost imperceptible. For chords in the middle positions, your hand will rotate slightly. In the higher positions, the fan will be more pronounced, but the shorter scale will make bends easier.
Comfort: If you have chosen the right perpendicular fret, la chitarra dovrebbe risultare comoda. Se il fan è troppo estremo per voi, considerate un design più moderato per il prossimo progetto.
Personalmente, ho impiegato circa dieci minuti per abituarmi al feeling della mia prima multiscale. Dopo mezz’ora, mi sembrava la cosa più naturale del mondo. Il cervello è una macchina incredibile per l’adattamento!
Disadvantages and compromises (because nobody is perfect)
Despite all the advantages, the multiscale guitars they are not without challenges:
Hardware cost: Multiscale-specific bridges tend to cost more than standard bridges. This is a factor to consider in the budget.
Setup complexity: Intonation and general setup require more attention and patience. Each saddle must be intonated individually, and the process can be a bit longer.
Re-fretting: If one day you need to refret, the job will be more complex. You cannot simply reuse the straight fret saw.
Initial difficulty: The learning curve for the builder is a bit steeper. But, hey, that's why you're here, right? To learn and overcome challenges!
Beyond the fretboard: intonation and final setup
You have your fretboard with angled frets, the neck is mounted, the hardware is in place. Now the final, but no less important, step is missing: intonation and complete setup. This is where your fanned fret guitar will come to life and transform from a piece of wood and metal into a musical instrument.
Intonation: an art of precision
Con una tastiera multiscale, l’intonazione è ancora più critica. Ogni corda ha una lunghezza di scala leggermente diversa, e quindi ogni sella del ponte deve essere regolata individualmente per compensare questa differenza.
1. Basic tuning: Accordate la chitarra all’accordatura desiderata.
2. String by string intonation: Suonate la corda a vuoto e poi al 12° tasto. Se la nota al 12° tasto è calante, spostate la sella in avanti (verso il capotasto). Se è crescente, spostatela indietro (verso il ponte). Ripetete finché le due note non sono perfettamente all’unisono.
3. Verify: Dopo aver intonato tutte le corde, fate una ripassata. A volte la regolazione di una corda può influenzare leggermente le altre.
Non abbiate fretta. Questo processo può richiedere tempo, ma è fondamentale per la suonabilità dello strumento. Un’intonazione perfetta è ciò che distingue una chitarra ben fatta da una mediocre.
Action and relief: the feeling under the fingers
Once intonated, focus on the action (string height) and relief (neck curvature).
Neck relief: Regolate il truss rod per ottenere il giusto relief. Generalmente, si cerca una leggera curvatura concava per evitare il fret buzz. Premete la corda al primo e all’ultimo tasto, e controllate lo spazio tra la corda e il 7°/8° tasto. Dovrebbe esserci un piccolo spazio, equivalente allo spessore di un biglietto da visita.
* Action: Regolate l’altezza di ogni sella del ponte per ottenere l’action desiderata. Ricordate che, data la natura multiscale, l’altezza potrebbe variare leggermente da corda a corda per mantenere un feeling uniforme.
Un buon setup può fare la differenza tra una chitarra “strana” e uno strumento incredibile. La pazienza è la virtù del liutaio DIY, specialmente quando si tratta di fine-tuning. Ogni piccola regolazione contribuisce a rendere la vostra creazione un piacere da suonare.
Per approfondire i concetti di setup e intonazione, vi consiglio di consultare guide specializzate. Un’ottima risorsa, anche se in inglese, è il blog di StewMac, che offre tutorial dettagliati su quasi ogni aspetto della liuteria: StewMac – How to set up a fanned fret guitar.
Costruire una chitarra con fanned frets is a rewarding experience that pushes your hobbyist luthier skills to the next level. It requires precision, understanding of principles, and a lot of patience. But with the right tools, like the Multi-Scale Generator by Biafax, and the willingness to learn from mistakes (yours and mine!), you can create a unique instrument that will give you years of satisfaction. Don't be intimidated by the apparent complexity: if I succeeded in my garage, you can do it too. Start designing, and good luck!
Related free tool: Multi-Scale Generator — generates online the fanned fret fretboard for your guitar.
Download the Luthier Survival Kit
Free PDF with checklist, problem-cause table and project card template.
 English
  Italiano
Stuck on your build?
If you ran into the same problem or have a question, drop it in the comments. I read and reply to every one.
Write a comment