

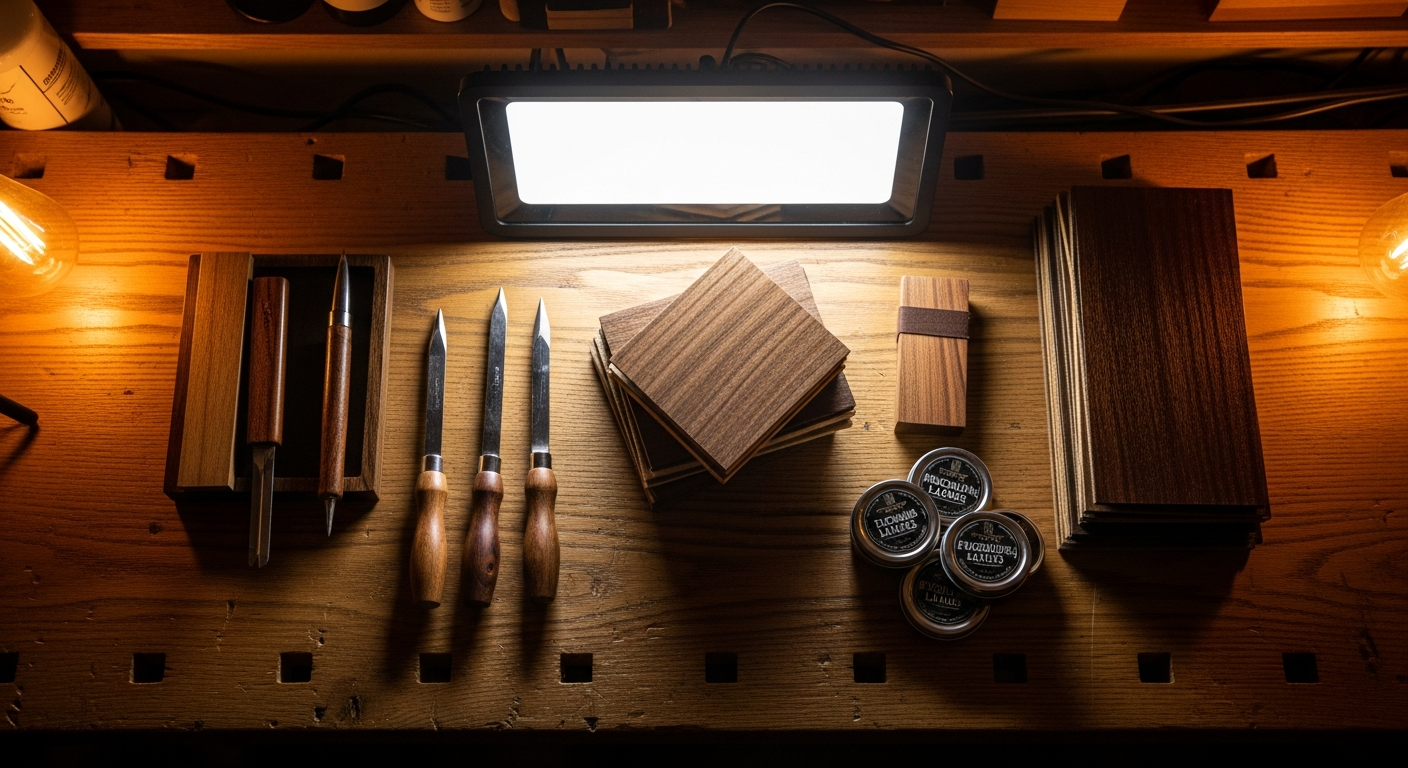
Garage luthier tools: a practical guide
When I first started tinkering with guitars, my garage was a mess of scattered screwdrivers, a few rusty wrenches, and a soldering iron inherited from my grandfather. The idea of building a guitar from scratch seemed like something only a wizard could do, or at least something a person with a workshop costing thousands of euros. And yet, I discovered that you don't need a mortgage to put together a set of guitars. instruments essential for the garage luthier that allows you to do a lot of things.The real obstacle, at the beginning, wasn't a lack of money, but the fear of making a mistake. Of buying the wrong tool, of ruining a seemingly perfect piece of wood, of drilling a crooked hole. Believe me, I've been there, too. I've bent screws, chipped edges, melted a potentiometer. But every mistake was a lesson, and every lesson led me to understand what the tools for the home laboratory that really matter, and how to use them without hurting yourself or causing irreparable damage.
This article isn't a shopping list of professional tools you'll use once a year. It's a practical guide, the fruit of years spent getting my hands dirty, learning from my mistakes, and finding clever solutions to get good results with what I had. If I could do it, you can too.
The Workshop in the Garage: My Tool Philosophy
[GRIGLIA FOTO]Let's start with a premise: the garage luthier doesn't have an unlimited budget. He doesn't have a €10,000 CNC milling machine,
It's the custom-made ergonomic workbench. It has a sturdy, perhaps slightly wobbly, table and a working power outlet. This isn't a limitation, it's a challenge. And the challenge is overcome with the right choice of tools. basic tools for building guitars.
My philosophy is simple: buy well, not too much. Better a mid-range tool that you'll use often than a super-tool that'll gather dust. And above all, learn to make the most of what you have. Not everyone can afford a drill press, but with a good hand drill, a little patience, and a properly made jig, you can still make straight holes.
The real secret isn't the tool itself, but your dexterity and understanding of the process. It's the "why" behind the "how." Why a certain type of file, why that glue, why that sequence of operations. If you understand the principle, you find the way.
The Workbench: Your Base of Operations
[BOX AFFILIAZIONE] Do not underestimate the importance of a good workbench. It doesn’t have to be beautiful, it has to be stable. I started with an old sturdy kitchen table, and I still use it today for most jobs.What do you need? Stability: It must be firm, it must not wobble when you work on it.
Flat Surface: Crucial for precise measurements and gluing.
Clamps: Invest in a good set of clamps. Jaw clamps, C-clamps, bar clamps… you can never have enough. You'll need them to hold pieces in place while you cut, glue, or drill. I have them in all sizes, and I assure you they're among my favorites. instruments essential for the garage luthier most used.
A quick tip: place a non-slip rubber mat on your workbench. It protects the guitar's wood and prevents the pieces from slipping.
The Essentials: Measuring and Marking Tools


1. Ruler and Metric Square
Not just any ruler. You'll need a steel ruler, preferably one with engraved measurements (not printed ones that will rub off). A minimum length of 30 cm is recommended, but a 60 cm ruler is even better for guitar bodies. What to look for: Steel, clear and precise measurements.Mistake to avoid: Use plastic rulers or flexible tape measures for critical measurements. Plastic warps, and tape measures are inaccurate around the edges.
A metric square is essential for marking 90-degree lines. Here, too, steel is the best choice. A good square will save you from crooked routing and misaligned handles.
2. Vernier Caliper
This is one of yours best Friends. You need it to measure thicknesses, hole diameters, and nut widths. A digital caliper is easier to read, but a good-quality analog one will also do the trick. What to look for: Accurate to the nearest tenth of a millimeter (or fiftieth). Stainless steel.Tip: Learn to use it correctly. Excessive pressure distorts the measurement. And clean it often; dust between the jaws is a disaster.
3. Feeler Gauge
Not only for final setup, but also to check clearances and minimum tolerances, for example when assembling a handle or checking the flatness of a surface.4. Tracer and Pencil
A well-sharpened pencil is essential, but for precision work, a fine-tipped scriber is indispensable. It leaves a thin, precise mark that doesn't spread like a pencil. What to look for: Hard metal tip.Mistake to avoid: Use a pencil that's too thick to mark the cutting lines. The cut will follow the center of the line, not the edge.
Cutting and Finishing: Woodworking Tools
Here we get to the heart of woodworking. Many think that expensive machines are needed, but with the right tools DIY lutherie tools manuals and some basic power tools, you can work wonders.1. Saws: From the Log to the Table
You won't need a band saw unless you want to cut bodies from huge blocks. For the garage, you'll need: Hand saw (Japanese or Western): A good backsaw allows you to make precise cuts for joints or cutting small pieces. Japanese saws cut on the pull stroke and are fantastic for fine, controlled cuts.Jigsaw: For roughing out the body or headstock profiles. It's not the most precise tool, but with a sharp blade and a little practice, it'll give you a good starting point.
Tip: Use hardwood blades and make slow cuts. Jigsaws tend to tear wood, so hold the workpiece firmly.
2. Planes and Rasps: Shaping with Patience
Patience is the main virtue here. Hand plane: A small plane (such as a block plane) is very useful for finishing edges, chamfering corners, or slightly reducing the thickness of small areas.Rasps and Files: A set of wood rasps (flat, half-round, round) and files (always for wood, with appropriate teeth) is essential for shaping handles, rounding edges and finishing curves.
Common mistake: Using rasps that are too harsh or not cleaning them at all. They become clogged with wood dust and stop cutting, starting to "smear" the wood.
3. Dremel or Router
This is perhaps the most important investment after measuring tools. A Dremel with its router base, or a small trimming cutter (trimmer), opens up a world of possibilities. Routing for pickups and cavities: With well-made templates, you can mill cavities for pickups, electronics, or tremolos. The "why" is crucial here: depth, shape, precision.Edge trimming: With the right bearing cutter, you can trim the edges of a body or headstock following a template.
Tip: Use light strokes; don't try to remove too much material at once. The wood will overheat, the cutter will wear out, and you risk burning the wood or making an inaccurate cut.
Useful links: If you want to learn more about modifying existing cavities or routing for new pickups, check out our guide on how to modify a guitar. Many principles are the same!
4. Sandpaper and Sanding Blocks
The sanding is the 80% of the finishing. Don't rush. You'll need a good supply of sandpaper of various grits, from the most aggressive (80-120) for roughing out, to the very fine (400-600) for preparing for the finish. What to look for: Good-quality sandpaper that doesn't clog quickly. Sanding blocks of various shapes, for flat surfaces, curves, and corners.Common mistake: Sand without blocking. Fingers create depressions.
Tip: Always sand with the grain of the wood. If you sand against the grain, you'll leave scratches that are impossible to remove.
Assembly and Fixing: Tighten and Glue
Once the pieces are ready, they need to be put together. And they need to stay together forever!1. Glue Clamps
I've already mentioned this, but it's such a critical point that I'll reiterate it. A good set of bar clamps or jaw clamps is essential for gluing handles, bands, or tops. They must be sturdy and have a good opening. What to look for: Clamps with jaws that won't mark the wood (or use soft wooden blocks to protect the workpiece).Tip: Always prepare the clamps Before to apply the glue. Once the glue is on the wood, time is running out.
2. Wood Glues
Carpenter's glue (such as Titebond I, II, or III) is your best friend. Titebond Original (I) is excellent for most interior bonding. Titebond II or III are more moisture-resistant and useful for more exposed areas. What to look for: Specific glue for wood, not generic glue.Common mistake: Using too much glue. A thin, even layer is enough. Excess glue just makes a mess and won't improve the hold.
3. Drill Driver and Bits
A good cordless drill will save you hours of work. Not just for driving screws, but also for drilling. Wood drill bits: Invest in a good-quality set of wood drill bits in various sizes. Forstner bits are great for drilling large, flat holes (e.g., for electronics or gear bushings).Countersink bits: Essential for seating the screw heads, so that they are flush with the surface.
Mistake to avoid: Drill without a scrap piece under the wood. The bit, as it exits, will tear the fibers on the back. Always place a scrap piece of wood under the piece you're drilling.
Electronics and Finishing: The Final Details
The guitar is a piece of wood, but it is the electronics that give it its voice, and the finish that gives it its soul (and protection).1. Soldering iron and tin
You don't need a 100 euro soldering iron. A good 30-40W soldering iron with a fine tip is more than sufficient for soldering pickups, potentiometers, and jacks. What to look for: Fine tip, constant temperature.Pond: Use good quality solder, either lead-free (if you want to be on the safe side) or leaded (if you don't have any problems). A diameter of 0.8-1mm is ideal for guitar electronics.
Tip: Learn the soldering technique. Don't heat the component, but the lead and the pad. The soldering iron must heat both, and the solder will melt and flow onto the joint.
Accessories: A stand for the soldering iron, a damp sponge to clean the tip, and perhaps a desoldering pump or braid to remove excess solder.
2. Screwdrivers and Wrenches
A complete set of screwdrivers (slotted, Phillips, and various hex sizes) and Allen keys (metric and imperial) is essential for installing hardware, pickups, and final setup. What to look for: Magnetic tips and ergonomic handles.Warning: Never use the wrong size screwdriver. You'll damage the screw head, and it'll be a mess to remove.
3. Finishing Tools
The list here can be endless, but to get started, you need: Cloths and rags: Clean, lint-free.Sprayers or brushes: To apply the finish (oil, shellac, varnish).
Hand or orbital polisher: For final polishing, if using varnishes.
Finishing products: Danish oil, linseed oil, shellac, polyurethane or nitro varnishes. Start with oil finishes, they're easier to apply and more forgiving.
4. Fretwork Tools (Frets)
This is a separate chapter, but to get started, you may need: Fret Hammer: With a soft face to avoid damaging the keys.Fret nippers: Specifications for cutting the key wire.
Fret crowning files: To give the correct shape to the keys after having leveled them.
Leveling blocks: A ground metal bar for leveling the keys.
Tip: Fretwork is one of the most delicate parts. If you're unsure, try it on a scrap neck first or ask for help.
Maintenance and Safety: Never Underestimate Them
The garage luthier is also a bit of a maintenance man and, above all, attentive to safety.1. Personal Protection
It seems trivial, but it isn't. Goggles: Always. Wood splinters, dust, welder sparks… your eyes are precious.Mask: When sanding, trimming, or grinding. Wood dust, especially from exotic woods, can be irritating or toxic.
Gloves: To protect your hands from splinters, chemicals or simply for a better grip.
2. Maintenance of the Tools
The tools for the home luthier They last longer if you treat them well. Cleaning: Always clean your tools after use. Wood resin can foul blades and cutters.Sharpening: Sharp blades cut better and are safer. Invest in a good sharpening stone or take your blades to a professional.
Oil: Lubricate moving parts and protect metal surfaces from rust.
3. Organization of the Bank
An organized workbench is an efficient workbench. I started out with complete chaos, then I realized that wasting half an hour searching for the right Allen key was putting me off. Drawers and containers: For small parts (screws, nuts, potentiometers).Pegboard: To hang your most used tools within easy reach.
* Clean area for electronics: Separate the dusty wood area from the clean, delicate electronics area.
The Next Step: Expanding Your Arsenal
This is a starter list, the basic equipment for DIY lutherie. As you gain confidence, you'll feel the need for more specialized tools. Perhaps a belt sander, a second-hand drill press, or a set of high-quality wood chisels.Remember, it's not a competition to see who has the most expensive tool. It's a journey of learning, practice, and satisfaction. Every guitar you make, even if not perfect, will be the fruit of your hands, your patience, and your desire to create. And that, believe me, is priceless. Don't be afraid to make mistakes. I still have guitars hanging on the wall with a few little flaws here and there, which remind me of the lessons learned. They are my favorite guitars, because they tell my story. And yours, I'm sure, will be just as fascinating.
To learn more about the specific techniques and tools used in violin making, an excellent resource is the website of StewMac, with its guides and tutorials covering a wide range of topics, from the use of basic tools to more advanced techniques.
See also
Deepening Choices: Where Quality Makes the Difference
After putting together your set of tools for the home laboratory essential, the time will come when you feel the need for something more. I'm not talking about industrial machinery, but about those few tools where investing a little more can really make a difference in terms of precision, durability and, let's face it, satisfaction.
It's not a question of ostentation, but of efficiency. Some tools, if of poor quality, can turn a pleasant job into an’agony, or worse, ruin the piece you are working on. Let's see which areas, in my experience, are worth spending a little extra.
The Router (Router/Trim Router): The Heart of Precise Routing
We have already mentioned the Dremel or a trim router. If your budget allows it, or if routing will become a consistent part of your projects, a good trim router is a solid investment. The main difference compared to a Dremel (even with its base) is the power and stability.
A Dremel is versatile for detail work, but for pickup cavities or body contours, a dedicated trim router offers more control and less vibration. Models like the Makita RT0700C (or its cheaper, often valid clones) offer a good combination of power and precision.
But the tool is only half the work. The milling cutters they are crucial. Invest in good quality tungsten carbide router bits, preferably with bearings for template trimming work. They cost more, but last much longer and make cleaner cuts, reducing the risk of burning the wood or chipping it.
Remember: the right router bit for the right job. Do not use a metal bit on wood, and vice versa. And keep them sharp, the life of your projects (and your bits) depends on it.
Calipers and Measuring Instruments: Investing in Precision
Accuracy, I said, is everything. If a 20-euro digital caliper may seem like a bargain, it often hides play or inaccuracies that will eventually drive you crazy. You don't have to buy a Mitutoyo for hundreds of euros, but a mid-range caliper, perhaps for 50-70 euros, will make a big difference.
Look for stainless steel models with good sliding fluidity and a clear display. I've had one for years that, despite a few drops, maintains a precision to the hundredth of a millimeter, allowing me to confidently measure fretboard thicknesses or saddle heights.
The same goes for rulers and squares. A good steel carpentry square, with a verified angle, is a tool that will last you a lifetime and save you from endless frustrations. Always check the flatness and perpendicularity before purchasing, perhaps by comparing it with another square that you know to be precise.
Clamps: Never Enough, Never Too Good
I will never tire of saying it: clamps are your best friends. And you will never have enough of them. For important glue-ups, like a handle or a top, bar clamps (bar clamps) are irreplaceable. They must be robust, not flex under pressure, and have good clamping force.
Brands like Bessey are a reference, but there are also cheaper alternatives that offer good value for money. The important thing is that the jaws are parallel and that the bar is rigid. For smaller jobs, C-clamps or single-jaw clamps are perfect.
A trick I learned the hard way is to always use soft wood blocks (like pine or plywood) between the clamp jaws and the piece you are gluing. This distributes the pressure and prevents marks or dents on the precious wood of your guitar.
Specific Tools for Fretwork: The Detail That Matters
Fretwork, or the work on the frets, è perhaps the most delicate aspect of lutherie. A good guitar setup largely depends on the precision with which the frets have been installed, leveled, and crowned. Here, patience and the right tools are essential.
It's not a job to be taken lightly, but with the right hobby luthier tools, it is absolutely within the reach of a garage craftsman.
Fret Leveling (Fret Leveling): The Basis of Everything
To have a low action without buzzing, the frets must be perfectly leveled. This means that all frets must be on the same plane. To do this, you need a fret leveling bar. Any ruler won't do.
These bars are usually made of aluminum or ground steel, with guaranteed flatness. They come in various lengths, from 15 cm for partial work to 40-50 cm for the entire fretboard. I have a 30 cm one that I find works very well for most necks.
They are used with medium-grit adhesive sandpaper (220-320) to uniformly remove material from the higher frets. The technique is crucial: long and uniform movements, constantly checking with a fret rocker (a small ruler with four sides of different lengths) that there are no “high spots”.
Fret Crowning (Fret Crowning): The Perfect Shape
After leveling, the frets will have a flat surface on top. But a flat fret doesn't sound good and doesn't allow for precise intonation. It must be “crowned”, meaning its original rounded shape must be restored, leaving only a small contact point with the string.
For this, you need the fret crowning files (fret crowning files). There are various types: single cut, double cut, with different grooves to adapt to narrow, medium or jumbo frets. A good set will allow you to work on different types of frets.
My favorite è a double-cut file, with one side for narrow frets and one for wide frets. It requires practice not to remove too much material or to create sharp edges. The movement must be delicate and follow the curve of the fret. È a delicate job that requires a lot of attention, but the result è a guitar that sounds and feels much better.
Fret Polishing (Fret Polishing): Brightness and Smoothness
The last step of fretwork is polishing. After filing and crowning, the frets will be dull and rough. Good polishing will make them shiny and, above all, smooth. This not only improves aesthetics but also reduces friction with the strings, making bends smoother and preventing premature string wear.
Start with fine-grit abrasive rubbers (type 400-600) to remove the coarsest marks, then move on to progressively finer grits (800, 1000, 1500, 2000). Finally, use specific polishing pastes for metals, applied with soft cloths or a small polisher with felt.
Remember to always protect the fretboard during polishing, using masking tape or special metal fretboard protectors. Abrasive powders and polishing pastes can ruin the wood of the fretboard if you are not careful.
Electronics: More than a Simple Soldering Iron
We talked about the soldering iron, but guitar electronics is a world of its own, and having the right tools can greatly simplify wiring and troubleshooting work.
Soldering Stations: A Useful Upgrade
If a 30-40W pen soldering iron is good to start with, a soldering station it's an upgrade I highly recommend if you plan to do a lot of electronics work. The main difference is temperature control.
Being able to adjust the temperature allows you to solder delicate components without overheating them (for example, sensitive potentiometers or capacitors) and to have enough heat for soldering on larger masses (like the back of a potentiometer) without having to wait too long. Economical but reliable models can be found starting from 50-70 euros and often include a stand and a sponge.
Multimeter: The Electronic Eye
The multimeter It is an indispensable tool for any electronics work. You don't have to buy a professional electrician's model, but an inexpensive digital multimeter (even for 15-20 euros) will allow you to perform continuity tests, measure resistances (ohm), voltages (DC and AC) and sometimes even capacitance.
It is fundamental for:
- Check the continuity of the cables and welds.
- Measure the resistance of the pickups to ensure they are working correctly.
- Identify wiring problems (short circuits, breaks).
- Test batteries (if you use active pickups).
Learning to use it is simple and will save you hours of frustration trying to figure out why your guitar isn't playing.
Cables and Connectors: Quality is Felt
They are not tools, but they are crucial materials. When assembling electronics, do not skimp on the quality of cables and connectors. Good quality shielded cables reduce noise and interference. Robust jacks and switches will last longer and cause fewer problems.
Good wiring, done with care and with decent materials, is the basis for a clean and reliable sound. I have learned that a small saving here can lead to big headaches later, with hums, interruptions and the need to reopen everything.
Tips for Smart and Sustainable Shopping
Building guitars in the garage is not just a hobby, it's also a way to learn to be shrewd with budget and resources. My experience has taught me that it's not always necessary to buy new,
is to spend crazy amounts.
Used Market and Offers
Many of my DIY lutherie tools I found them used. Sites like eBay, Facebook groups dedicated to carpentry or lutherie, flea markets or specialized fairs are gold mines. I found high-quality antique planes which, after a good sharpening, work better than many expensive modern planes.
Also for power tools, a second-hand drill press, perhaps a bit worn but still functional, can be a bargain. The important thing is knowing how to recognize a good deal from a useless piece of iron. Always check the operation, the absence of excessive play, and the wear of critical parts.
DIY and Homemade Jigs
The true spirit of the garage luthier is the ability to make do. Many specific tools can be built at home with a few euros. Routing jigs, custom sanding blocks, neck supports, fret press... the possibilities are endless.
A good piece of plywood, some screws, and a bit of ingenuity can turn into incredibly useful and precise tools. This not only saves you money, but also helps you understand more deeply the “why” behind a certain tool design and customize it for your specific needs.
Spending Priorities: Where to Save and Where Not To
To recap, here's my personal list of spending priorities:
- Precision: Don't skimp on calipers, rulers, squares, and leveling blocks. They are the basis of every job well done.
- Safety: Glasses, masks, gloves. Your health is priceless.
- Cutting and Milling: Router bits and quality cutters, sharp blades for saws and planers. A good cut prevents hours of finishing and sanding.
- Fretwork: Fret crowning files and leveling bars. Good fretwork is the key to a playable guitar.
- Clamps: Invest in a good set, you will use a lot of them.
- Welding: If you do a lot of electronics, a soldering station with temperature control is a plus.
- Drill: A good drill driver is versatile, but a drill press can wait (or be bought used).
- Rasps and Sandpaper: These wear out, there's no need to buy the most expensive ones, but to focus on good value for money.
Remember, every tool is an extension of your hands. Learn to use them well, to maintain them, and to respect them. Every project, every guitar that will take shape under your hands, will be a monument to your passion and your tenacity. And that feeling of playing something you created, from raw wood to the final sound, is priceless.
FAQ: Frequently Asked Questions
How much should I spend on a basic set of tools to start lutherie in the garage?
For a set of luthier tools for the garage really basic, that allows you to tackle simple projects like the assembly of a kit or small modifications, you could get by with 200-300 euros. This includes a good caliper, a ruler, a hand saw, rasps, sandpaper, a cheap soldering iron, screwdrivers, and some clamps. If you want to add a trim router and decent bits, the budget will go up to 400-600 euros, but it will open up many more possibilities.
Can I build an entire guitar with only hand tools?
Absolutely yes! Many traditional luthiers work almost exclusively with hand tools. It requires more time, more patience, and greater development of manual skills, but it is an extremely rewarding path. You will need a good set of planes, chisels, rasps, hand saws, and a lot of sandpaper. The result will be a guitar with a unique character, shaped entirely by your hands.
Download the Luthier Survival Kit
Free PDF with checklist, problem-cause table and project card template.
 English
  Italiano
Stuck on your build?
If you ran into the same problem or have a question, drop it in the comments. I read and reply to every one.
Write a comment