

Master tone: passive low-pass filter for guitar
When I started getting my hands on guitars, many years ago, the tone control was a bit of a black box for me. I turned that knob and the sound changed, becoming darker, more muffled. But what Why was happening, well, I had to sweat for that. I soldered, desoldered, tried different capacitors, and each time I learned a little bit. The beauty of guitar electronics is that it's not magic. It's physics, it's logic. And the Master tone: passive low-pass filter for guitar is one of the most striking examples of how a couple of simple components can deeply shape your sound. If you've always wondered what's behind that knob, or if you finally want to understand how to modify it, you're in the right place. Here we don't act like NASA electronic engineers. Here we act like garage luthiers. Those who, perhaps, have a somewhat old soldering iron and a dirty tip, but who ultimately get the job done. And if I succeeded, you can succeed too.What, Really, is a Tone Control? The Curtain that Lowers Frequencies
Why Do We Need a Low-Pass Filter?

STRICH DIY Electric Guitar Kit, LP Style Mahogany Body & Maple Neck Guitar with HH Pickups, Easy to Assemble Kit with All Parts Included – Build Your Own Electric Guitar SLP-D30
See on Amazon

The Heart of the Circuit: Potentiometer and Capacitor
Well, now that we understand what it does, let's see who does it. The Master tone: passive low-pass filter for guitar is made up of two main components that work in tandem: the potentiometer and the capacitor. They are the real protagonists behind that knob.The Potentiometer: The Flow Regulator
The tone potentiometer is, in essence, a variable resistor. Imagine a faucet: when you open it all the way, water flows freely (the signal is not filtered). When you close it, the water decreases (the signal is filtered more and more). Technically, a potentiometer has three terminals (or “lugs”). On tone controls, one goes to the input signal, one to the capacitor, and one to ground. When you turn the knob, you are varying the amount of resistance the signal encounters before reaching the capacitor. The most common values for tone potentiometers are 250k Ohm and 500k Ohm. Potentiometers from 250k Ohm are often used with single coil pickups, like those on a Stratocaster or Telecaster. They tend to cut a bit more high frequencies even when fully open, giving a slightly warmer and less “ice pick” sound. Potentiometers from 500k Ohm are more common with humbuckers. Since humbuckers are already darker and have a higher output, 500k Ohm allows for more brightness to be maintained when the tone is at 10. If you used a 250k with a humbucker, you might find the sound too dark even with the knob fully open. There's no hard and fast rule, though. I've seen guitarists put in 1 Meg Ohm potentiometers for a super bright sound, or 100k Ohm for a very dark sound. It's all a matter of taste and what you're looking for. The beauty of DIY is precisely this: you don't have to follow the rules, you write them yourself.The Capacitor: The High-Frequency Sponge
The capacitor is the other key component. If the potentiometer is the faucet, the capacitor is the actual “filter”. Its function is to accumulate electrical charge and, in our case, to divert high frequencies to ground. High frequencies, in fact, find it easier to pass through a capacitor to ground than low frequencies. It's a bit like high frequencies are more “agile” and can bypass the capacitor's obstacle, while low frequencies are more “heavy” and continue on their way. Capacitors used in guitars are non-polarized (it doesn't matter how you mount them) and the most common values are expressed in microfarads (uF) or nanofarads (F). 0.022uF (22nF): It is the most common value, found on many guitars, especially those with humbuckers. It offers a good balance, cutting highs without making the sound excessively dark too quickly. 0.047uF (47nF): Often used with single coils. It cuts more high frequencies than the 0.022uF, giving a darker and “vintage” sound when the knob is turned down. 0.01uF (10nF): Cuts fewer high frequencies. You can use it if you want a very subtle tone control, which doesn't darken the sound too much even at low values. 0.1uF (100nF): Cuts a lot. At low values, the sound becomes almost a “subwoofer”. Sometimes used for experiments or particular sounds. The capacitor value determines the amount of high frequencies that are cut and the speed at which the cut occurs when you turn the tone knob. A higher value will cut more high frequencies, making the sound darker.
The RC Circuit: The Magic Together
When we combine the potentiometer (Resistance R) and the capacitor (Capacitance C), we create an RC circuit. It's a basic concept in electronics, but essential for understanding the low-pass filter. The combination of R and C values determines the filter's “cutoff frequency”. In practice, it decides at what point in the sound spectrum the filter starts working and with what intensity. That's why changing even just one of these two components can have a huge impact on the final sound. During my first modifications, I remember soldering and desoldering a lot of cheap capacitors. I would buy a handful of different values and try them out. The difference between a 0.022uF and a 0.047uF is not just theoretical, you can definitely hear it! And there's no better way to understand it than to try it.Soldering and Understanding the Diagram: The Practice of Tone
Ok, theory is important, but we are people who get our hands dirty. So, let's move on to practice. Soldering guitar electronics can seem intimidating at first, with all those wires and components. But I assure you, with a little patience and the right approach, it's nothing impossible. I started with a soldering iron that looked like a lightsaber, and now, well, now I have a better soldering iron, but the technique is the same. The biggest fear is causing damage. But what can you ruin? A potentiometer for a few euros? A capacitor for a few cents? At most, you learn to desolder. And that's a valuable skill.The Conceptual Diagram of a Tone Control
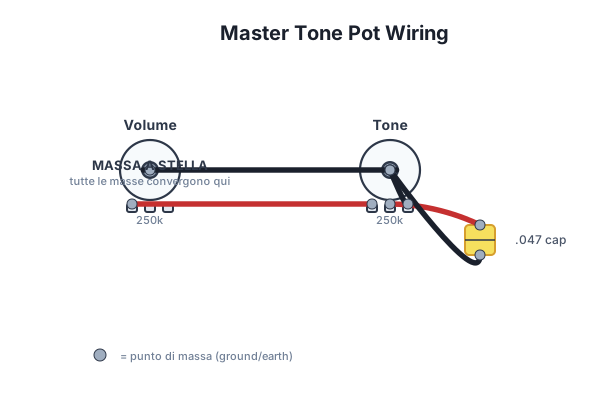
You don't need a complex electrical diagram with aerospace engineer symbols. Let's think practically, with a conceptual diagram. 1. Input Signal: The “hot” wire coming from your pickup selector (or directly from the pickup, if you don't have a selector) goes to one of the outer terminals of the tone potentiometer (e.g., terminal 1, if you look at the terminals from the front with the shaft pointing upwards). 2. The Capacitor: One terminal of the capacitor goes to the center terminal of the tone potentiometer (terminal 2). 3. Ground: The other terminal of the capacitor goes to ground. The ground in a guitar is a common point for all components (the back of the potentiometers, the jack socket, the bridge). You can solder it directly to the body of the potentiometer, which is already connected to ground. 4. Output Signal: The center terminal of the tone potentiometer (terminal 2) is also where you pick up the filtered signal, which will then go to the volume control and finally to the output jack. In practice, when you turn the knob, you are varying the amount of resistance between the input signal and the capacitor. The more resistance you put between the two, the less signal the capacitor “sees”, and fewer high frequencies are diverted to ground. Conversely, less resistance means more high frequencies are diverted, and the sound darkens.Steps for Installation or Modification
If you are installing a new tone circuit or replacing existing components, here's a mini-checklist: 1. Disconnect and Disassemble: Unplug the guitar from the amplifier, loosen the strings, and remove the pickguard or control plate to access the electronics. 2. Identify the Components: Locate the tone potentiometer and the capacitor. If you are replacing, take a photo before disconnecting everything, it will save your life. 3. Unsoldering: Carefully desolder the old components. Heat the solder joint and, as soon as the solder melts, pull off the wire or component. Use a desoldering pump if necessary. 4. Prepare the New Components: If you are installing a new capacitor, shorten the leads (the “legs”) to the correct length. 5. Soldering the Capacitor: Solder one terminal of the capacitor to the center terminal (lug 2) of the tone potentiometer. Solder the other terminal of the capacitor to the body of the potentiometer (ground). 6. Signal Wiring: Solder the input “hot” wire (the one coming from the selector or pickup) to the outer terminal (e.g., lug 1) of the tone potentiometer. 7. Output Wiring: The wire that goes to the volume potentiometer (or directly to the jack, if it's a master tone without volume) starts from the center terminal (lug 2) of the tone potentiometer. 8. Grounding: Make sure all potentiometers, the output jack, and the bridge are properly grounded. Good grounding is essential to avoid hum. 9. Check and Test: Before reassembling everything, do a test. Connect the guitar to the amplifier and try each selector position, each potentiometer. Turn the tone from 0 to 10. Does everything work? If you hear hums or the sound is weak, it's likely there's a cold solder joint (not well done) or a ground issue. Don't get discouraged, it happens to everyone. Review the connections, reheat suspicious solders. To delve deeper into other aspects of electronics or to start working on your guitar, check out our guide on how to modify your guitar. You'll find a lot of practical tips.Garage Tips for Soldering
Clean Tip: A clean and tinned soldering iron tip (with a bit of solder on it) is key to good solders. Clean the tip on the damp sponge often. Right Solder: Use good quality solder, perhaps with a flux core. 60/40 (60% tin, 40% lead) is the easiest to use for beginners. Heat, Not Too Much: Heat the components, not the solder. Bring the soldering iron tip close to the components to be soldered, then apply the solder. When you see the solder melt and “wet” the surfaces, remove the solder first and then the soldering iron. Bright Welds: A good solder joint is shiny and cone-shaped, not dull and lumpy (that's a cold solder joint). Ventilation: Work in a well-ventilated area or use a fume extractor. Solder fumes are not good for you.Variations on the Theme: Beyond the Single Standard Tone
The basic tone circuit is a great starting point, but guitar electronics are a world of experimentation. There are many variations and modifications you can make to further customize your sound, going beyond the simple passive low-pass filter.Multiple Tone Controls: The Stratocaster Example
The Stratocaster is a classic example of how multiple tone controls can be used. Typically, it has two: one for the neck pickup and one for the middle pickup. The bridge pickup, in standard configuration, is without tone control. This allows you to sculpt the sound of each pickup independently, offering remarkable versatility. You can have a very dark and velvety neck pickup, and a brighter middle pickup. It's a configuration I've replicated on some of my guitars, and it opens up a lot of tonal possibilities. If you want to add a tone control to the bridge pickup as well, it's a fairly simple operation. Just replicate the circuit and connect it to the desired pickup.No-Load Potentiometers: A “Totally Open” Tone
Have you ever had the feeling that even with the tone control at 10, the sound wasn't Really fully open? That there was always a veil, a slight opacity? Well, that's not an unfounded feeling. Even with the potentiometer at 10, the tone circuit introduces a minimal resistance and capacitance that can “load” the signal, stealing a bit of brightness. This is where “no-load” potentiometers come into play. These potentiometers are designed so that when the knob is at “10”, the tone circuit is completely bypassed. The signal goes straight through, without encountering any additional resistance or capacitance. The result? A slightly brighter and more transparent sound when the tone is at 10. It's a subtle modification, but some guitarists love it for that extra “boost” of clarity. It's like completely removing the curtain, not just opening it all the way. I tried a no-load potentiometer on a Telecaster and the difference was noticeable, especially with clean sounds.Push-Pull and Push-Push Pots: Hidden Versatility
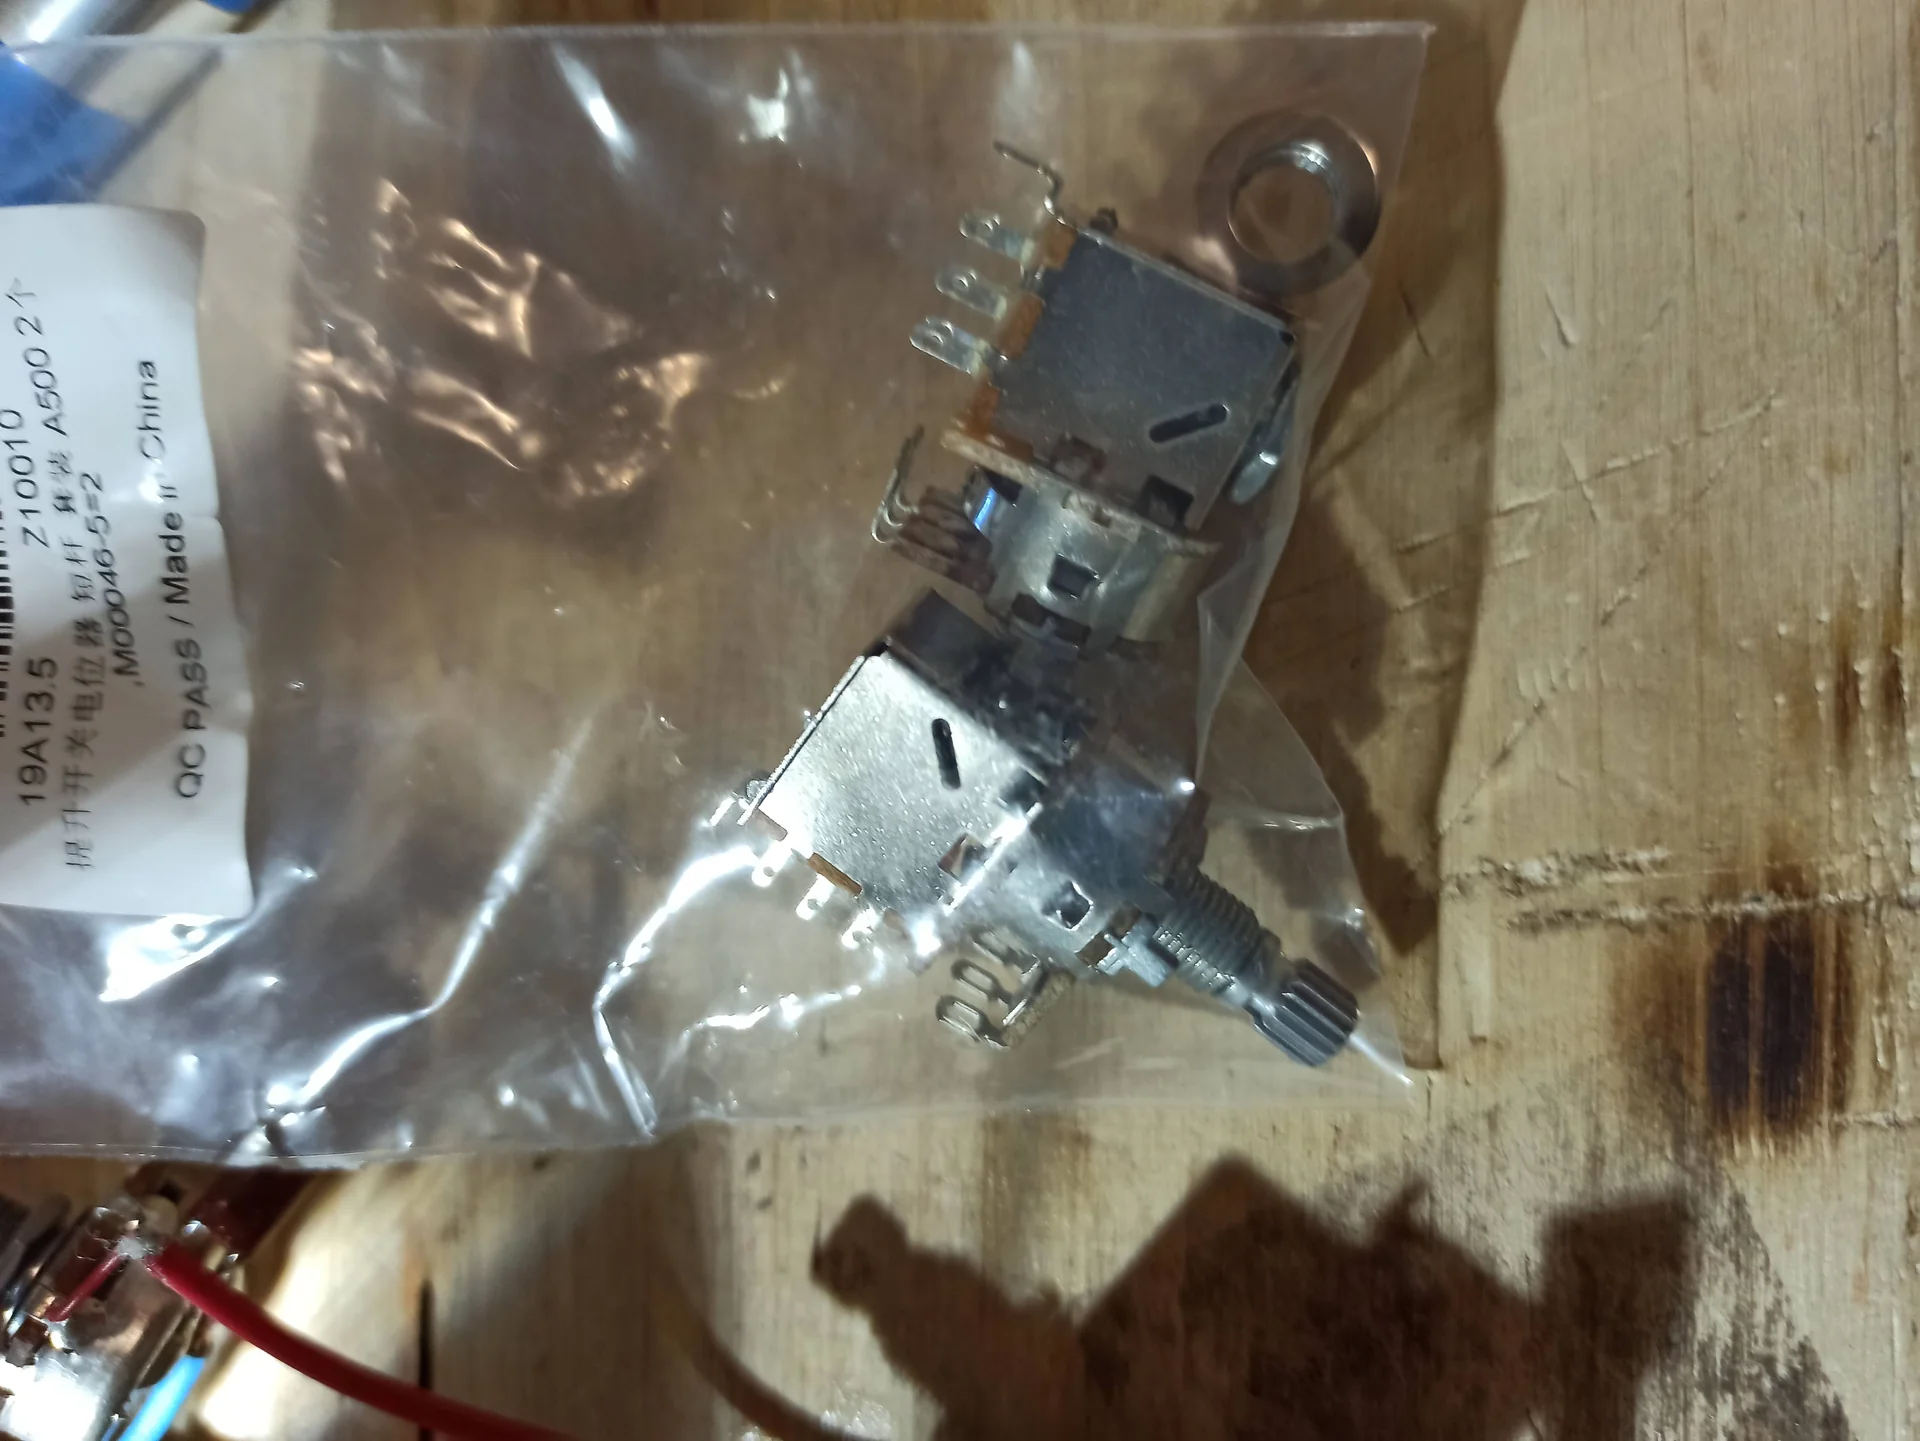
Even if they are not directly tone controls, push-pull or push-push potentiometers are a fantastic way to add extra functionality without drilling into your guitar. They have an integrated switch that activates by pulling or pushing the knob. You can use them for: Coil Split/Tap: Transforming a humbucker into a single coil (or almost). Phase Switching: Inverting the phase of a pickup for “out of phase” sounds. Series/Parallel Switching: Changing the wiring of a humbucker from series to parallel for a thinner sound. Activating a Treble Bleed: Having a switchable treble bleed only when needed. I mention them because tone or volume potentiometers are often used for these modifications. It's a smart way to expand your guitar's sonic capabilities without altering its aesthetics too much.Treble Bleed: Maintaining Brightness at Low Volumes
Although not a tone filter in itself, the “treble bleed” circuit is closely related to how we perceive the guitar's sound and how it interacts with the potentiometers. When you turn down the volume on your guitar, you often notice that the sound loses brightness and becomes darker. This happens because the volume potentiometer, acting as a low-pass filter, also cuts high frequencies. The treble bleed circuit is a small combination of a capacitor and/or a resistor, soldered between the input and output terminals of the volume potentiometer. Its purpose is to allow high frequencies to “bypass” the resistance of the volume potentiometer when it is turned down, thus maintaining the clarity and brightness of the sound. It's a modification that changes the volume's reaction, not the tone's, but it's a classic “upgrade” that often goes hand in hand with understanding passive electronics. I've installed a treble bleed on almost all my guitars because I love being able to turn down the volume without losing that sparkle in the highs. For those who want to further explore the infinite possibilities of wiring and modifying their guitar, an excellent resource is the Seymour Duncan wiring diagram library. You'll find configurations for every type of pickup and combination: Seymour Duncan Wiring Diagrams.Experimenting and Finding “Your” Sound
We've talked a lot about theory and practice, about potentiometers and capacitors. But the real essence of the matter, the reason why we in the garage get our hands on our guitars, is only one: to find the our* sound. The Master tone: passive low-pass filter for guitar is a powerful tool in this quest. There isn't a “right value” for a capacitor or potentiometer that works for everyone. Sound is subjective; it depends on your ear, your style, your amplifier, the effects you use. It depends on you. My heartfelt advice is: experiment. Buy a handful of capacitors with different values (0.01uF, 0.022uF, 0.033uF, 0.047uF, 0.068uF). They cost a few cents each, you won't break the bank. Arm yourself with a soldering iron and try replacing them, one at a time, on your guitar. Listen carefully. Turn the tone knob. What changes? Do you like it more? Less? Take notes if you want. At first, you might not catch all the nuances, but the more you try, the more your ear will refine. It's like learning to taste wine; it takes practice. I remember when I first tried a 0.01uF capacitor. I expected a minimal change, but instead, I was surprised at how much subtler the high-end cut was, perfect for certain blues sounds I was looking for. Then I tried a 0.1uF, and the guitar sounded like a bass, but it was fun! Don't be afraid to make mistakes. The beauty of passive guitar electronics is that they are incredibly forgiving. You'll hardly do irreparable damage. At most, you'll have a strange sound for a while and have to redo a solder joint. And it's precisely from mistakes that you learn the most. The tone control is not just a knob to always leave at 10. It is an integral part of your instrument, a means to express yourself, to give color and depth to your music. Learning to use it, and to modify it, will give you greater control over your sound and open new creative doors. So, get out your soldering iron, components, and your guitar. Put on some music, maybe some good blues. And start experimenting. You'll discover that behind that simple knob there's a world of sonic possibilities just waiting to be explored. And, trust me, the satisfaction of having done it with your own hands is priceless.See also
Wiring diagrams library
No diagrams found.
 English
  Italiano
Stuck on your build?
If you ran into the same problem or have a question, drop it in the comments. I read and reply to every one.
Write a comment