

Best Guitar Bridge: Practical Advice
When I first started getting my hands on guitars, the first thing that obsessed me was the sound. Then the look. Then, with experience, I realized that there's a component that's often underestimated, but that makes the difference between an instrument that sounds and one that doesn't. sing: The bridge guitar. It's not just a piece of metal where the strings rest. It's the vital point of contact between the vibrations and the body of the instrument, the beating heart of sustain, intonation, and stability.At first, like many, I took the plunge. I grabbed a body, a neck, and mounted the first bridge I could find, hoping it would fit. Of course, things didn't always go smoothly. I learned the hard way that choosing the right one right bridge system And, above all, installing it correctly is half the battle. And I assure you, if I managed to do it in my garage, with all the mistakes, you can do it too.
In this article, I want to share what I've learned in the field. I won't give you the magic formula for "“best guitar bridge”"universal, because it doesn't exist. I'll give you the tools to understand which is best. for your project, how to install it without going crazy, and how to avoid the most common pitfalls. Prepare to get your hands dirty, but do it methodically.
The Bridge: The Hinge Between Vibration and Tone
Fixed Bridges: Stability and Sustain
Fixed bridges are, by definition, firmly anchored to the guitar's body. They don't allow you to alter the intonation while playing, but they do offer excellent tuning stability and great sustain.

1. Hardtail Bridge
How it works: The strings pass through the body (string-through) or are anchored to a lug on the back of the bridge. Each string has an independent saddle for intonation and pitch (action).Advantages: Maximum tuning stability, excellent sustain, relatively simple assembly. Less moving mass means fewer potential vibration leakage points.
Disadvantages: No possibility of vibrato effects.
When to use it: If you're looking for an instrument for rock, blues, jazz, or any genre where stability and sustain are key, and you don't care about vibrato, it's perfect for beginners.
I remember my first hardtail: a mahogany body, maple neck. I chose a Gotoh 510UB bridge. It was super easy to install, and the sustain was incredible. I realized then how crucial the bridge-body fit was.
2. Tune-o-matic (TOM) + Stop Tailpiece
How it works: Two separate components. The TOM bridge has adjustable saddles for height and intonation. The strings then pass over a stop tailpiece (tailpiece) which anchors them to the body via two studs (pins).Advantages: Precise action and intonation adjustments, very popular (e.g., Gibson Les Paul), excellent sustain. Allows you to adjust the angle of the strings on the bridge by varying the height of the tailpiece.
Disadvantages: It requires a certain amount of precision when drilling the four pin holes. The angle of the handle relative to the body is critical.
When to use it: For warm, full sounds, typical of classic rock and blues.
Ah, the Tune-o-matic! The first time I had to drill holes for the four pins, my heart was in my throat. Four holes, not two. Every millimeter off means a crooked or misaligned bridge. I used a homemade jig and a drill press, but even with a hand drill, patience is golden.
3. Wraparound Bridge
How it works: A single piece that serves as both a bridge and a tailpiece. The strings wrap around the bridge and pass over the saddles.Advantages: Extreme simplicity, great resonance and sustain, often associated with vintage guitars (e.g. some Les Paul Juniors). Less unnecessary mass.
Disadvantages: Intonation can be more difficult to fine-tune, especially on models without individually adjustable saddles.
When to use it: For a more “raw” look and feel, with a focus on the resonance of the wood.
Tremolo Bridges: Expressiveness and Performance
The movable bridges allow you to vary the tension of the strings and therefore the intonation, creating vibrato effects, dive bomb And whammy. They require more maintenance and more complex configuration.1. Synchronized Tremolo (Fender Style)
How it works: Anchored to the body with six screws (vintage style) or two pins (modern style), the saddle block is connected to a metal block that extends into the body. Springs in the tremolo cavity they balance the tension of the strings.Advantages: Smooth and musical vibrato, bright and resonant sound, possibility of float (raise the bridge to raise the pitch).
Disadvantages: Less tuning stability than a fixed string, especially with heavy use. Requires good lubrication of the nut and saddles.
When to use it: For bright, versatile sounds, perfect for blues, rock, country.
How many times have I cursed the synchronized tremolo for tuning problems! Then I discovered that the secret is a good nut (TUSQ or well-crafted bone), an impeccable setup, and using a few but well-tensioned springs. It's not the bridge that's unstable, but often the overall setup.
2. Floyd Rose (and similar)
How it works: A double-lock system that locks the strings to both the bridge and the nut. The bridge "floats" on the body and is balanced by springs.Advantages: Almost absolute tuning stability, even with dive bomb extremes and pull-ups exaggerated. It allows for incredible expressiveness.
Disadvantages: Complex to assemble and adjust. Changing strings is a pain. If a string breaks, the whole guitar goes out of tune. Requires deep milling of the body for the tremolo cavity.
When to use it: For genres like heavy metal, shred, or any style where heavy use of leverage is essential.
The Floyd Rose is a beast. The first time I installed it, I spent an entire afternoon just figuring out how to make it float properly. And milling the body... that's where precision is needed. If the body isn't already pre-prepared, it's a job that requires specific tools or a lot of caution.
3. Bigsby Vibrato
How it works: A mechanical spring system mounted on the body surface. The strings pass over a roller and are anchored to a rotating pin.Advantages: Very smooth, vintage-style vibrato effect with an unmistakable look. No deep body milling required.
Disadvantages: It is not meant for dive bomb Extremes. May slightly compromise sustain compared to a fixed bridge. Tuning may suffer with aggressive use.
When to use it: For semi-acoustic, hollow body guitars, or for a rockabilly, blues, or rock look and sound.‘
‘' classic roll.
I mounted a Bigsby on a modified Telecaster. The effect is beautiful, but don't expect the stability of a Floyd Rose. It's an elegant vibrato, for more subtle uses. And here too, a good nut and locking tuners work wonders for tuning.
Not All Bridges Are Equal: Materials and Details
In addition to the type of mechanism, the materials and the construction quality of the guitar bridge They're crucial. It's not just aesthetics, it's physics.Bridge and Block Materials
Steel: Typically bright, with good sustain and a quick response. Many Fender-style bridges use steel.Brass: Warmer, rounder tone, with a more "singing" sustain. Often used for tremolo blocks or saddles.
Zinc/Zinc Alloy: A cheaper material, often found on lower-end bridges. It tends to have less sustain and a less defined tone. In my testing, the difference is noticeable. A zinc tremolo block sounds dull compared to one made of steel or brass.
The Saddles
Saddles are the direct point of contact between the string and the bridge. Their material and design significantly influence tone and sustain. Steel: Brilliance and sustain, excellent for transmitting vibrations.Brass: Warmer tone, slightly softer.
TUSQ/Graphite: Self-lubricating synthetic materials, excellent for reducing friction and improving tuning stability, especially with tremolos.
Ceramic/Plastic: Often on inexpensive bridges, they tend to dampen vibrations.
Rollers: Present on some bridges (e.g. Tune-o-matic with rollers), they reduce friction and improve tuning stability, but can slightly alter sustain.
A small saddle upgrade can work wonders. I swapped the zinc saddles on a cheap Tune-o-matic bridge for Graphtech brass saddles. The sustain increased, and the tone became richer. It doesn't cost much, but the result is noticeable.
“"There's no such thing as the 'best bridge.' There's a bridge that's best for the sound you're looking for and your building style." – Mimmo, biafax.it
The Right Choice for Your Project: Not Just Taste
Okay, so you have an idea of the type of bridge. Now we need to figure out how best to integrate it into your project. This is where size and compatibility come into play. This is where many hobbyists get stuck, because the specifications aren't always clear, and a mistake here can jeopardize everything.1. Scale Length (Diapason) and Intonation
There scale length, or tuning fork, is the distance between the nut and the bridge. It is a fundamental measurement that determines the frequencies of the notes. Each guitar has a scale length specific (e.g. 25.5″ for Fender, 24.75″ for Gibson). The bridge must be positioned so that the intonation point (where the string rests on the saddle) is exactly this distance. The problem: If the bridge is too far forward or too far back, you'll never be able to tune your guitar correctly. The notes will sound out of tune as you move up the fretboard.The solution: Calculate the scale length exact length of your neck. The tuning point for the low E string should be that distance from the nut. The other saddles will be slightly further back. Practical advice: For the initial placement of the bridge, measure the scale length from the edge of the nut (headstock side) to the twelfth fret. Multiply this measurement by two. This will give you the theoretical position of the low E saddle. Then, for the other strings, allow a small margin (a couple of millimeters) for intonation adjustments.
2. Neck Angle
With bridges like the Tune-o-matic, the angle of the neck relative to the body is crucial. If the neck is too flat, the bridge will need to be very high to achieve decent action, and the strings could rub against the edge of the bridge or tailpiece. If it's too angled, the bridge could be too low and the strings could touch the pickups. The problem: Action too high or too low with no adjustment.The solution: Plan for a slight angle of about 1.5-3 degrees for necks with TOM bridges. This allows the bridge to be set at a reasonable height, with a good angle of the strings on the saddles and tailpiece.
For Flat Mount bridges (Hardtail, Fender Style Tremolo): Here the neck is usually straight (without an angle), because the bridge is much thinner and mounts almost flush with the body.
3. String Spacing
The spacing between the strings at the bridge should match the spacing between the strings at the nut and, ideally, the pole piece spacing of the pickups. The problem: Strings that are not centered on the pickup pole pieces, resulting in a loss of volume or tonal balance between the strings.The solution: Check the string spacing on your bridge (e.g., 52mm, 54mm, 56mm) and compare it to the spacing of your pickups (especially humbuckers, which are more sensitive). The specifications are almost always provided by the manufacturer.
I learned this lesson with a cheap Wilkinson pickup. It seemed fine, but once installed, the low E sounded dull. I discovered that the bridge spacing was a tad too wide for that particular pickup. Small details, big differences.
4. Fixing and Assembly
Each bridge has its own fixing method: Screws: Many Fender-style hardtails and tremolos are bolted on. Precise pilot holes are required.Pins (Studs): Tune-o-matic and Floyd Rose use pins that fit into press-fit bushings in the body. These require larger holes and pinpoint precision.
Surface (Top Mount): Bigsby and some others mount directly to the body surface with screws.
This is the real pain point for many. The fear of getting a crooked puncture, of ruining the bodysuit. It's a legitimate fear, but it can be overcome with method.
Installation: The Moment of Truth (and Common Mistakes)
Now that you have chosen yours guitar bridge, It's time to put it on the leotard. This is the most delicate step, and one where you can't afford to make any major mistakes. I'll guide you step by step, with the tricks I've learned to avoid mistakes.1. Critical Measurements and Marking
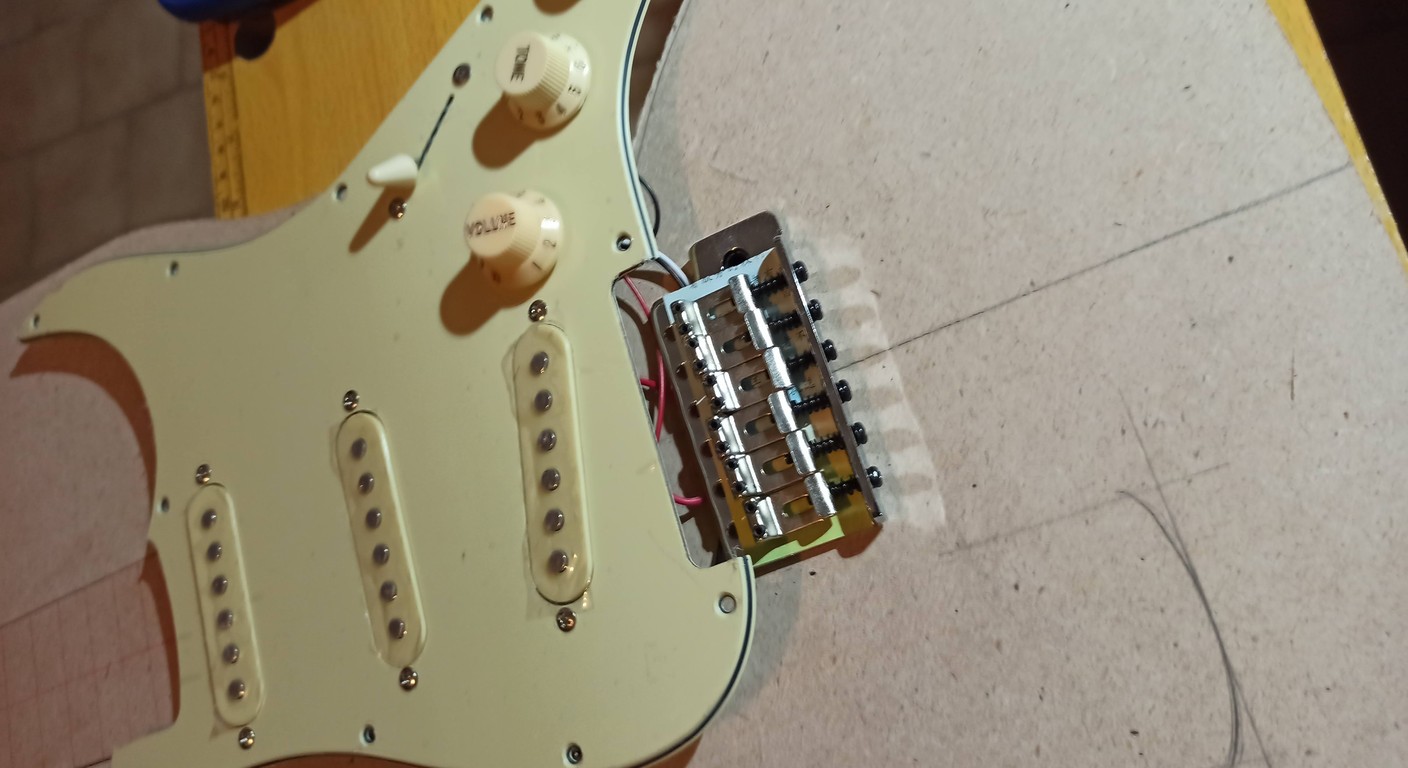
Precision is everything. Measure three times, mark once, drill once. 1. Find the Center Line: Use a long ruler and a sharp pencil to mark the center line of the body, from the neck pocket to the bottom edge. This will be your guide for horizontal alignment. 2. Calculate the Bridge Position: Measure the scale length of your neck from the nut to the 12th fret. Multiply by two. This is the theoretical zero point for the low E saddle.For fixed bridges (hardtail/TOM): Position the bridge so that the low E saddle is at this distance. Keep in mind that the other saddles will be slightly further back for intonation. Often, position the front edge of the bridge about 1/8" (about 3 mm) away. Before from the scale length calculated is a good starting point to have room for adjustment.
For tremolos (Fender/Floyd Rose): Consult the manufacturer's specifications. They will often give you a precise measurement from the edge of the neck pocket or the 12th fret.n3. Mark the Holes: Place the bridge on the body, aligning it perfectly with the center line and the calculated distance.
Use a thin drill bit (or awl) to precisely mark the center of each mounting hole. If the bridge has screws, use the screws themselves to mark the center. If it has pins, mark the center of the bushing holes.
Advice from Mimmo: Secure the bridge to the body with masking tape (the kind used by body shop technicians) to hold it in place while you mark the holes. This prevents accidental movement.
2. Puncture: The Fear of the Irreversible
This is where many people shudder. A wrong hole can ruin a bodysuit. But with the right technique, it's doable. 1. Choose the Right Tip: The drill bit should be slightly smaller than the diameter of the screw or dowel, so that the wood will grip without splitting. For press-fit dowels, the bit should be the same diameter. Exactly of the bushing or a tenth of a millimeter less. Test on a piece of scrap wood of the same type as the body.n2. Use a Drill Press (if possible): If you have access to a drill press, use it. It ensures perfectly perpendicular holes.n3. If you use a hand drill: Template: Build a jig out of wood or MDF. Drill a precise hole in the jig to guide the drill bit. This is essential for dowel holes (Tune-o-matic, Floyd Rose).Eye and Patience: Start drilling slowly, keeping the drill as straight as possible. Check the angle from different perspectives.
Depth: Use a piece of tape on the drill bit to mark the maximum depth. Don't drill too deep, or you might come out the other side of the body! 4. Bushing Holes (Press-fit): If your bridge has bushings that need to be pressed into the wood, make sure the holes are precisely drilled. If they're too loose, the bushings won't hold. If they're too tight, you could split the wood trying to insert them. A little beeswax or soap on the bushings will help with insertion. Common mistake: Drilling without a template or marking properly. The result is a crooked bridge and misaligned pins. If this happens, don't despair. Sometimes you can fix it by slightly enlarging the holes and filling them with wooden dowels and glue, then redrilling. It's extra work, but it can save the body. I've done it several times!
3. Fixing and Alignment
Once the holes are drilled, assemble the bridge. Screws: Screw in the screws slowly, always predrilling with a smaller bit. Don't overtighten, or you might strip the wood.Bushings/Pins: Insert the bushings with a press (such as a woodworking clamp) or a rubber mallet, placing the body on a soft but stable surface. Make sure they are flush with the surface of the body. Then screw in the pins.
Final Alignment: Make sure the bridge is perfectly centered and straight. The strings should run in a straight line from the nut, above the pickup, to the bridge.
4. Initial Setup: Action and Coarse Tuning
Don't expect it to sound perfect right away. It's a process. 1. Mount the Strings: Start with a set of strings you intend to use regularly.n2. Adjust the Action (string height): Raise or lower the bridge (or individual saddles) so that the strings don't buzz on the frets but aren't too high either. A good starting point is 1.5-2mm of height at the 12th fret. 3. Coarse Intonation: Use a chromatic tuner. Tune the open string, then press down on the 12th fret and pluck. If the note at the 12th fret is flat, move the saddle. after you (towards the neck). If it is sharp, move the saddle backwards (towards the body). Do this for each string, then retune and repeat. This will take several passes.Remember, this is just an initial setup. The fine tuning will come later, once the neck has settled under the tension of the strings. If you'd like to delve deeper into guitar setup, I recommend checking out our article on how to modify a guitar, where we also talk about adjustments and optimizations.
Maintenance and Optimization: Making Your Work Last
A guitar bridge A well-installed one is just the beginning. To keep it in top condition and keep your guitar sounding its best, a little attention is needed.Cleaning and Lubrication
Every string change: Clean the bridge, saddles, and screws thoroughly with a soft cloth. Remove dust and debris.Tremolo bridges: Lubricate the saddle contact points and nut with powdered graphite or a string lubricant (e.g., Big Bends Nut Sauce). This reduces friction and improves tuning stability. For Floyd Roses, check the locking screws and pins for looseness.
Fine Adjustments
After a few days of the strings settling in, it's time for the final setup: Intonation: Repeat the tuning process with greater precision. Chromatic tuner in hand, patience, and an ear.Action: Adjust the height of the strings to your preference, making sure there are no fret buzz (fried) unwanted.
Pickup Height: If you've changed the bridge, the string height has changed. Adjust the pickup heights accordingly to achieve the desired balance of volume and tone.
Upgrades and Modifications
The beauty of DIY is that you can always improve. Tremolo Block: If you have a synchronized tremolo, replacing the zinc block with a solid steel or brass one can significantly increase sustain and resonance. Many aftermarket manufacturers offer quality upgrades.Saddles: As I mentioned before, a saddle change (e.g. from zinc to brass, steel, or TUSQ) can improve tone and stability.
Tremolo Springs: Experiment with different spring tensions and configurations. Fewer but stiffer springs can provide more sustain, while more and softer springs make the tremolo more "floaty.".
For those who want to delve deeper into the topic of materials and their impact on sound, I always recommend checking out the resources of manufacturers like Wilkinson or Gotoh. They often explain the differences between various materials in their "tech" or "FAQ" sections. For example, Stewart-MacDonald's technical page (https://www.stewmac.com/how-to/online-resources/fret-work-and-setup/how-to-set-up-a-tune-o-matic-bridge/) offers detailed guides that, while sales-oriented, contain valuable information on bridge setup and features.
Final Considerations: The Value of Experience
I hope this overview of the guitar bridges May it be useful to you. Remember, the process of building a guitar is a journey, not a destination. Every mistake is an opportunity to learn something new. I've drilled the wrong holes, installed crooked bridges, and had guitars that wouldn't stay in tune because of a poorly adjusted bridge. But every time I learned, the next guitar turned out better. Don't be afraid to try. Your garage isn't a sterile workshop, and you're not a luthier with years of experience. You're an enthusiast who wants to create something with your own hands. And that, believe me, is the right spirit.Choose the bridge that inspires you, study its specifications, take your time and take your measurements. The end result is a guitar that sounds great. your, it will repay your efforts. And if you have any doubts, the online community is there for you. I've also learned a lot from reading forums and Reddit discussions. Share your progress, ask for advice, and above all, have fun!
See also
Download the Luthier Survival Kit
Free PDF with checklist, problem-cause table and project card template.
 English
  Italiano
Stuck on your build?
If you ran into the same problem or have a question, drop it in the comments. I read and reply to every one.
Write a comment