

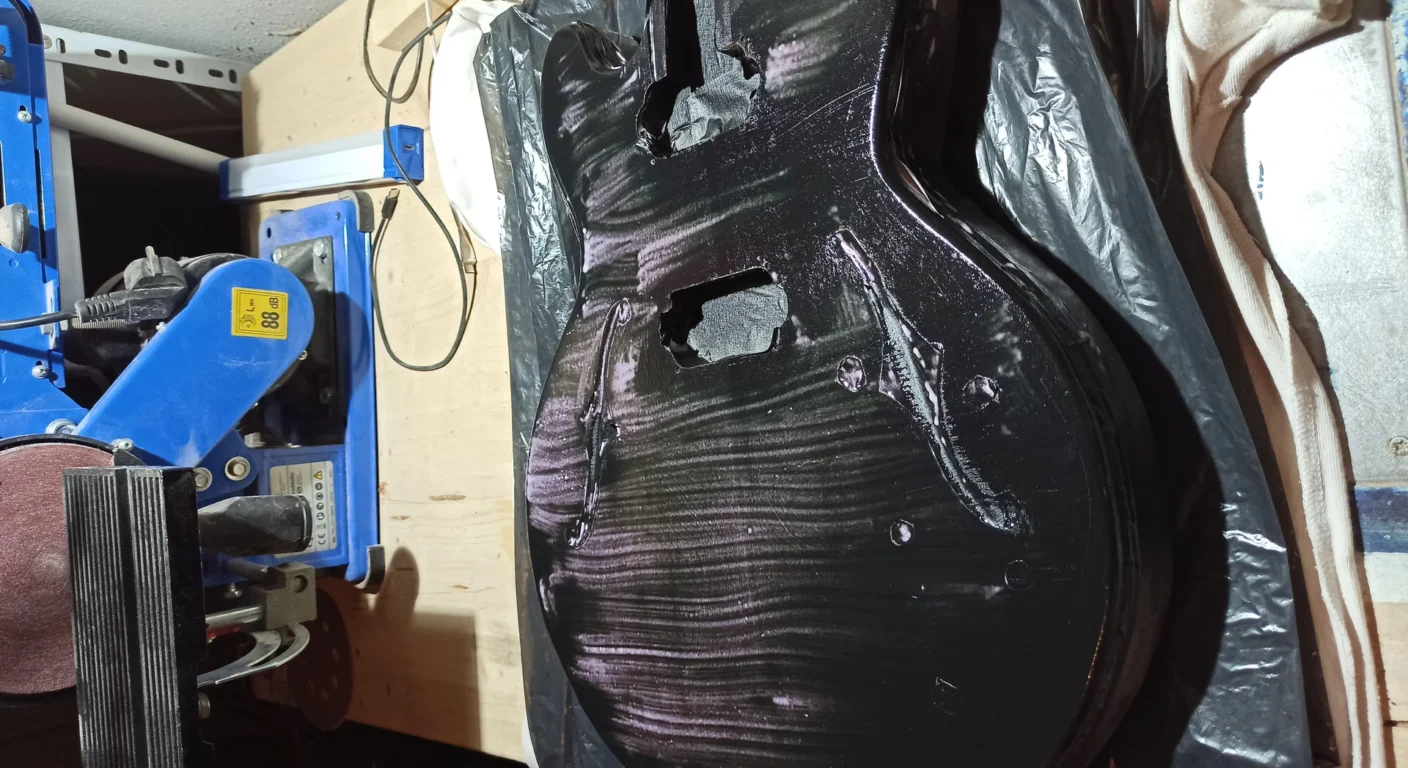
Building an Electric Guitar: 5 Steps with Hand Tools
When I decided to build my first guitar electric, I had a garage full of dust and a head full of doubts. Most online tutorials showed CNC routers, drill presses worth thousands of euros, and woodworking benches that looked like spacecraft. I had a jigsaw, a hand plane inherited from my grandfather, and a set of chisels I used to crack nuts. I was convinced it was impossible. That for make a stringed instrument with traditional tools you needed the skill of a master luthier, or a fat wallet to buy complex machinery. Instead, I discovered that patience, stubbornness, and the willingness to get your hands dirty can work miracles. And yes, I made mistakes. I ruined pieces of wood, drilled crooked holes, spent nights sanding. But in the end, I did it. And it played. It wasn't perfect, but it was mine. This article is not a definitive guide for professional luthiers. It's a chat between friends, from someone who started in the garage, to you who have the same desire and maybe the same tools. I will guide you through the key steps to build an electric guitar with hand tools, focusing on the tricks, mistakes to avoid, and the “whys” behind each choice. Because if I succeeded, with my limited means and my good dose of stubbornness, you can do it too. Get ready, let's begin!
1. Design and Wood Selection (or Kit): The True Starting Point



[GRIGLIA FOTO]
Even before touching a piece of wood, there's a phase that many underestimate, but which becomes fundamental with hand tools: design. It's not just about choosing the body shape, but about planning every single operation. Every cut, every excavation, every drilling must be thought out in advance, because here there's no machine that automatically corrects errors.
Kit or Raw Wood? The Initial Dilemma

[BOX AFFILIAZIONE]
The first crossroads you face is this: do you start with a pre-cut kit or with raw wood blocks? Pre-cut kit: If it's your first time and you only have hand tools, a kit can be a godsend. You already have the shaped body, the neck with the fretted fingerboard, and often even the holes for the pickups and components. Your work will focus on finishing, assembly, and electronics. This drastically reduces the points where you can make gross mistakes with cuts and shaping, which are the most difficult without machinery.
Raw wood: If you already have some experience with wood and truly want the satisfaction of creating every single curve, raw wood is your way. It will give you much more creative freedom and the possibility to choose specific woods. However, know that it will require much more patience, precision, and time. In my case, the first one I made with a semi-finished kit. The body was already shaped, but the neck needed finishing and the routings for the electronics were only sketched out. I learned a lot. The second one, however, I started from scratch, with a block of mahogany and one of maple. There I broke a sweat more than once.
The Drawing and Templates: Your Best Friends
Whether you start from a kit or raw wood, drawings and templates are indispensable.
For those starting from scratch, the 1:1 scale technical drawing is your treasure map. You can find blueprints online (for example, on sites like Guitarelectronics.com or luthiers who share their projects) or create them yourself. The important thing is that they are precise. Every millimeter counts.
From the drawings, you will then derive the template. What are they? Wooden (plywood, MDF) or acrylic shapes that you will use as a guide for cutting and routing. With hand tools, a robust and precise template is the equivalent of a CNC router. It allows you to replicate complex shapes with surprising precision, even with just a rasp and sandpaper. How to make a template: Print your drawing, glue it onto a 6-10mm piece of MDF (it's stable and easy to work with), and cut the shape with a jigsaw. Finish the edges with files and sandpaper until they are perfect. This template will be your “matrix”.
The Choice of Wood: Not Just Aesthetics
If you decide to start with raw wood, the choice of wood is crucial. It's not just an aesthetic matter, but it affects the sound, weight, and, above all, workability with hand tools.
Body:
- Mahogany: Relatively easy to work with hand tools. It has good stability and a warm, rich sound. A classic for Les Paul.
- Alder: Light, resonant, and quite soft, therefore easy to cut and shape. Excellent for Stratocaster and Telecaster.
- Ash: Harder than alder, but still workable. It offers a bright sound and remarkable sustain. Swamp ash is lighter and more resonant.
- Maple: Very hard. If you plan to make a solid maple body with hand tools, be prepared to sweat and use very sharp chisels. It's more common for tops or necks.
Handle:
- Maple: The king of necks. Stable, durable, and offers a bright sound. It's hard, but its stability is invaluable.
- Mahogany: Softer than maple, but still robust. It gives a warmer sound.
Fretboard:
- Rosewood: The classic. Relatively easy to work with, offers a good feel and a warm sound.
- Ebony: Extremely hard and dense. Difficult to work by hand, but incredibly smooth to the touch and with a bright attack.
- Maple: The maple fretboard is often carved from the same piece as the neck (one-piece neck). It offers a bright attack and clean sustain.
My heartfelt advice: For your first experience with hand tools, choose softer woods like alder or mahogany for the body. Maple for the neck is fine, but be aware of its hardness. Always buy a little more wood than you think you'll need. Mistakes happen, and having a spare piece will save you from frustration and waiting.
Essential Tools for Phase 1:
- Pencil and tape measure
- Graph paper or blueprint printer
- MDF or plywood for templates
- Jigsaw (or hand saw) for cutting templates
- Files and sandpaper to finish the templates
- Spray glue for fixing drawings to wood
Remember, planning is 90% of success when you assemble a six-string without complex machinery. Don't rush here.
2. The Body: Cutting, Shaping and Routing – Patience is the Keyword
Here we are at the heart of the project: the body. Here you start to see the shape of the instrument come to life. With hand tools, this phase requires a lot of patience, precision and above all, excellent tool sharpening.
Cutting the Block: From Matrix to Rough Shape
If you started from a raw wood block, the first step is to cut the body's shape.
- Trace the shape: Place your template on the wooden block and accurately trace the outline. Use a well-sharpened pencil.
- Rough cut: With a jigsaw (if you have one) or a good hand saw (like a Japanese saw, which cuts by pulling and is more precise), cut the wood leaving a safety margin of 2-3 mm outside the traced line. Don't look for perfection here, your goal is to remove most of the superfluous material.
Common mistake: Cutting too close to the line or even inside the line. If you do, you’ve ruined the piece. It’s better to leave a little extra margin, which you can remove later.
- Fixing: Once the rough piece is cut, secure it firmly to your workbench. Clamps are your friends. You cannot work well if the piece moves.
Body Shaping: The Slow Sculpture
Now the real sculpting begins. You need to bring the body to its final shape, following the template.
- Remove excess material: Start with a coarse-grained rasp to remove excess wood, working towards the drawn line. Be methodical. Don't try to remove too much material at once.
- Finishing: As you get closer to the line, switch to finer files and then to sandpaper wrapped around a wooden block (or a piece of MDF). This will help you keep surfaces flat and curves smooth.
- Check with the template: Frequently place the template on the body to check for accuracy. Imperfections are immediately visible. If you find a point where the body is narrower than the template, you have a problem. If it's wider, you can still correct it.
- Comfort carves: Comfort curves (like the “belly cut” on the back or the “forearm contour” on the top) are more complex. Here you will use rasps, files, and hand sanders (like a shaped wooden block with sandpaper) to create the ergonomic shapes. Work slowly, often checking the symmetry and fluidity of the curves.
The garage trick: For curves, sometimes, I used a piece of PVC pipe wrapped with sandpaper. It works surprisingly well for creating constant radii.
Routing the Cavities: The Moment of Truth
This is perhaps the most feared step by those who build their own handcrafted guitar with hand tools. The routings for pickups, electronics, and neck pocket must be precise and have straight walls. Without an electric router, it's a challenge. But not impossible.
Specific Materials and Tools for Manual Routing:
- Sharp chisels: A set of good quality, razor-sharp chisels is essential. Having chisels of different widths will help you.
- Hammer (or wooden mallet): For controlled blows to the chisels.
- Dremel or multi-tool: It's not a router, but with the right accessories and a guide, it can help a lot.
- Sturdy templates: For routing, templates must be thicker (10-12mm) and securely fastened to the body.
- Depth gauge: A depth gauge is essential for not digging too deep.
Routing Procedure with Hand Tools:
- Position and secure the template: Secure the cavity template (pickup, electronics, neck pocket) firmly to the body with strong double-sided tape and clamps. It must be immobile.
- Dig out the center: With a wider chisel, start removing material from the center of the cavity. Don't try to go to the final depth immediately. Work in thin layers, say 2-3 mm at a time.
- Define the edges: This is the critical step. With a sharp chisel, position it with the bevel facing the inside of the cavity. Give small taps with the hammer, cutting vertically along the edge of the template. Repeat this operation on all sides. This creates a clean, straight edge.
- Advice from Mimmo: Don't try to “tear” the wood. You must cut it. If you see the wood splintering, the chisel is not sharp enough or you are applying too much force.
- Remove the remaining material: After defining the edges, you can continue to carve out the center with the chisel, or if you have a Dremel, you can use it with a router bit to remove the bulk of the material, being careful not to touch the edges.
- Check the depth: Constantly measure the depth with your caliper. The routings must have the correct depth to accommodate the components without problems. For example, for humbucker pickups, the standard depth is often around 20-22mm. The neck pocket must be precise to the millimeter in both width and depth, to ensure a correct neck angle.
- Neck Pocket: This is the most important. A poorly made neck pocket compromises intonation and playability. If possible, use a template that perfectly fits the neck you will be using. Carve with maximum precision, continuously checking the neck's fit. It should enter with slight friction, without play.
Useful links: To better understand the importance of precision and how small modifications can impact sound and playability, take a look at this article on guitar modification and customization. Many woodworking principles apply there too.
Pain Point: Chipping (wood splintering) on the edges of the cavity. To avoid this, make sure your chisels are very sharp and make light passes. Sometimes, applying painter's tape along the outer edges of the template can help prevent chipping, providing some support to the surface fibers.
Drilling: Straight is Better
The holes for potentiometers, the switch, the jack, the bridge, and the string-through ferrules (if present) must be straight. Without a drill press, it's a challenge.
Tools: Hand drill or portable electric drill. Sharp wood bits.
The trick: Use a drill jig or, alternatively, a thick piece of scrap wood with a pre-made hole. Secure it firmly to the body and use it as a guide for the drill bit. This will help you keep the drill perpendicular to the surface.
Through holes: For holes that go through the body (e.g., for a hardtail bridge or string-through), drill from both sides. Make a thin pilot hole from one side, then drill with the final bit halfway. Turn the body, use the pilot hole as a reference, and drill from the other side. This prevents chipping on exit.
This phase is long and tiring. Don't get discouraged if not everything is perfect on the first try. What's important is consistency and attention to detail.
Enjoying this article? Subscribe to the newsletter: one email a week, zero spam.
Subscribe →3. The Neck: The Biggest Challenge, But Not Impossible
The neck is the soul of the guitar. Its stability, playability, and correct intonation depend on its construction. If the body forgives some imperfections, the neck does not. For this reason, if it's your first time assembling a six-string without complex machinery, my heartfelt advice is: buy a good quality ready-made neck.
Why a Ready-Made Neck?
Making a neck from scratch with hand tools is an undertaking that requires micrometric precision and a deep understanding of wood tensions and mechanics.
- Truss Rod Channel: Carving the truss rod channel with precision, ensuring the correct curvature and depth, is extremely difficult without a router. An error here means an unusable neck.
- Keyboard radius: Creating the fretboard radius (e.g., 9.5″, 12″) uniformly along its entire length is a delicate job that requires dedicated sanding blocks and a lot of patience.
- Fretting: Fret installation (fretting) is an art. Each fret must be perfectly inserted into its slot, at the correct depth, and precisely leveled. Poorly installed frets completely ruin playability.
- Angles and dimensions: The neck profile, the headstock angle, the width at the nut and at the last fret... every detail affects the feel and sound.
That said, if you're a masochist like me and want to try, here's what awaits you.
Building a Neck from Scratch (with serious warnings!)
If you have decided to face the challenge of creating your own handcrafted guitar starting from the raw neck, get ready.
- Wood Selection: Maple is the most common for necks due to its stability. Make sure the piece is well-seasoned and free of defects.
- Cutting and Shaping the Blank:
- Trace the shape of the neck and headstock onto your wood block.
- Use a hand saw or jigsaw to cut the rough shape, always leaving a 2-3mm margin.
- Refine the shape with rasps and files, following a template.
- This is the most critical step. The channel must be perfectly straight (or with the slight curvature required by the specific truss rod) and of the correct depth.
- To carve it manually, you will need very sharp chisels and a sturdy side guide. Secure two wooden strips parallel to the center of the neck, at the exact distance of the channel width. Use these strips as a guide for the chisel.
- Remove material in thin layers, constantly measuring the depth.
- My mistake: The first time, the channel wasn't deep enough in one spot and the truss rod protruded slightly. I had to sand the neck to compensate, altering its profile. Learn from my mistakes!
- If the fretboard is a separate piece (e.g., rosewood or ebony), gluing it is a delicate operation.
- Fretboard Radius: Before gluing, you need to create the radius on the top face of the fretboard. This is done with specific sanding blocks for the desired radius, onto which you glue sandpaper. It's a long and monotonous job, but crucial for playability. Make sure the radius is uniform along its entire length.
- Gluing: Apply a good quality wood glue (like Titebond) evenly. Secure the fretboard to the neck with many clamps, ensuring it is perfectly aligned. Let it dry for at least 24 hours.
- Cutting the slots: If you don't have a pre-fretted neck, you need to cut the fret slots. This requires a fret saw with a specific thickness (e.g., 0.023″). Secure the neck in a jig and cut with precision. The depth must be uniform.
- Installing the keys: You can insert the frets by gently hammering them with a specific fret hammer (with a nylon or brass head) or by pressing them with a hand fret press (fret press caul). The important thing is that each fret is fully inserted and that the ends do not protrude.
- Leveling and crowning: After installation, the frets must be leveled to eliminate any unevenness and then “crowned” (rounded) for optimal intonation and sustain. This is done with specific files (crowning file) and then with progressively finer grit sandpaper. It is a high-precision job.
- This is the most "artistic" part. With rasps, files, and sandpaper, you will sculpt the back profile of the neck. You can base it on existing profiles (e.g., C-shape, D-shape) or create your own.
- Work slowly, frequently checking the feel of the profile with your hands. It must be comfortable and uniform.
- Cut the final shape of the headstock.
- Drill the holes for the tuners. Here too, precision is essential for good operation. Use a template or a jig.
Essential Tools for the Neck (if you make it from scratch):
- Maple (or mahogany) wood for the neck, rosewood/ebony for the fretboard
- Truss rod
- Set of sharp chisels
- Fret saw and jig
- Fret hammer or fret press
- Fret files (leveling and crowning)
- Sanding blocks for radius
- Wood glue, clamps
- Wood rasps and files
- Sandpaper of various grits
My final advice on the neck: If you decide to build it from scratch, be prepared to invest a lot of time and not get discouraged. It is the part that truly defines the instrument. If in doubt, a quality pre-made neck will save you a lot of trouble.
4. Finishing: Patience Pays Off (and Covers Some Imperfections)
After all the cutting, shaping, and carving, we have arrived at the finishing phase. This is where your guitar goes from a worked piece of wood to a real instrument. And with hand tools, finishing is a long but incredibly rewarding process. It is also the phase where you can somewhat mask previous mistakes, or mercilessly highlight them.
Sanding: The Most Tedious but Most Important Work
Sanding is the foundation of any good finish. If the surfaces are not smooth, the final finish never will be. And with hand tools, surface imperfections can be more noticeable.
- Start with a coarse grit (but not too coarse): Start with 120 or 150 grit sandpaper. Work over the entire surface of the body and neck. Always use a flat sanding block for flat surfaces and a contoured block (or your hands) for curves. The goal is to eliminate all rasp, file, or chisel marks.
- Gradually move to finer grits: Once the surface is uniform with 120 grit, move to 180, then 220, 320, and so on, up to 400 or 600.
- The trick: Between grits, thoroughly clean the piece with a damp cloth to remove sanding dust. This will help you see the marks left by the previous grit and ensure you have completely eliminated them before moving on to the next.
- “Pop the grain”: After 220 grit, you can lightly sponge the wood with distilled water. This will make the wood fibers “rise”. Let it dry completely and then sand again with the same grit (e.g., 220). Repeat this process once or twice. This will help prevent the fibers from rising after applying the finish, leaving a smoother surface.
- Check under grazing light: Raking light is your best friend for finding imperfections. Pass a lamp along the wood surface; every scratch or mark not yet eliminated will be evident.
Pain Point: The temptation to skip a grit or not sand enough. Don't do it! Every scratch left by the previous grit will be amplified by the finish. Patience here is crucial.
Pore Filling (Grain Filling)
Some woods, like mahogany or ash, have open pores that need to be filled to achieve a smooth and glossy finish.
- Grain Filler: Apply a grain filler (water-based or solvent-based options exist) following the manufacturer's instructions. Generally, it is applied, allowed to dry a bit, and then the excess is removed with a cloth or spatula, pushing it into the pores.
- Sanding: Once dry, lightly sand with a fine grit (e.g., 320-400) to remove excess filler from the surface, leaving it only in the pores.
Choosing the Finish: Oil, Lacquer, or Polyurethane?
With hand tools, some finishes are more “friendly” than others.
- Oil Finish:
- Ideal for DIY: It's the simplest and most forgiving choice for those working in a garage. It doesn't require special equipment (like spray guns) and forgives small mistakes.
- Process: The oil (such as Danish oil, tung oil, or specific guitar blends) is applied with a cloth, allowed to penetrate, excess is removed, and then polished. Many coats (even 10-20) are repeated over days or weeks.
- Advantages: Natural look, pleasant tactile feel, easy to repair. Does not require a spray booth.
- Disadvantages: Less impact resistant than lacquer or polyurethane, it does not offer a 'mirror-like' glossy surface unless with very careful polishing work.
- My first love: I finished my first guitar with tung oil. It took me a month.
- The “vintage” sound: Many purists prefer it for its appearance and how it affects the sound (although the sonic impact is debated).
- Process: It requires many thin coats, applied with a spray gun in a well-ventilated and dust-free environment. It also requires time for drying and curing.
- Advantages: Classic look, thins over time (creating a “checking” effect desired by some).
- Disadvantages: Very difficult to apply well without professional equipment. It is toxic and requires extreme precautions. Very sensitive to heat and scratches.
- The most durable: Offers maximum protection against scratches, impacts, and chemical agents.
- Process: Similar to nitro, but often thicker and easier to apply. Can be solvent-based or water-based.
- Advantages: Exceptional durability, deep glossy finish possible.
- Disadvantages: It can sound “plastic” and less resonant than other finishes (this is another open debate). Difficult to repair if deeply damaged. Requires good ventilation.
- If you don't want a glossy finish, you can opt for a satin or matte finish. This is achieved by using specific finishes or by sanding the glossy finish with very fine grits (e.g., 800-1000) to achieve a satin effect.
- For those who use an oil finish, the natural effect is already satin in itself.
My advice for you who use hand tools: Start with an oil finish. It is the most accessible, the least toxic, and the most forgiving. It will allow you to focus on assembly and electronics without the anxiety of a complex finish.
Final Polishing
If you have chosen a glossy finish (oil or polyurethane), polishing is the final touch. After the finish has completely hardened (it can take weeks for nitro or polyurethane), you can use progressively finer abrasive pastes (up to mirror-finish ones) and then waxes to achieve a deep shine. With an oil finish, polishing is done with soft cloths and clean oil, working until the desired sheen is achieved.
5. Assembly and Electronics: The Moment of Truth
Finally, the moment to bring your creation to life. Assembly and electronics installation are the final stages that transform a collection of parts into a functioning guitar. Here too, precision and attention to detail are fundamental, especially if you have built the neck and body from scratch.
Neck Assembly
If you have built the neck and body, make sure the neck pocket is perfect. The neck should fit with slight pressure, without play. If it's too tight, you'll need to sand with extreme caution; if it's too loose, the problem is more serious and could compromise stability. Once the neck is inserted, attach the neck plate (if present) or screw the neck directly to the body with long, sturdy screws.
Neck Angle: The angle at which the neck connects to the body is critical. A neck angled too far downwards will make the action (string height) too high. A neck that is too flat or angled upwards can cause action and sustain problems. If you have worked precisely, everything should align correctly. If you used a kit, the neck is often pre-angled.
Hardware Installation
Now it's time to mount the bridge, tuners, pickguards, controls, etc.
- Bridge: Follow the manufacturer's instructions carefully for positioning. The distance from the nut to the bridge determines the intonation. If you have a floating bridge (tremolo type), this requires more complex adjustment. For the first handmade guitar, I recommend a fixed bridge (hardtail) or a vintage-style tremolo, which are simpler to install.
- Mechanics: Mount the tuners on the headstock. Make sure they are straight and securely fastened.
- Pickguard and Electronics Cover: Attach the pickguard (if present) and the back covers for the electronics.
- Nut: The nut (the part that separates the strings from the fretboard) is a small but fundamental piece. If it's not already installed or shaped on the neck, you'll need to do it. It must be perfectly aligned, and the string grooves must have the correct depth and angle. A poorly made nut can cause intonation and action problems at the beginning of the neck.
Electronics Wiring: The Sonic Heart
This is the part that scares many, but with the right diagrams and a little attention, it's manageable. You need to connect pickups, potentiometers (volume and tone), switches, and the output jack.
Typical Components:
- Pick-up: They pick up the vibrations of the strings.
- Potentiometers: They adjust volume and tone. They are usually 250k ohm for single coils and 500k ohm for humbuckers.
- Switch: Allows you to select which pickup to use (e.g., 3-way switch for guitars with two pickups, 5-way switch for Stratocaster).
- Output Jack: Where you connect the guitar cable.
Wiring Diagrams: Search online for the specific diagram for your guitar's configuration (e.g., “Stratocaster wiring diagram”, “Les Paul wiring diagram”). There are endless resources, such as those offered by Seymour Duncan or Fender. Many kits already include pre-assembled wiring.
Welding: You will need a soldering iron (with a fine tip) and electronic solder. Practice on spare parts before you start. Solders must be clean, shiny, and firm. Avoid overheating components.
Ground (Grounding): Ground wiring is essential to eliminate hum and unwanted noise. Make sure all metal components (bridge, pickups, shielding if present) are connected to the volume potentiometer and then to the output jack.
Pain Point: Hum and background noise. These are often caused by cold solders, missing or incomplete ground connections, or insufficient shielding.
Initial Setup: Fine-Tuning
Once everything is assembled and wired, it's time for the setup.
- Action: Adjust the string height at the bridge and, if necessary, at the nut.
- Intonation: Use a tuner to adjust the vibrating length of each string at the bridge, so that every note played on every fret is perfectly in tune with the open note.
- Truss Rod Adjustment: If the action is too high or too low, or if the neck has excessive “belly” (forward curve) or “back bow” (backward curve), you might need to adjust the truss rod. Do this very carefully, a quarter turn at a time.
- Pickup Height: Adjust the pickup height to achieve the desired volume balance and sound.
The first test: Connect the guitar to an amplifier and... play! Listen carefully. Is there background noise? Are the notes clear? Is the intonation correct? Every small defect is an opportunity to learn and improve.
Build better. Subscribe for updates, guides and free ebooks.
Subscribe →Cost and Time Considerations
How much does it cost to build an electric guitar with hand tools?
It's difficult to give an exact figure because it depends on many factors:
- Kit vs. Raw Wood: A good quality kit can cost from 200 to 500 euros. Starting from raw wood might seem cheaper, but if you buy quality, well-seasoned woods, you could spend similar, if not higher, amounts.
- Wood: Alder or mahogany for the body are relatively inexpensive (50-100 euros). Maple for the neck and fretboard can increase the cost.
- Hardware: A set of good quality tuners costs around 30-60 euros. A fixed bridge around 30-70 euros. A set of pickups can vary enormously, from 50 euros for cheap clones to over 300 euros for high-end sets.
- Electronics: Potentiometers, switches, capacitors, jacks: about twenty euros for a basic set.
- Finish: Oil, paints, sandpaper: here too, from 30 to 100 euros depending on what you choose.
- Tools: If you start from scratch, you'll need to invest in basic tools (saw, files, chisels, etc.). This can be the biggest initial investment, but these are tools you'll use for many other projects.
Realistic Estimate: For your first guitar built with hand tools, perhaps starting from a semi-finished kit or buying pre-planed woods, you can expect to spend between 300 and 700 euros.
How long does it take?
That's the million-dollar question. It depends on your manual skills, the complexity of the project, your dedication, and, most importantly, whether you're working from scratch or from a kit.
- From Kit (with simple finish): If you are organized and work on weekends, you could assemble and finish a guitar in 2-4 weeks.
- From Raw Wood (with oil finish): Here we're talking months. Design, cutting, shaping, routing, finishing (with its drying times), and assembly can easily take 2-6 months of part-time work. My first guitar from scratch took almost 8 months, between unforeseen events and moments of intensive “study”.
My mental roadmap:
- Phase 1: Planning and Materials (1-2 weeks) – Drawings, wood/kit selection, material purchase.
- Phase 2: Body (2-4 weeks) – Cutting, shaping, routing, drilling.
- Phase 3: Neck (if from scratch, 4-8 weeks; if ready, 1-2 days) – Construction, fretting, profiling.
- Phase 4: Finishing (4-10 weeks) – Sanding, pore filling, finish coats, drying, polishing.
- Phase 5: Assembly and Electronics (1-2 weeks) – Hardware mounting, wiring, setup.
Remember that these are indicative times. The important thing is not to rush and enjoy the process.
Frequently Asked Questions (FAQ)
What happens if I make a mistake routing the neck pocket?
An imprecise neck pocket can severely compromise the neck alignment, action, and intonation of the guitar. If it's too wide, the neck will be unstable. If it's too narrow, it might not fit or create tension. In mild cases, you can try to compensate with shims or glue. In the worst cases, it might be necessary to redo the body or the neck.
Is it possible to build an electric guitar with only hand tools?
Yes, it is absolutely possible, but it requires much more patience, precision, and time compared to using electric machinery. The use of well-made templates and very sharp hand tools (saws, planes, chisels, files, sandpaper) is the key to achieving professional results even without an equipped carpentry workshop.
Building your own electric guitar with hand tools is an incredible journey. It's not just a woodworking project, it's a total immersion in the mechanics of a musical instrument. Every mistake teaches you something, every success fills you with pride. Remember that perfection is not the main goal, especially the first time. The goal is to learn, have fun, and create an instrument that speaks to you. If you've read this far, you already have the desire. Now you just have to get to work. And if you need advice on how to improve or repair your creation, you know where to find me.
For further technical details you can consult this external resource.
Download the Luthier Survival Kit
Free PDF with checklist, problem-cause table and project card template.
 English
  Italiano
Stuck on your build?
If you ran into the same problem or have a question, drop it in the comments. I read and reply to every one.
Write a comment