

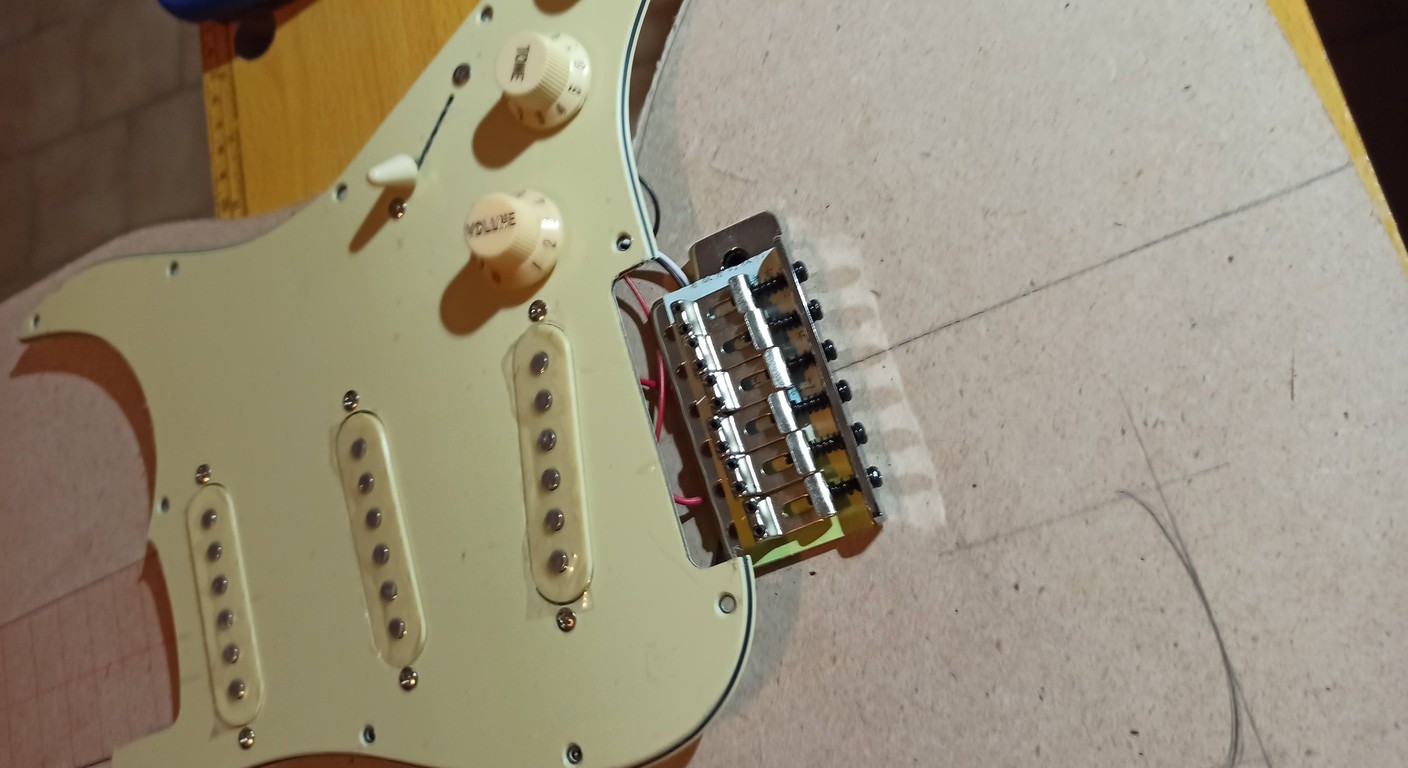
Adjusting the Electric Guitar Bridge: 5 Trouble-Free Steps
That guitar you painstakingly assembled, or that old Glory you dusted off from the garage, should sound like a dream, not like a rickety cowbell. Yet, sometimes you pluck a string and hear that annoying… buzz, or to bend at the seventh fret and find yourself completely out of tune. It happened to you, right? It happened to me, a lot of times. The first guitar I built, a kind of Frankenstein Stratocaster, had such a wobbly intonation that it seemed to play in two different keys simultaneously. I wanted to throw it out the window.
The point is that the key to transforming a piece of wood and metal into an instrument that makes you want to play for hours is not just in the electronics or the quality of the wood. Often, the secret is a good electric guitar bridge configuration. And no, you don't have to be a professional luthier with thousands of euros' worth of tools. You need patience, a little attention to detail, and the willingness to get your hands dirty.
In this article, I'll guide you through the five fundamental steps to adjust your guitar's bridge. I'll tell you what I learned by making mistakes, and how you can avoid my same errors. Because if I managed it, with a garage full of makeshift tools and a few YouTube tutorials, you can do it too.
Because the bridge is the heart of your setup (and your headaches)
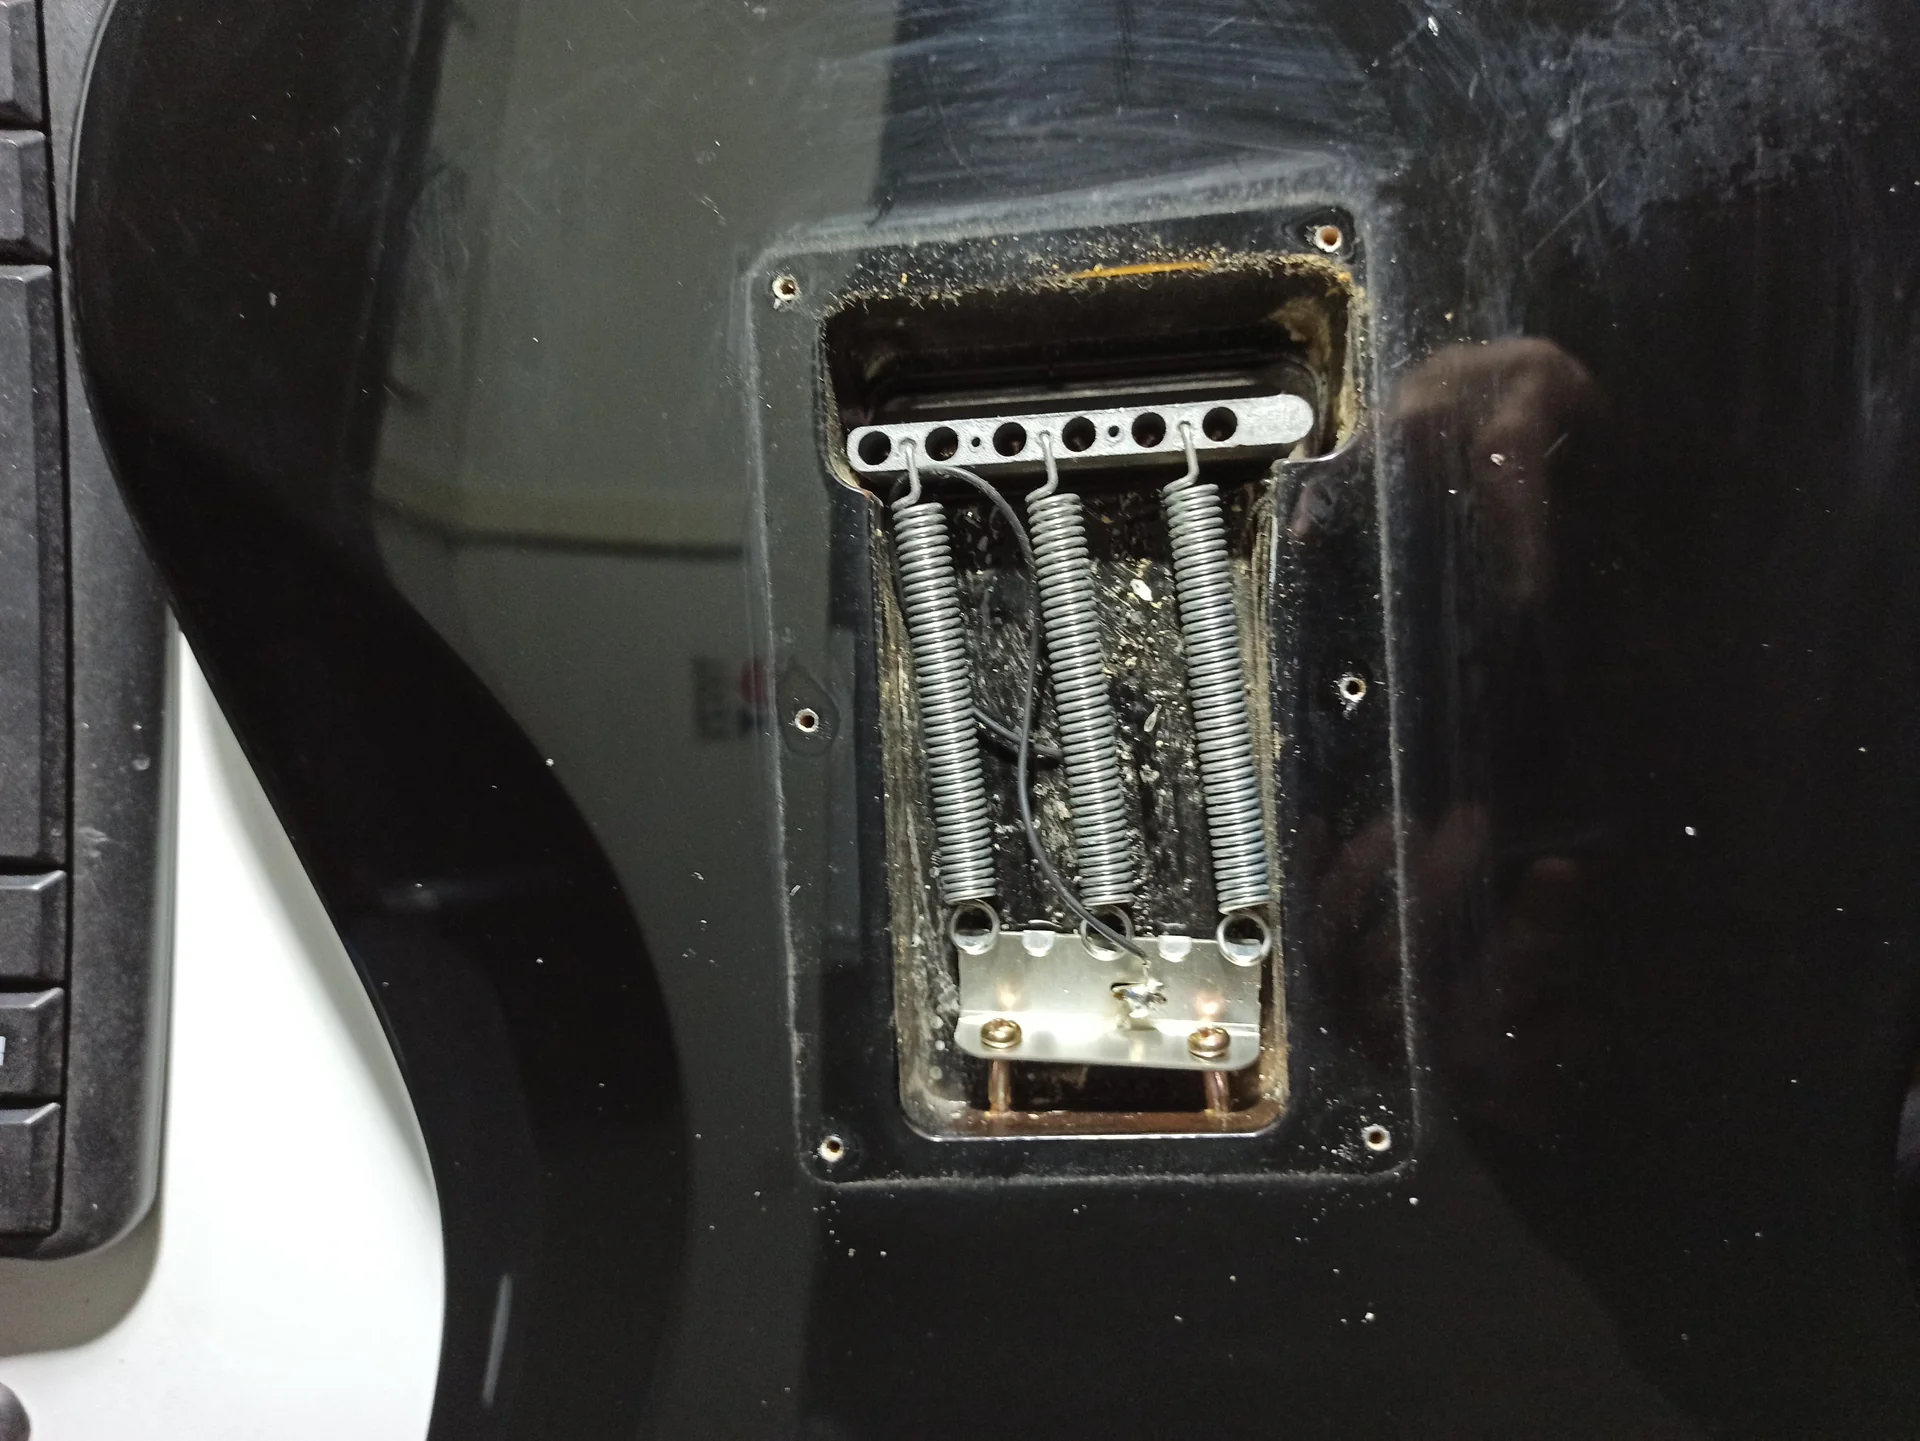
Screwdrivers (slotted and cross-head): To adjust the height of the bridge posts (the bridge pins) or the screws of the claw (the spring block in the rear compartment).
Precision Chromatic Tuner: Not the phone one, please! You need a reliable tool for intonation. A good quality pedal or clip-on tuner will make a difference.
Ruler for action/string action ruler: A small ruler graduated in millimeters and inches, specifically for measuring string height and pickup height. Essential.
Set of feeler gauges (feeler gauges): Useful for accurately measuring the neck relief (the curvature of the handle).
New strings: If your strings are old, replace them. Always set up with new strings of the gauge you'll use regularly.
Soft cloth: To avoid scratching your guitar. ### Preliminary checks (don't skip them!): 1. Check the neck relief: The curvature of the neck directly affects the action and the fret buzz. If the neck is too straight or too curved, you must first adjust the truss rod. This is a fundamental step that precedes any bridge calibration. To do this, press the sixth string at the first fret and then at the last fret (or where the neck joins the body). Look at the space between the string and the seventh/eighth fret. You should see a very slight space, about 0.15-0.25mm. If there isn't, or it's too much, act on the truss rod. Don't be afraid, but do it calmly and in small fractions of a turn.n2. New and stable strings: Install the new strings and tune them. Then, pull them a little to ’settle“ them, tune again, and repeat the process a couple of times. New strings tend to ”stretch“ and go out of tune initially. A good setup requires stable strings.n3. Spring tension (if you have a tremolo): If you have a bridge tremolo (like a Stratocaster, Floyd Rose, etc.), make sure it's level with the body (or slightly floating, depending on your preference). This should be done Before from the bridge tuning, acting on the screws of the claw in the rear compartment.
Now that we have prepared the ground, we can move on to the heart of the operation.
The 5 anti-problem moves for a electric guitar bridge configuration perfect


Move 1: String Height (Action)
This is the first thing you notice when you pick up a guitar: how high the strings are from the fretboard. An action that's too high is tiring, one that's too low can cause fret buzz. The goal is to find a compromise between playability and absence of buzzing.
How to adjust:
1. For Tune-o-matic (Gibson-style) or Hardtail bridges: These bridges have two pins (the bridge posts) on which the entire bridge rests. To raise or lower the action, you need to act on the screws on these pins. They are usually slotted or Allen. Lower or raise both sides evenly to keep the bridge parallel to the fingerboard. Make small adjustments and recheck.n2. For Stratocaster or Tremolo type bridges: Each string has its own saddle (saddle) individual. Each saddle has two small Allen screws that allow you to raise or lower it. Adjust each saddle individually. This gives you much finer control over the action of each individual string.n3. Measure your height: Use your action ruler. Measure the height of the strings at the 12th fret (from the bottom of the string to the top of the fret).
Typical values (but these are personal tastes!): Low strings (low E, A, D): 1.8mm – 2.2mmn High strings (G, B, E): 1.5mm – 2.0mmn These are starting points. Many prefer a lower action for speed, others higher for a cleaner sound and less buzz with powerful chords. The important thing is that it's comfortable for you.n4. Test and readjust: He plays the guitar. There are buzz annoying? Is the action too hard? Make small adjustments, retune, and try again. It's an iterative process.
My “garage” advice: Don't look for absolute perfection right away. Aim for decent playability and the absence of fret buzz obvious. Then, with use, you'll understand if you prefer a slightly higher or lower action. Your hand will give you the best feedback.
Move 2: Intonation
This is the part that drives many crazy. Intonation is fundamental: it ensures that every note played on every fret is in tune. If your guitar sounds good open but “out of tune” when you play chords at the seventh fret or higher solos, it's the intonation's fault.
How to adjust:
1. Tune your guitar: Make sure each string is perfectly tuned when open.n2. Check out the twelfth position: Play the natural harmonic at the 12th fret of a string (lightly touching the string without pressing it, and then removing your finger). Check the tuner. Then, press the same string at the 12th fret and play the note.n3. Compare the two values: If the note pressed at the 12th fret is FLAT compared to the harmonic: You need to shorten the string. Move the bridge saddle closer to the neck (usually by tightening the saddle adjustment screw).
If the note pressed at the 12th fret is SHARP compared to the harmonic: You need to lengthen the string. Move the bridge saddle away from the neck (by loosening the screw).n4. Fix one string at a time: Make small adjustments at a time. Tighten or loosen the saddle adjustment screw a quarter turn, then retune the open string and recheck the harmonic and the fretted note. 5. Repeat for all strings: It's a slow and meticulous process. Take your time.
My “garage” advice: Arm yourself with patience and a good tuner. Don't use the phone tuner, for heaven's sake! Surgical precision is needed here. And remember, intonation is also affected by action: if you've changed the string height, you'll (almost certainly) have to redo the intonation.
Step 3: Spring Tension (for Tremolo Bridges)
This move only affects those who have a bridge tremolo, whether it's a classic Fender-style vibrato or a Floyd Rose. Here, balance is everything. The string tension must perfectly balance the spring tension in the guitar's rear cavity.
How to adjust:
1. Remove the back cover: Access the spring compartment. You will see a metal block (the claw) fixed to the body with two screws and the springs attached.n2. Floating vs. Contact Bridge: Floating Tremolo Bridge: The idea is that the bridge is slightly raised from the body, allowing the tremolo arm to be used to both raise and lower the pitch. To do this, you need to find the point where the bridge plate is parallel to the guitar body. If the bridge is tilted too far forward (towards the neck), the springs are too tight. If it's tilted too far back (towards the pickups), the strings are too tight.
Contact Bridge (Decked Tremolo): Some prefer the bridge to be flush with the body, only allowing the pitch to be lowered with the tremolo arm, but improving tuning stability and sustain. In this case, the springs must be tight enough to hold the bridge firmly against the body.n3. Fix the screws of the claw: To raise the bridge (or increase the string tension): Slightly unscrew the two screws of the claw. This loosens the springs.
To lower the bridge (or increase the spring tension): Lightly tighten the two screws of the claw. This tightens the springs.n4. Tune and double-check: Every time you touch the screws of the claw, the tuning will change drastically. Tune, adjust, tune, adjust... it's a dance.
My “garage” advice: This is the part that made me sweat buckets the first time with a Floyd Rose. It takes patience and a keen eye. Look at the bridge from the side as you adjust it. It must be flat and stable. If you have a Floyd Rose, remember that the fine-tuners on the saddles will give you the fine tuning final, but the rough adjustment is done here.
Step 4: Locking and Stability (for fixed bridges or locking tremolos)
Once you have the action and intonation set, you need to make sure everything stays there. Bridge stability is crucial for tuning stability and sustain.
What to check:
1. Saddle screws: For Stratocaster-type bridges, make sure the small screws that adjust the saddle height are tight, but not overtightened. They shouldn't vibrate. 2. Locking screws (for Floyd Rose): If you have a Floyd Rose, make sure the locking nuts at the nut and the blocks on the saddles are well tightened after the final tuning. This is what keeps the tuning rock-solid.n3. Bridge Pins (for Tune-o-matic): Check that the posts on which the bridge rests are firmly seated in the body. Sometimes they can loosen. If the bridge wobbles, sustain suffers and tuning will be unstable.n4. Bridge tilt (for tremolo): As mentioned in Step 3, a tremolo bridge must be stable in its resting position, whether floating or in contact with the body. Any play or instability here translates into tuning problems.
My “garage” advice: A bridge that moves is an unforgiving bridge. I had a guitar with a Tune-o-matic whose posts moved slightly. Every time I did a more energetic bend, I heard a click and the guitar went out of tune. I had to dismantle everything, fill the holes with wood glue and toothpicks, and then reinstall the posts. A lot of work that could have been avoided with an initial check.
Step 5: The final test and micro-adjustments
You've done everything, you've sweated buckets. Now it's the moment of truth. But don't think it's over here. The electric guitar bridge configuration is an art of small adjustments.
What to do:
1. Play the guitar: Don't just play a few chords. Play scales, bends, and complex chords all over the neck. Listen carefully. 2. Check the tuning: After playing for a few minutes, recheck the tuning. Have the strings settled? Has the tremolo returned to position?n3. Check the fret buzz: Play the strings with different intensities. Is there a buzz only if you pluck hard, or is it also present with a light touch? If it's only with a hard touch, it might be acceptable for your style. If it's always present, you might need to slightly raise the action.n4. Intonation across the entire neck: Check the intonation not only at the 12th fret, but also at the 5th, 7th, and 17th frets. Small imperfections are normal, but they should not be obvious.n5. Micro-adjustments: You may need to go back and make small adjustments to the action or intonation. Maybe a string needs to be raised 0.1mm, or a saddle moved a breath.
My “garage” advice: It's not an exact science on the first try, it's an art of small adjustments. Every guitar is a world unto itself, and your playing style will also influence the ideal setup. Don't be afraid to go back and forth between steps. It's normal.
Common Mistakes and How to Avoid Them (My 'I Made a Mistake' Shopping List)
I've made every possible mistake, and then some. Here I list the most common ones, so you can avoid them and save yourself some headaches (and some swearing).
1. Ignore the neck relief: This is error number one. If the neck doesn't have the right relief, any bridge adjustment will be a palliative. I spent hours fighting with the fret buzz thinking it was the action, when the problem was a truss rod too tight. Always check the curvature of the handle first!n2. Changing string gauges without redoing the setup: Are you going from 0.09 to 0.11? Or vice versa? Congratulations, you just messed up your whole setup. The string tension changes, and with it the neck relief, the tension of the tremolo springs and the intonation. Every time you change gauge, you have to redo the whole process bridge adjustment.n3. Fretting too hard when intoning: When checking the note at the 12th fret, press the string with the same force you would normally play. If you press too hard, the string stretches slightly and the note will be sharp, skewing the tuner's reading.n4. Using a poor quality tuner: I've told you before and I'll say it again: a phone tuner is fine for open-ended tuning, but intonation requires precision. Invest in a good chromatic tuner. It makes a huge difference. The rush: There's nothing worse than rushing when doing a setup. Every adjustment must be small, measured, and verified. If you feel frustrated, take a break. Have a coffee. Come back later.n6. Do not lubricate friction points: Especially for tremolo bridges, but also for fixed ones, the points where the strings pass (nut, saddles, string tensioners) can create friction and cause tuning problems. A little graphite (from the tip of a pencil) or a specific lubricant can work wonders.
When to consult a professional (and when not)
Now, I'm not here to tell you what you can do All alone. I've learned that there are limits to garage tools and my skills.
When you can (and must) do it yourself: Basic setup: Adjust action, intonation, neck relief (with caution on the truss rod), spring tension. These are the things I've just explained to you, and they are within reach of anyone with a bit of manual skill and patience.
Minor adjustments: If your guitar goes a little out of tune after a change of season or strings, don't rush to the luthier. Make the micro-adjustments yourself.
When it's best to call a professional: Crooked or twisted handle: If the handle has a noticeable twist that is not resolved with the truss rod, it's a serious problem. Don't improvise.
Worn or uneven keys: If the keys are worn unevenly (the famous flat spots) or are not leveled, you will always have fret buzz in certain places, regardless of the bridge setup. This requires a fret adjustment (fret leveling), a delicate job that requires specific tools.
Structural problems on the bridge: If the bridge is damaged, the saddles are blocked or the studs are stripped. Sometimes replacement is the only solution.
* You don't feel safe: If you have tried, tried again and cannot get a good result, or if you are afraid of causing damage, there is no shame in asking for help. A good luthier will be able to give you a hand and perhaps explain what you were doing wrong.
To further explore setup and maintenance techniques, an excellent resource is the StewMac guide, a reference point for luthiers all over the world, even for those, like me, who work in their home garage: StewMac's Basic Electric Guitar Setup Guide. There you will find many other useful details and videos.
Conclusions: Your guitar, your setup
Adjusting the bridge of your electric guitar is not just a technical matter, it is an act of love towards your instrument. It allows you to better understand how it works, to feel the differences that every small adjustment can make and, in the end, to have a guitar that responds exactly how you want it to.
The first few times it will be slow, you will be frustrated, perhaps you will feel like you can't succeed. But every time you do it, you will learn something new. You will become faster, more precise, and you will develop that “feeling” that allows you to quickly understand what's wrong.
So, get out your tools. Put together a good album. And get to work on your electric guitar bridge configuration. The satisfaction of playing a guitar that you have set up yourself, and that sounds divine, is priceless. And if I succeeded, with my glue-stained hands and my limited patience, you can do it too. Good luck!
See also
Download the Luthier Survival Kit
Free PDF with checklist, problem-cause table and project card template.
 English
  Italiano
Stuck on your build?
If you ran into the same problem or have a question, drop it in the comments. I read and reply to every one.
Write a comment