


DIY your guitar? You can, without tools.
How many times have you thought about building your own guitar electric, but you got stuck in front of the luthier tools catalog? CNC routers, thickness planers costing thousands of euros, industrial belt sanders… I understand you perfectly. The first time I tried, I almost gave up just seeing the prices of certain machinery. Then I told myself: “Mimmo, but excuse me, how did the artisans of the past do it?”. And I discovered that, with a little patience, some tricks of the trade, and the right tools (which you often already have in your garage), a DIY guitar without professional tools is absolutely possible. I'm not promising you to replicate the millimeter precision of a Custom Shop, at least not on the first try. But I assure you that you can create a playable, personalized instrument and, above all, built with your own hands. The satisfaction is priceless, believe me. I have a couple of pieces that, despite all their aesthetic flaws, sound amazing and are my favorites precisely because I know every single piece of wood, every solder joint, every imperfection.So, let's start with the assumption that “without professional tools” doesn't mean “without tools”. It means we'll use what you can find in a good home workshop: a drill, maybe a Dremel, hacksaws, files, clamps, sandpaper. Nothing exotic, nothing that requires a mortgage. Ready?
1. The most important phase: planning and material recovery
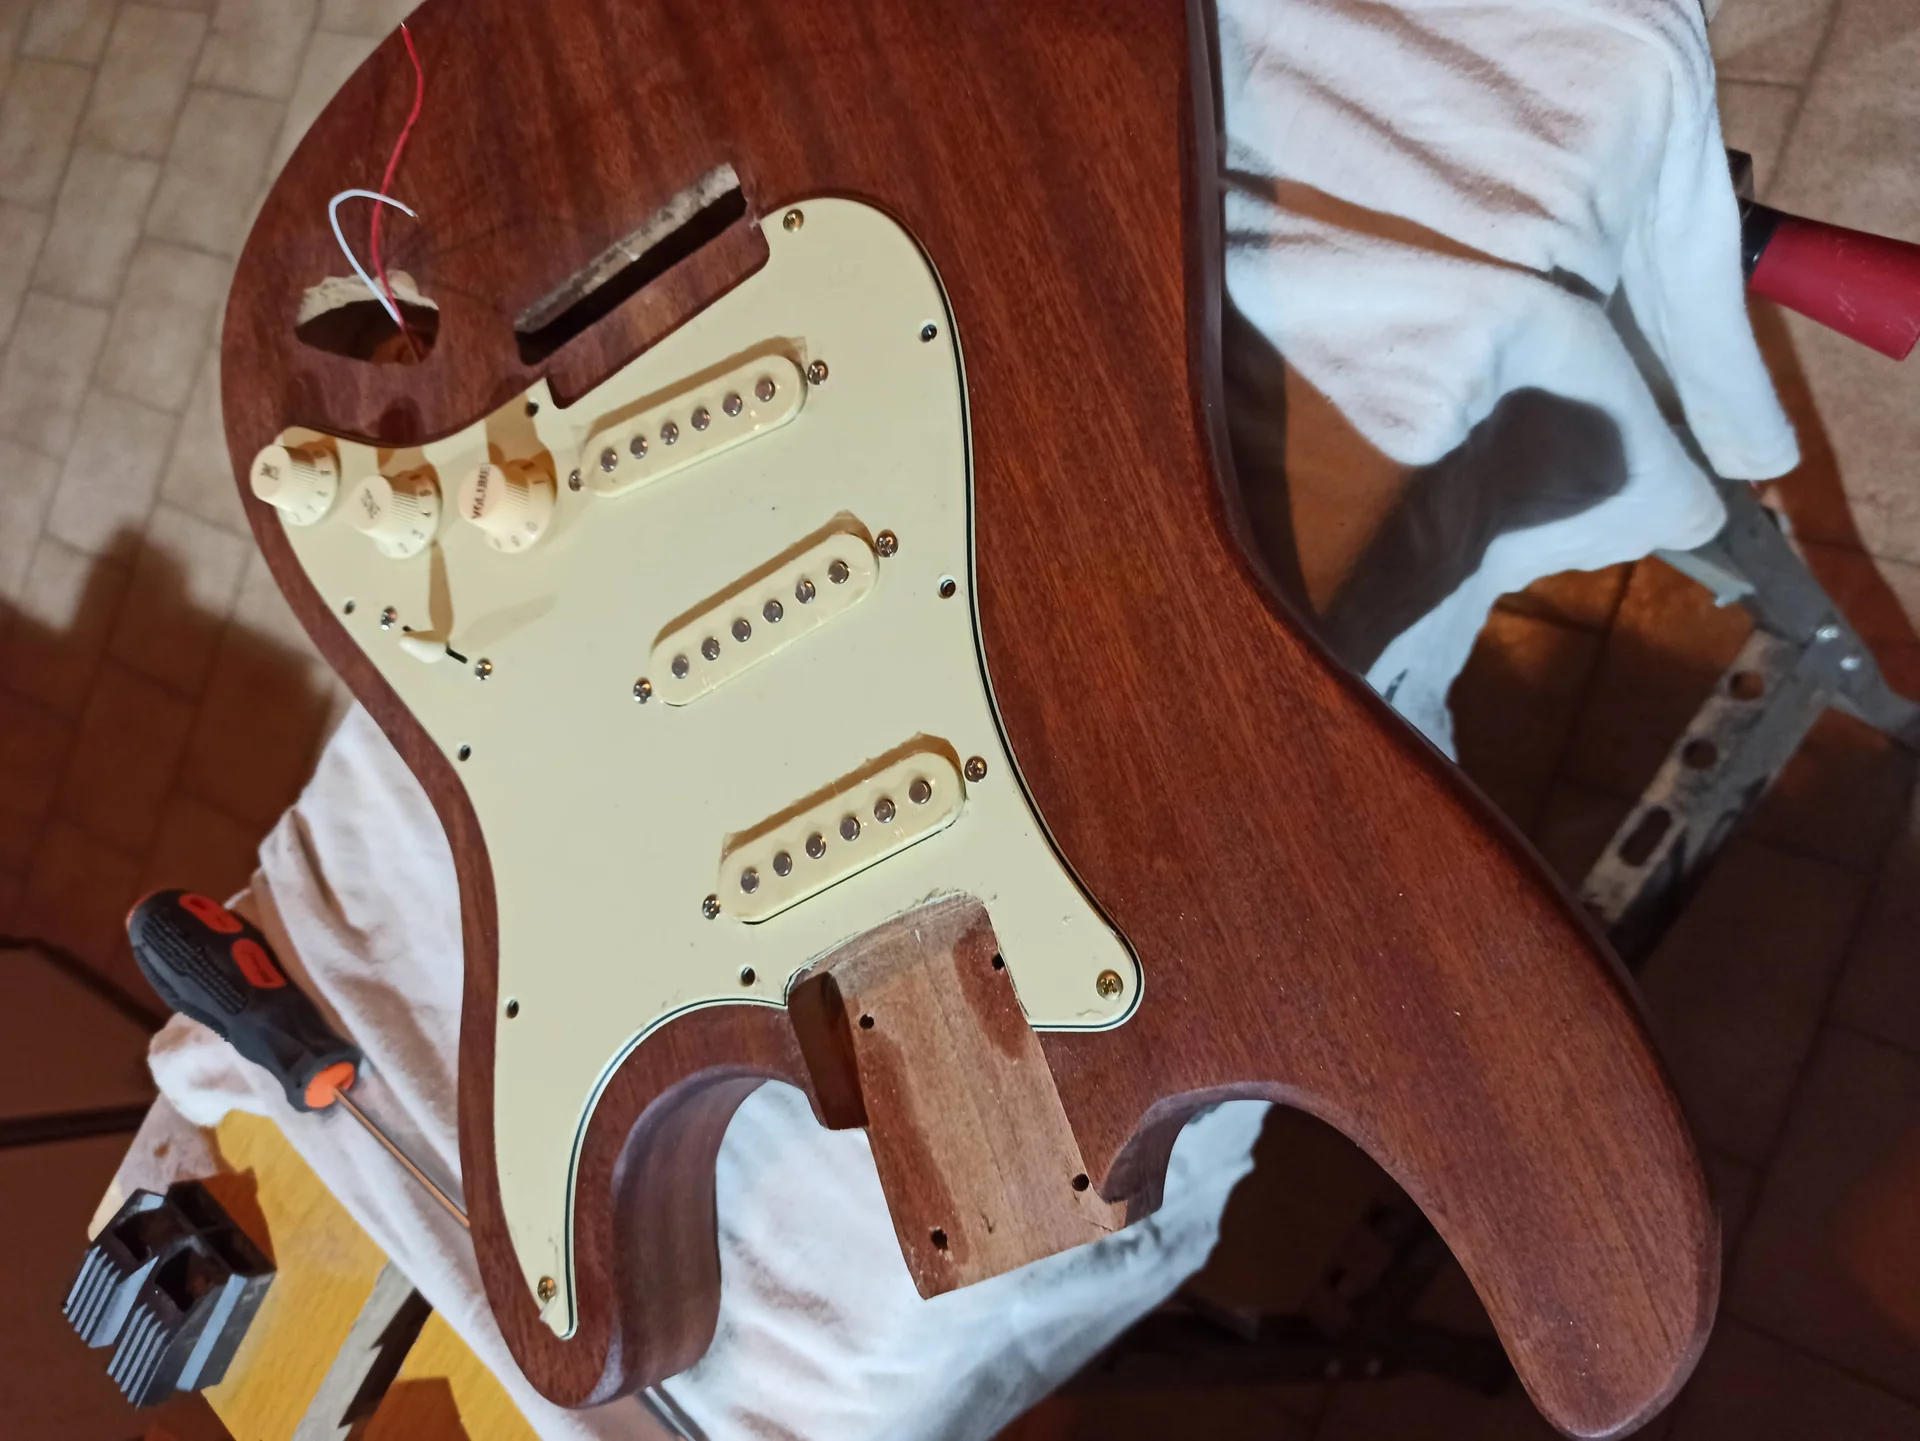

Ok, you have your piece of wood (or the shaped body). Now things are getting serious. Don't rush. Every step requires calm and precision.
Body shaping (if starting from a board)
Advertising

Fender Tex Mex Strat Pickup Set, Single Coil, Alnico 5 Magnets, Reverse Wound, Enhanced Output Warm Tone, 3 Piece
See on Amazon

Routing for pickups, electronics, and neck pocket
This is the most delicate part for those who don't have a router. But it can be done.The neck pocket: As I said, this is critical. If you don't have a pre-made template, you can make one by printing the design and gluing it onto MDF, then cutting out the inside precisely.
“Dremel and jig” technique: Secure the neck pocket template to the body with clamps. Use a Dremel with a routing base and a straight bit. Set the depth gradually. Make light passes, removing a little material at a time. Frequently check the depth with a caliper. The bottom of the pocket must be flat and uniform.
“Drill and chisel” technique: This is more laborious but feasible. Drill along the inner perimeter of the neck pocket with a hand drill (with a wood bit) to remove most of the material. Then, with a sharp chisel, remove the remaining wood, working from the edges towards the center. Be extremely cautious not to damage the outer edges. Finish with files and sandpaper.
Advise: The depth of the neck pocket is fundamental for string action. It depends on the thickness of the neck and the height of the bridge. Generally, it is between 16 and 18 mm. Check the specifications of the neck you purchased. Cavities for pickups and electronics: Here too, templates are your best friends.
Pick-up: Trace the outline of the pickup on the body. Drill inside the outline with a drill to remove the bulk. Then use the Dremel with the routing base or a chisel to refine the edges. The depth must be sufficient to accommodate the pickup and its springs/screws.
Electronics (control cavity): Same principle. Trace the outline, drill, hollow out. The depth must be sufficient for potentiometers, switches, and wiring.
Wiring channels: You need to carve narrow channels to run the wires from the pickups to the control cavity, and from the control cavity to the output jack. You can do this with a Dremel or with a long, thin drill bit, drilling diagonally from one cavity to another. Practice on a scrap piece to understand the correct angle.
Drilling for bridge, neck, and jack
These drillings are crucial for alignment.n1. Bridge placement: This is the heart of intonation. Using your template or project measurements, mark the exact position of the bridge. The distance between the nut and the bridge saddle must be equal to the scale length. Check and recheck. Use a metal ruler and a caliper.For tremolo bridges: Mark and drill the posts or mounting screws.
For fixed bridges: Mark and drill the holes for the bushings or screws.n2. Neck holes: Place the neck in the neck pocket. Make sure it is perfectly centered and aligned. Use clamps to hold it still. With a hand drill, drill pilot holes through the neck holes and into the body. Use a drill bit slightly smaller than the screws you will use to attach the neck. Be careful not to drill too deep! Use a piece of adhesive tape on the drill bit to mark the maximum depth.n3. Jack hole: Mark the position and drill. Usually, it's a 3/8″ or 1/2″ (9.5mm or 12.7mm) hole.n4. Holes for pickguard, strap button, etc.: These are less critical, but mark them carefully.
Sanding and preparation for finishing
The finish is what will give your guitar its final look. And a good finish depends on impeccable sanding.n1. Coarse sanding: Start with 80 or 120 grit sandpaper to remove coarse machining marks. Always work with the grain of the wood.n2. Progressive sanding: Gradually move to finer grits: 180, 220, 320, 400. With each pass, make sure you have eliminated all marks from the previous grit. You can use a pencil to mark the wood and ensure you have removed all marks.n3. Details: Use wood blocks or abrasive sponges for curves and corners.n4. Cleaning: After each pass, thoroughly clean the dust with a slightly damp cloth or compressed air. A tip from Mimmo: Do not underestimate this step. A perfect finish does not exist on a poorly sanded body. Every scratch, every mark from the previous grit will show up once the paint or oil is applied. Shine a grazing light on the body: you will immediately see all the flaws.3. The finish: color, protection, and appearance
Finishing is an art in itself. Don't expect professional results on the first try, but with a little care, you can achieve a great look.Choosing the type of finish
Oil/Wax: The simplest and most forgiving. Boiled linseed oil, Danish oil, Tru-Oil. It penetrates the wood, protects it, and gives it a natural feel. It doesn't require spraying, only application in layers with a cloth. Ideal for beginners.Spray paint (aerosol can): More complex, requires a clean environment and good technique. You can use acrylic or nitrocellulose car paints. It requires multiple layers and a final polish.
Wood stain: To change the color of the wood before the actual finish. My experience: I tried all three. For the first guitar, I went with Tru-Oil. Simple, durable, and very forgiving of errors. You don't have to worry about drips or bubbles. After gaining some experience, I ventured into spray paint. I learned that humidity is the enemy of paint and that spray cans are not made to cover large surfaces, but with many light coats and the right distance, decent results can be achieved.
Finishing process (e.g., with Tru-Oil)
If you choose oil, the process is relatively simple:n1. Prepare the surface: Make sure the body is perfectly clean and dust-free after the last sanding pass (up to 400-600 grit).n2. First coat: Apply a small amount of Tru-Oil to a clean, lint-free cloth. Spread it evenly over the entire body, in a thin layer.n3. Let it dry: Wait 24 hours. The oil must polymerize.n4. Light sanding: After drying, lightly sand with very fine sandpaper (600-800 grit) or 0000 steel wool. This removes small imperfections and opens the wood pores for the next layer. Clean the dust.n5. Repeat: Apply another 5-10 coats of oil, lightly sanding between each coat. The more coats you apply, the deeper and shinier the finish will be.n6. Final polishing: After the last coat, let it dry for a few days. Then you can polish with a soft cloth and a bit of fine car polishing paste, if you want a brighter effect. If you use spray paint:n1. Primer: If the wood is porous or you want a uniform color, apply a spray primer.n2. Colored paint: Apply very thin and even coats, about 20-30 cm away. Let dry between coats (check can instructions). Better 10 thin coats than 2 thick ones full of runs.n3. Clear coat: For protection and shine, apply several coats of clear spray.n4. Treatment: Let the paint cure for several weeks (yes, weeks!) before sanding and polishing. Nitrocellulose takes a long time to fully harden. Then you can sand with very fine grits (from 1000 to 3000) and polish with abrasive and polishing pastes. Pay attention to timing: Finishing is a long process. Don't rush. Each layer must dry thoroughly, otherwise you will have adhesion problems or a dull finish.“Patience is the virtue of luthiers. And also of those who build guitars in their garage.” – Mimmo
4. Final assembly and wiring: the sound takes shape
Done with the finish? Great! Now your DIY guitar is really taking shape. This is the most rewarding moment, when the pieces come together and the magic begins.Neck assembly
Place the neck in the neck pocket. Make sure it is secure and there is no lateral play. If you drilled precisely beforehand, the screws should go in without problems. Use the specific screws for neck attachment (usually 4, sometimes 3 or 5). Screw them in by hand, alternating them, until the neck is secure. Do not overtighten, you could strip the wood.Hardware installation
1. Mechanics: Insert the tuners into the headstock holes. Secure them with washers and nuts on the front side, and screws on the back side (if provided). Make sure they are correctly aligned.n2. Bridge: Place the bridge on the body. If it's a tremolo, insert the posts or screw in the screws. If it's a hardtail, screw in the screws. Double-check that it is straight and aligned.n3. Strap button: Screw the strap buttons (the buttons for the strap) into the correct positions on the body.n4. Pick-up: Insert the pickups into their routs. Secure them with screws and springs, but do not tighten completely yet. We will adjust the height later.Electronics wiring
This is the part that scares many, but in reality, it's quite simple if you follow a diagram.n1. The diagram: Find the wiring diagram online for the pickup and control configuration you have chosen (e.g., “Stratocaster wiring diagram”, “Telecaster wiring diagram”). There are hundreds of diagrams available, even on the Seymour Duncan or DiMarzio websites.n2. The tools: You will need a soldering iron (30-40W is sufficient), good quality solder (with flux core), wire cutters, wire strippers.n3. The process: Ground everything: This is the secret to avoiding background noise. All grounds (black or uninsulated wires) must be connected to each other and to the ground of the output jack. Also include the bridge (usually a wire that goes from the control cavity ground to under the bridge).Connect the pickups: Each pickup has at least two wires (signal and ground). Humbuckers have 4 plus the ground. Follow the diagram: the signal goes to the switch or the volume potentiometer. The ground goes to the general ground.
Connect potentiometers and switches: Follow the diagram carefully. Potentiometers have 3 terminals: one for input, one for output, one for ground (or tone pot). The switch routes the pickup signals.
Capacitors: Tone capacitors go between the “output” terminal of the tone potentiometer and ground.
Output jack: It has two terminals: tip (signal) and sleeve (ground). The final signal of all the electronics goes to the tip, the general ground goes to the sleeve. Common problems: Buzzes: Most likely it's a ground problem. Recheck all ground solders. Make sure the bridge is connected to ground.
No sound: Check that the jack is soldered correctly. Check that the pickup wires are connected.
Weak/distorted sound: It could be a pickup wired in reverse (phase), or a problem with a potentiometer or capacitor.
Mimmo's trick: Before soldering permanently, assemble the components on the bench, connect them with alligator clips, and test the circuit with a multimeter for continuity. Or, if you have a small amplifier, you can touch the terminals with a screwdriver to hear if the pickups make noise. This saves you a lot of unnecessary soldering and desoldering.
Shielding: To reduce noise, you can shield the pickup and electronics cavities with conductive paint or copper/aluminum tape. Make sure the shield is connected to ground.
The pickguard
If your guitar has a pickguard, install it after wiring everything. Many pickguards already have holes for the potentiometers and the switch. Attach the pickguard to the body with the appropriate screws.5. The final setup: intonation and playability
Your guitar is assembled and wired. Now comes the part that transforms it from a nice piece of wood into a musical instrument. The setup.String installation
Put on the strings. Thread them through the tuners and wind them carefully. Don't cut the excess string too soon. Tune it and let it rest for a few hours, or even a day. The strings will settle, and the neck will get used to the tension.Truss rod adjustment
The truss rod is the soul of the neck. It serves to adjust the "curvature" of the neck.n1. Check the curvature: Hold down the sixth string at the first fret and the last fret (or where the neck joins the body). Check the space between the string and the top of the fret halfway (around the 7th/8th fret). There should be a small gap, like the thickness of a sheet of paper or a little more.n2. Rule: If the neck is too straight (the strings buzz on the first frets), loosen the truss rod (turning counter-clockwise).If the neck is too curved (action too high on the middle frets), tighten the truss rod (turning clockwise).
Attention: Only make a quarter turn at a time and wait a few minutes before rechecking. The wood takes time to respond. Never force it. If you feel excessive resistance, stop. You could break the truss rod.
To learn more about truss rod adjustment and other setup aspects, I recommend checking out our section dedicated to guitar modification and setup, where you will find more detailed guides.
String height (action)
The action is the height of the strings from the fretboard. It depends a lot on your playing style.n1. Bridge height: Adjust the bridge saddles (or tremolo posts) to raise or lower the strings. Start with a slightly higher action and gradually lower it until you feel that the strings do not buzz on the frets.n2. Nut height: If the strings are too high at the first fret, you might need to slightly file the nut grooves. This is a delicate job: file a little at a time and check often. It's easier to remove than to add!Intonation
This is fundamental for making the guitar sound in tune across the entire fretboard.n1. Metronome and tuner: Tune the sixth string (low E) open.n2. Check the 12th fret: Press the sixth string at the 12th fret and pluck it. Compare the sound with the natural harmonic of the 12th fret.n3. Adjust the saddle: If the 12th fret sounds waning compared to the harmonic (lower), move the saddle after you (towards the handle).If the 12th fret sounds growing compared to the harmonic (higher), move the saddle backwards (towards the bridge).n4. Repeat for all strings: Tune, check the 12th fret, adjust the saddle.
Pickup height
Adjust the pickup height by screwing or unscrewing the screws on the sides.Too close: The magnetic field can “pull” the strings, causing a distorted sound and reduced sustain (a phenomenon called “strato-itis” for single coils).
Too far: The sound will be weak and lacking attack.
**Adjust to
See also
Download the Luthier Survival Kit
Free PDF with checklist, problem-cause table and project card template.
 English
  Italiano
Stuck on your build?
If you ran into the same problem or have a question, drop it in the comments. I read and reply to every one.
Write a comment