

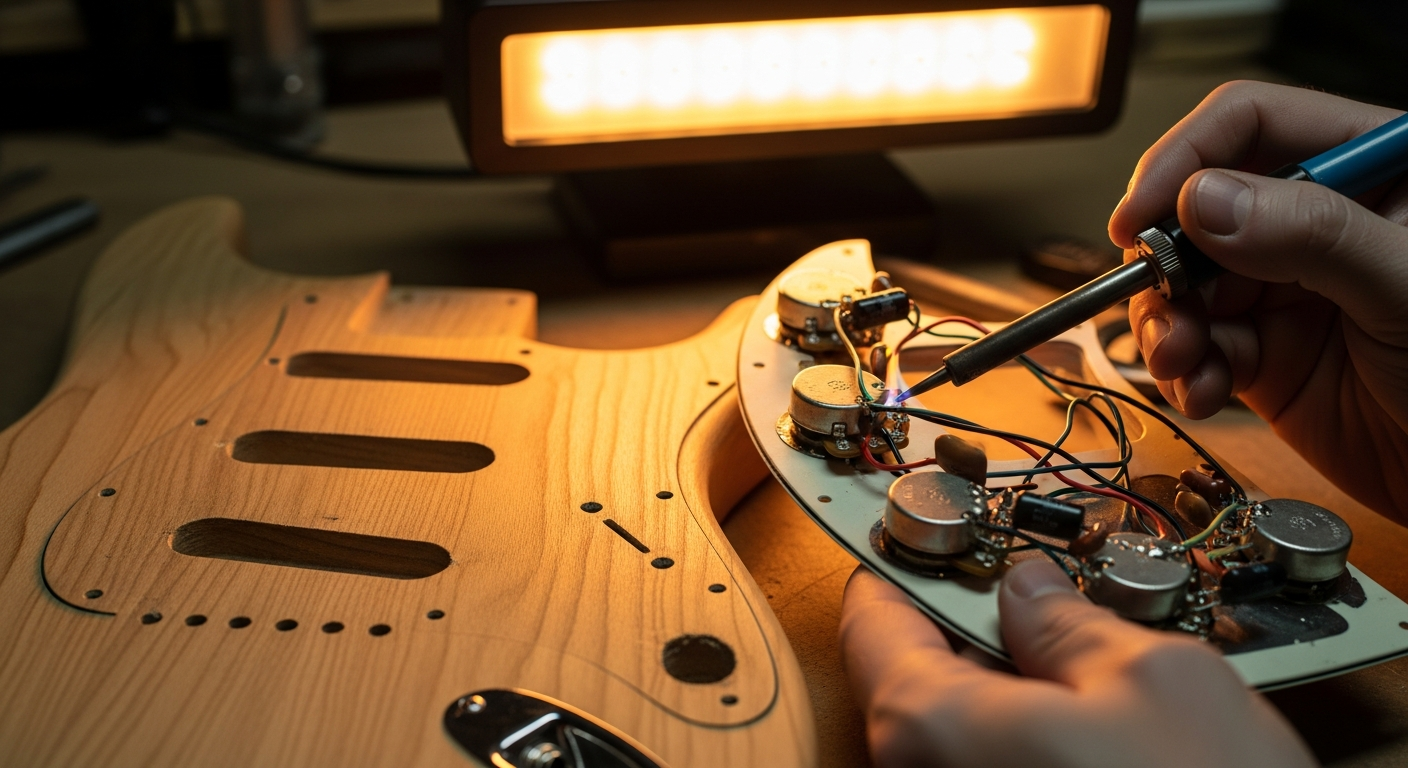
Electric guitar service: 7 common faults and solutions
I still remember the first time I heard that hum. It wasn't a desired feedback, or an interesting sound; it was a dull, annoying noise that covered everything else. I was there, with my newly assembled guitar, convinced I had made a masterpiece, and instead… a sonic disaster. The temptation was strong: give up everything, take it to a real luthier, or worse, put it away. But then I thought: “Hey, if I built it, I can also figure out what's wrong”. The truth è that almost all the problems a guitar electric can have are solvable with a little patience, the right tools, and above all, the willingness to get your hands dirty. I'm not a professional luthier, I've always said that. I'm someone who in the garage has assembled, disassembled, soldered and desoldered, broken components and learned the lesson. And the nice thing è that every time I solved a fault, I learned something new. This article è not an untouchable bible, but a kind of garage notebook. Those where you tell yourself “ok, if this happens, I'll check here”. I've put together the seven most common problems I've encountered myself, or read about on forums and enthusiast groups, and for each one I'll give you a tip on how to deal with it. The goal? To give you the confidence to try and solve your guitar's problems without fear. Because if I succeeded, you can do it too.
1. No Sound or Intermittent Sound: The Unexpected Silence
Imagine the scene: you plug the guitar into the amp, turn it on, put your hand on the string… and nothing. Or, the sound comes and goes, interrupting right at the best moment. This è one of the most frustrating problems, but often, fortunately, also one of the simplest to diagnose and solve. The key è to proceed by exclusion.
Symptoms
The guitar è completely mute, produces no sound, or the sound appears and disappears unpredictably. Sometimes, the volume drops drastically for no apparent reason, or you hear a “pop” or a “crackle” when the sound reactivates.
Diagnosis: Where did the signal break?
Your guitar's signal è a fragile path that can be interrupted at several points. The first thing to do è to rule out the most trivial causes. I've seen people go crazy for hours before realizing the problem was the cable. I'm not kidding, it happened to me too.
- Faulty jack cable: It è the number one cause. A worn cable, with broken internal solders or bent connectors, will not pass the signal.
- Loose or dirty guitar input jack: The jack where you insert the cable can loosen, or its internal contacts can oxidize, preventing good contact.
- Cold or broken solders: Inside the electronic cavity, a weak solder can give way, detaching a wire from a potentiometer, a pickup or the switch.
- Faulty pickup switch or potentiometer: Wear or oxidation can compromise the functioning of these components, causing interruptions.
Solutions: Restore the Sound Flow
Let's tackle the problem step by step, from the simplest to the most complex, to avoid unnecessarily disassembling half the guitar.
- Test the cable: Try with a different cable, one you are sure works. If the guitar starts playing again, you've found the culprit.
- Check the input jack: Make sure the outer nut of the jack è tightly secured. If it è loose, the jack could rotate and the internal wires could rub and break. You can also try spraying some contact cleaner (specific for electronics, like DeoxIT) inside the jack and inserting and removing the cable several times to clean the contacts.
- Open the electronic cavity: Remove the back plate (or front, depending on the model) that covers the electronics. Carefully, take a look at the solders. Look for detached wires or solders that appear dull and lumpy (a sign of a “cold solder”) instead of shiny and smooth. If you find a detached wire, you can resolder it. If you don't have a soldering iron or don't know how to use it, this è the time to learn or ask for help from someone more experienced. A multimeter can help you test the continuity of the circuit.
- Check switches and potentiometers: If you suspect the problem è in one of these components, try spraying contact cleaner directly inside them (if accessible) and operate them several times. If the problem persists, the component may need to be replaced.
Warning: Working on electronics requires a minimum of caution. Make sure to disconnect the guitar from the amplifier and power supply before opening the cavities. Avoid touching wires with greasy or sweaty hands and be careful not to create short circuits.
2. Hums and Background Noise (Hum/Buzz): When the Guitar Talks Too Much


How many times have I happened to hear an annoying hum that crept into the clean sound, ruining the atmosphere. The “hum” or “buzz” are almost inevitable travel companions for an electric guitarist, but understanding their cause can transform a sonic nightmare into a small, solvable inconvenience.
Symptoms
A constant low-frequency hum (hum, typical of 50/60 Hz of alternating current) or a sharper and variable noise (buzz) that manifests when the guitar is connected. Often, the noise worsens when moving away from the amplifier, or when touching the guitar (the noise decreases). In some cases, the noise varies depending on the position in the room.
Diagnosis: A World of Interferences
The world is full of electromagnetic fields, and your guitar is a perfect antenna. Pickups, especially single coils, are very susceptible to these interferences. But it's not always their fault.
- Grounding problems: The most common cause. If the guitar circuit is not properly grounded, it can pick up noise. Sometimes, the problem is in the house's electrical system, not in the guitar.
- Electromagnetic interference (EMI): Wi-Fi routers, computer monitors, fluorescent lights, transformers, dimmers, even electrical cables running through walls can generate noise.
- Single coil pickup: By their nature, single coils are more prone to picking up noise than humbuckers, which are designed to “cancel” hum.
- Poor or unshielded wiring: Improperly shielded wires or poorly made solders can act as antennas for noise.
Solutions: Silence the Background Noise
Here too, let's start with the simplest and least invasive solutions.
- Check the environment: Try playing in another room or, if possible, in another building. If the noise disappears, the problem is probably in the environment (electrical system, nearby electronic devices).
- Power cable and sockets: Make sure the amplifier is connected to a well-grounded outlet. Avoid cheap power strips or excessively long extension cords.
- Check the guitar's grounding: Open the electronic cavity and make sure that all metal components (bridge, tuners, potentiometers, jack) are connected to the ground circuit. Often, the problem is a solder joint that has come loose from the volume potentiometer or the input jack. A multimeter set to “continuity” is your best friend here.
- Cavity shielding: If the pickups are single coil and the noise è excessive, you can shield the electronic cavities with conductive copper or aluminum adhesive tape, or with conductive paint. This creates a “Faraday cage” that blocks interference. It’s a bit longer job, but it can work wonders. Remember to ground the shielding.
- Quality cables: Good quality, well-shielded jack cables can significantly reduce noise.
Warning: Never attempt to repair grounding problems in your home’s electrical system unless you are a qualified electrician. It is dangerous and illegal. For shielding, make sure that the foil or paint does not come into contact with the “hot” terminals of the components, to avoid short circuits.
Enjoying this article? Subscribe to the newsletter: one email a week, zero spam.
Subscribe →3. Fret Buzz: When the Strings Rattle
The “fret buzz” is that annoying metallic sound you hear when a string hits the next frets while vibrating. It’s a bit like fingernails on a chalkboard for a guitarist’s ears. It can ruin a solo or make a chord almost inaudible.
Symptoms
A sound of “whipping” or “metallic ticking” that accompanies the note, especially when playing with a firmer touch. It can manifest only on some strings, in some positions on the neck, or more generally across the entire fretboard.
Diagnosis: A Delicate Balance
Fret buzz is almost always a symptom of an imbalance in the guitar's setup. The guitar is a precision machine and each component influences the other.
- Action too low: If the strings are too close to the frets, there's less space to vibrate freely.
- Neck not straight (incorrect relief): The neck must have a slight curvature (relief) to allow the strings to vibrate without touching the frets. If it's too straight or even slightly bowed backward, the strings buzz.
- Uneven or worn frets: Some frets may be higher than others, or have grooves due to wear, causing unwanted string contact.
- Capo too low: If the nut slots are too deep, the strings will be too close to the first frets, causing buzz in that area.
Solutions: Finding the Right Compromise
Solving fret buzz means finding the right balance between action, neck relief, and intonation. It's an art that requires patience.
- Check the neck relief:
- Place a capo on the first fret.
- Press the sixth string at the last fret.
- Mid-neck (around the 7th-9th fret), you should see a small gap between the string and the top of the fret. This is the relief.
- Use a feeler gauge: the ideal gap is about 0.20-0.30 mm (or 0.008-0.012 inches).
- If the gap is too small or absent, the neck is too straight. Loosen the truss rod (by turning counter-clockwise). If it's too large, tighten (clockwise). Make small adjustments (a quarter turn at a time) and wait a few minutes before checking again.
- Raise the action at the bridge: If the buzz persists after adjusting the neck, slightly raise the height of the bridge saddles. Use the appropriate hex key or screwdriver. Raise it a little at a time and test the guitar. The goal is to eliminate the buzz while keeping the action as low and comfortable as possible.
- Check the nut height: If the buzz is only on the first frets, the nut might be too low. It's a less common but possible problem. In this case, you might need to replace the nut or, temporarily, place a shim under it.
Warning: Adjusting the truss rod requires delicacy. Never force it. If you feel excessive resistance, stop. A broken truss rod is an expensive repair. If the problem is uneven frets, fret leveling is an operation that requires specific tools and a lot of experience; in that case, it's best to consult a luthier.
4. Intonation Problems: When the Guitar Is Never Perfect
The guitar is tuned open, but when you play a chord at the seventh fret, it sounds out of tune. Or worse, a solo on the twelfth fret is completely off. This is an intonation problem, and it can be incredibly frustrating, because even if the strings are tuned, the music sounds bad.
Symptoms
The guitar is tuned when the strings are played open, but the notes on subsequent frets are sharp or flat. This is particularly evident when comparing the 12th fret harmonic with the note pressed at the 12th fret, or when playing complex chords that require precision.
Diagnosis: The Physics of the Vibrating String
Intonation depends on the effective length of the vibrating string, which changes when you press the frets. Adjusting intonation means compensating for small variations.
- Poorly adjusted bridge saddles: Each bridge saddle must be positioned to ensure the correct length for each string, from the saddle to the nut.
- Old or worn strings: Old strings lose their uniformity of mass and tension, compromising intonation.
- Suboptimal nut height: If the nut is too high, the strings will be “pulled” excessively when pressed on the first frets, making the notes sharp.
- Neck not straight (incorrect relief): As with fret buzz, an incorrectly adjusted neck can affect intonation.
- Worn keys: Very worn or uneven frets can alter the string's contact point, affecting intonation.
Solutions: The Pursuit of Perfection (or almost)
Perfect intonation is a compromise, but we can get very close. This is a setup you should do regularly, especially after a significant string change or a tuning change.
- Change the strings: Make sure you have new strings of the same brand and gauge you usually use. Old or dirty strings will not intonate correctly.
- Adjust the intonation of the saddles:
- Tune the guitar with a precise chromatic tuner.
- Play the sixth string (low E) open and check the tuning.
- Now play the same string pressed at the 12th fret.
- Compare the two readings. If the note at the 12th fret is sharp, the string length is too short. You will need to move the saddle away from the neck (generally, by turning the screw clockwise for Tune-o-matic or Stratocaster/Telecaster type bridges).
- If the note at the 12th fret is flat, the string length is too long. You will need to move the saddle closer to the neck (generally, by turning the screw counter-clockwise).
- Make small adjustments, retune the open string, and recheck. Repeat for all six strings.
- Check the nut and neck relief: These are preliminary steps to intonation setup. If they are not correct, intonation will always be a problem.
Warning: The tuner must be very precise. A smartphone tuner can be fine, but a quality pedal tuner or a bench tuner is preferable. The intonation of an electric guitar will never be absolutely perfect across the entire fretboard due to physical laws. The goal is to make it as musical as possible.
5. Noisy/Malfunctioning Potentiometers or Switches: The Crackle That Disturbs
You know that annoying “scratching” sound you hear when you turn the volume or tone, or that sound that comes and goes when you change pickups? These are signs that your guitar's potentiometers or switches need a bit of electric guitar maintenance.
Symptoms
“Scratching”, “crackling” or “hissing” noises when operating the potentiometers (volume, tone) or pickup switches. Sometimes, the sound cuts out completely in certain positions, or the potentiometer no longer performs its function (e.g., the tone doesn't change).
Diagnosis: Dust and Oxidation
Most of the time, these problems are caused by the accumulation of dirt, dust, and oxidation inside the electronic components, which prevent clean electrical contact.
- Dirty or oxidized contacts: Inside potentiometers and switches, there are conductive tracks and wipers that move over them. Dirt and oxidation can interrupt contact.
- Mechanical wear: Over time, components can wear out mechanically, but this is less common than the oxidation problem.
- Loose solder joints: Less frequently, the problem could be a solder joint that has come loose on the potentiometer or switch itself.
Solutions: A Splash of Life
The most common and often effective solution is a deep cleaning with a specific spray. Do not use WD-40 or other generic lubricants, as they could worsen the situation or damage the components.
- Use a contact cleaner spray specific for electronics: My favorite is DeoxIT D5, but there are other valid ones. These sprays are designed to clean and lubricate electrical contacts without leaving harmful residues.
- Apply the spray:
- Open the guitar's electronic cavity (always unplugged!).
- Locate the noisy potentiometers or switches.
- For potentiometers, look for the small hole or slot at the base (near the solder terminals). Spray a small amount of spray directly there.
- For switches (especially toggle switches), spray the cleaner inside the mechanism, moving the lever to help it penetrate.
- Operate repeatedly: After spraying, turn the potentiometers from one end to the other about twenty times. Operate the switch several times. This helps the spray to distribute and remove dirt.
- Head: Let it dry for a few minutes, then close the guitar and test it. In most cases, the noise will be gone or significantly reduced.
- Replacement: If the problem persists after cleaning, it’s probable that the component is worn or irreparably damaged. In this case, you will need to replace it. This operation requires a soldering iron and some manual skill.
Warning: Don't overdo it with the spray. A small amount is sufficient. Make sure the product is specific for electronic contacts and is non-flammable before use, or at least that you are in a well-ventilated environment. Do not touch the circuits with the spray while the guitar is connected.
Build better. Subscribe for updates, guides and free ebooks.
Subscribe →6. Tuning Instability: When the Strings Don't Keep Up
there's nothing more annoying than a guitar that constantly goes out of tune. Maybe you've just tuned it, play a couple of chords and voilà, the sixth string is already flat. This problem, which falls within the scope of theelectric guitar maintenance, has multiple causes, but almost all of them can be resolved with a little attention to setup and maintenance.
Symptoms
The guitar loses its tuning very quickly, even after being precisely tuned. The strings go out of tune unpredictably, sometimes after a bending, other times simply by playing.
Diagnosis: The Critical Points of Tension
The tuning stability depends on how well the string tension is maintained along their entire path, from the anchoring point at the bridge to the machine heads. Every point of friction or yielding can cause instability.
- Old or poorly installed strings: Old strings lose elasticity and intonation. If the strings have not been mounted correctly (for example, with too many windings or without locking at the tuners), they can slip.
- Poor quality or loose mechanics: Cheap mechanisms can have gears that do not hold their position. Even good quality mechanisms can loosen.
- Capo that “pinches” the strings: If the nut slots are too narrow, deep, or not well lubricated, the strings can get stuck and then suddenly release after a bend or vibrato, causing a detuning.
- Poorly adjusted floating bridge (if present): Tremolo bridges (especially Floyd Rose) are complex and require a precise setup to maintain tuning.
- Excessive friction: Even the string trees on the headstock can create friction and block the strings.
Solutions: A Frictionless Path
The goal is to minimize friction and maximize stability along the rope path.
- Change and string the strings well:
- Use new and good quality strings.
- When you mount them, avoid too many wraps on the tun tuners (2-3 are sufficient for most tuners).
- Learn the technique of “locking” the strings to the tuners, which prevents them from slipping. There are many online tutorials that show how to do it.
- Lubricate the nut:
- Remove the strings from the nut grooves.
- Apply a small quantity of specific nut lubricant (such as powdered graphite, a PTFE-based lubricant, or a guitar-specific product like Nut Sauce) in each slot. Graphite from a soft pencil (2B or 4B) works surprisingly well.
- Put the strings back on and tune. This reduces friction and allows the strings to slide freely.
- Tighten the mechanics: Check the nuts and screws of the tuners. Make sure they are well tightened, but without overdoing it so as not to damage the wood of the headstock.
- Adjust the floating bridge: If you have a floating bridge, make sure it is balanced correctly. This is a vast topic and would deserve a separate article, but in summary, the springs in the rear cavity must balance the string tension so that the bridge is parallel to the guitar body.
- Consider an upgrade: If your mechanics are of poor quality and the problem persists, you might want to consider a upgrade to self-locking or better quality tuners. Also a nut made of more slippery material (like TUSQ or bone) can make a big difference.
External Link: To delve deeper into string installation techniques, an excellent resource is D’Addario's guide on how to string a guitar, which offers detailed advice for different types of tuners: How to String a Guitar – D’Addario.
Warning: When lubricating the nut, do not use generic oils or greases that can attract dirt or damage the nut material. Use specific products or graphite.
7. Pickups Too High/Low or Unbalanced: Finding the Sound's Sweet Spot
The height of the pickups is one of those parameters that many overlook, but which has a huge impact on the sound of the guitar. It's not just a matter of volume, but also of dynamics, sustain, and clarity. A poorly positioned pickup can make the sound "squashed" or, on the contrary, weak and lacking body.
Symptoms
Volume too low or too high compared to other pickups or the amplifier. Sound lacking dynamics, “squashed” or too aggressive. Lack of sustain. Volume imbalance between the strings (for example, basses too loud compared to trebles, or vice versa). Sometimes, a “fake” or almost “flanger” sound if the pickup is too close to the strings (magnetic pull).
Diagnosis: The Magnetic Interaction
Pickups work by detecting string vibrations through their magnetic fields. The distance between the strings and the pickup magnets is crucial for this interaction.
- Overall height not optimal: If the pickup is too far, the signal will be weak and lack body. If it is too close, the magnet “pulls” the string, reducing sustain and causing intonation problems and a compressed sound.
- Incorrect inclination: Pickups have two screws, one for the bass side and one for the treble side. If they are not adjusted correctly, the volume and tonal response between the strings can be unbalanced.
- Individual pole height (if adjustable): Some pickups allow you to adjust the height of individual magnetic poles, which can help balance the volume of each string.
Solutions: The Art of Listening
Adjusting pickup height is an operation that requires ear and patience. There are no fixed rules, only recommended starting points. The “sweet spot” is subjective.
- Start from manufacturer's specifications (if available): Many pickup manufacturers (e.g. Seymour Duncan, DiMarzio) provide recommended heights for their models. This is an excellent starting point. Typically, the distance is measured from the bottom of the string (pressed at the last fret) to the top of the pickup.
- Adjust the overall height:
- Press the last string (high E) at the last fret.
- Measure the distance between the string and the top of the bridge pickup. Start with about 2-3 mm for humbuckers, 3-4 mm for single coils.
- Repeat for the sixth string (low E).
- Adjust the neck pickup with slightly greater distances, as it naturally has a higher output.
- Use a screwdriver to screw or unscrew the side screws of the pickup.
- Adjust the tilt to balance the strings:
- Play a chord and listen for the balance between the bass and treble.
- If the bass is too strong, slightly lower the bass side of the pickup. If the treble is too weak, raise the treble side.
- Experiment with small adjustments, playing and listening carefully each time.
- Try with the amplifier: Adjustments should always be made with the guitar connected to the amplifier, at the volume you usually play, because perception changes.
Warning: If a pickup is too close to the strings, it can cause a phenomenon called “magnetic pull”. This can reduce sustain, make notes less clear, and even alter intonation, especially on higher frets. Listen carefully for these symptoms.
Conclusions: The Satisfaction of DIY
Having come this far, I hope you have understood one fundamental thing: your guitar is not an untouchable black box. It is an instrument, and like any instrument, it needs maintenance and, sometimes, small repairs. Addressing these seven common faults will not only save you money and time but will also give you a much deeper understanding of how your instrument works. Every time I solved a problem in the garage, I felt immense satisfaction, that of having understood, of having gotten my hands dirty, and of having brought something back to life. Don't be afraid to make mistakes: error is the best teacher. Start with the simplest problems, invest in a few basic tools, and, above all, listen to your guitar. With a little practice, you will become the best technician your guitar could ever wish for.
FAQ
When è it time to take the guitar to a luthier?
You should consider taking your guitar to a professional luthier when problems are complex and require specific tools (such as fret leveling, complete neck replacement, or structural body repairs) or if, after attempting the simpler solutions, you do not feel confident proceeding further. It is better to prevent greater damage than to attempt repairs beyond your own skills.
What è the most useful tool for DIY electric guitar maintenance?
For electronics, a good multimeter is indispensable for diagnosing continuity and grounding problems, along with a quality soldering iron and a set of screwdrivers. For mechanical setup, a string action ruler, a set of hex keys (for truss rod and bridge saddles), and a precise chromatic tuner are crucial tools for keeping your guitar in perfect shape.
Download the Luthier Survival Kit
Free PDF with checklist, problem-cause table and project card template.
 English
  Italiano
Stuck on your build?
If you ran into the same problem or have a question, drop it in the comments. I read and reply to every one.
Write a comment