

[BOX AFFILIAZIONE]
Electric Guitar Repair: 4 Problems and Solutions
When it comes to electric guitars, there's always a moment when something doesn't sound as it should. That extra hum, a buzzing string, the intonation going its own way. I know it well, I've been through it myself, not once, not twice, but dozens of times. I'm not a luthier with a century-old workshop, but someone who learned by disassembling, soldering, and swearing in the garage. And if I succeeded, with patience and a few tools, you can too.
In this article, I want to talk to you about four common problems you face when you have to repair an electric guitar, and how I learned to solve them. I won't give you a magic formula, but a path, often made of trials, that will lead you to fix your six-string. We'll look at practical solutions, the reasons behind certain steps, and, most importantly, mistakes to avoid. Because, believe me, mistakes are the best part of learning.
It's not just about screwing or soldering. It's about understanding how your instrument works, making it yours, and not being afraid to get your hands on it. Many get stuck thinking they'll cause irreparable damage. I'll tell you one thing: most damage can be fixed, or at worst, the part can be replaced. And the satisfaction of having done it yourself, that's priceless. So, grab your screwdriver, soldering iron, and desire to learn. Let's go!
The Infernal Hum: When the Guitar Talks (Badly) to You
Ah, the hum. That annoying presence that manifests as a sonic shadow every time you turn on the amplifier. It's not a sound you expect from a well-functioning electric guitar, but it's an incredibly common problem. Often it's the first sign that something is wrong and can turn a practice session into a battle against noise.
Hum Symptoms
The signs are quite clear. You might hear a constant background hum, a deep 'hum,' which increases in volume when you increase the gain on the amplifier. Sometimes, this noise lessens or disappears when you touch the strings or other metal parts of the guitar, such as the bridge or potentiometers. Or, it can be a sharper hum, almost a 'buzz,' which changes depending on your position relative to the amplifier or lights.
Probable Causes
The causes can be manifold, from the most trivial to the most complex. Let's start with the most common:
- Grounding problems: This is the number one culprit. A disconnected or poorly soldered ground wire can create a ground loop or simply prevent electromagnetic noise from being properly discharged.
- Low-quality or damaged cables: A faulty jack cable can introduce noise. Even internal guitar cables, if not well shielded or damaged, can be the cause.
- Insufficient shielding: The internal cavities of the guitar (electronics and pickups) should be shielded to protect the circuits from electromagnetic interference (EMI) and radio frequency interference (RFI). Many inexpensive guitars, or even some mid-range ones, have weak or non-existent shielding.
- Single-coil pickups: By their nature, single-coils are more susceptible to 50/60Hz hum (the so-called “hum”) than humbuckers, which are specifically designed to cancel it. If your hum is a classic hum, it might simply be a characteristic of your pickups.
- Electrical system problems: Sometimes the problem is not the guitar, but the environment. Ungrounded power outlets, old systems, or nearby electrical equipment (refrigerators, neon lights, monitors) can radiate interference.
- Faulty components: A faulty potentiometer, capacitor, or even a pickup can generate noise.
Diagnosis: Finding the Real Culprit
Before picking up the soldering iron, we need to isolate the problem. This is the most important step for repairing the electric guitar without creating new problems.
- Change cable and amplifier: It seems trivial, but it's the first thing to do. Connect the guitar to another amplifier with a different cable that you are sure works well. If the hum disappears, the problem is not the guitar.
- Try different power outlets: If the hum persists, try connecting the amplifier to different outlets, perhaps in different rooms or even in another house, if possible. A grounding tester for outlets can be useful to check the system.
- Internal visual inspection: Open the electronics compartment (usually on the back of the guitar). With the guitar disconnected from the amplifier, carefully observe all cables. Look for cold solders (dull, lumpy, not shiny and smooth), broken or disconnected wires, or loose contacts.
- The “touch” test: With the guitar connected to the amplifier (low volume!), touch the various metal parts inside the electronics compartment with a metal screwdriver: the potentiometer casings, the output jack, the pickup bodies. If touching one of these parts drastically reduces the hum, you have found a problematic ground point.
- Multimeter to the rescue: For the more adventurous, a multimeter set to “continuity” (usually beeps) is your best friend. Check continuity between all grounds: the potentiometer bodies, the output jack, the bridge ground, the pickup grounds. Everything that should be grounded must be.
Hum Solutions (from least to most invasive)
Once the problem is identified, we can act. Remember: always disconnect the guitar from the amplifier before working on the electronics!
- Improving shielding: If the guitar has poor shielding, you can add copper tape or conductive paint (shielding paint) in the pickup and electronics cavities. It's a meticulous but effective job. Make sure all pieces of tape are in contact with each other and with the general ground. I spent an entire afternoon shielding my Stratocaster that was buzzing like a beehive, and the result was incredible.
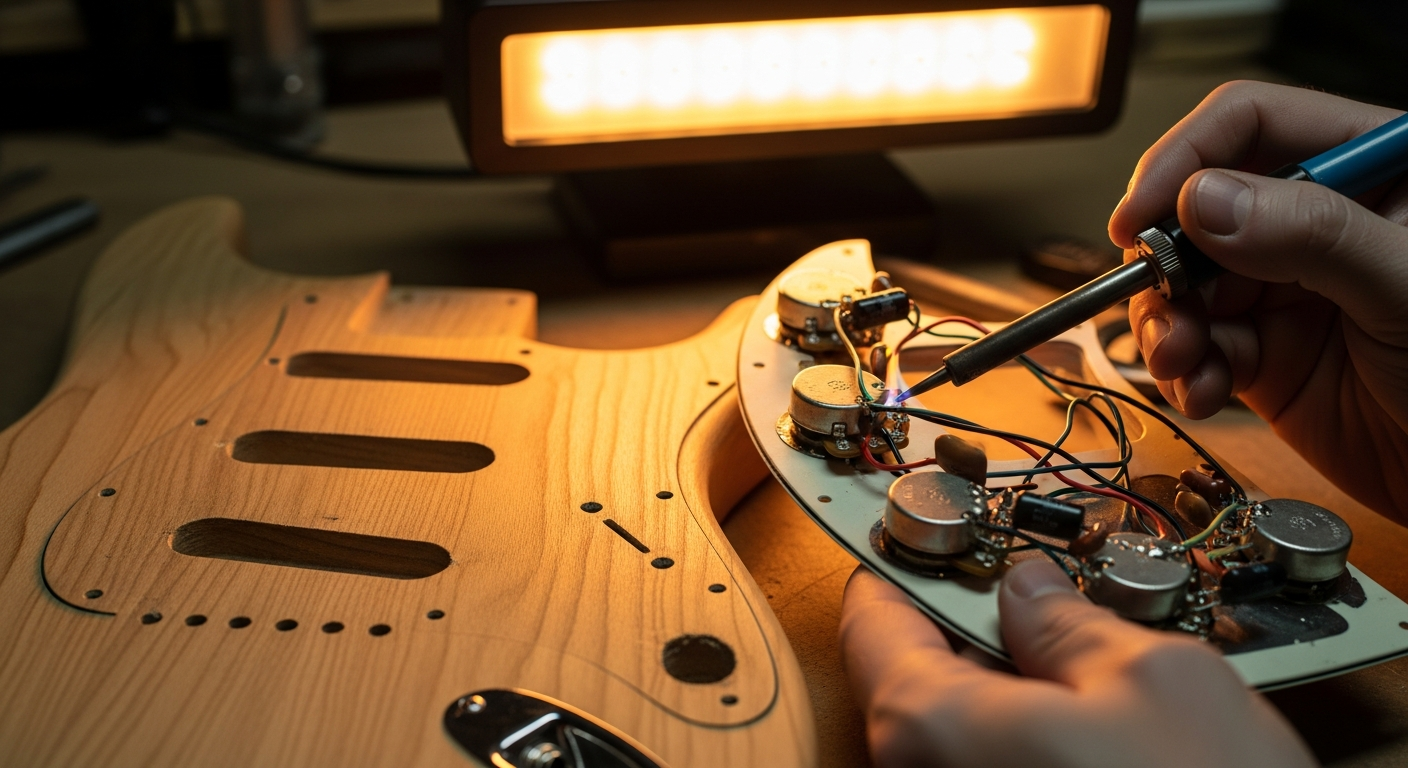
- Redo the welds: If you have found cold solders or loose cables, it's time to pick up the soldering iron. Heat the existing solder and add some fresh tin to create a solid and shiny joint. If a cable is disconnected, strip it slightly and solder it to the correct point.
- Check and tighten the output jack: Often the jack nut loosens, causing intermittent contact or an unstable ground. Tighten it well. If the jack is old or oxidized, you might consider replacing it.
- Replace faulty components: If a potentiometer or a pickup selector (switch) is the source of the noise, the best solution is to replace it. These are relatively inexpensive components and not too difficult to install.
- Bridge grounding: Make sure the ground wire from the bridge is well connected to the electronics. In many guitars, this wire passes through the body and connects to the back of a potentiometer or the jack.
A good starting point to understand how your guitar should be wired is to consult the wiring diagrams provided by the pickup or guitar manufacturers themselves. Many diagrams are available online and will give you a valuable reference.
Strings Fret Buzz: A Fizz That Isn’t Rock’
‘'Roll
That annoying “fizz” or “buzz” you hear when you play the strings, as if they are rubbing against something. It's not the vibrato you want, but a sign that there's a mechanical problem in your guitar's setup. This can ruin sustain, intonation, and, in general, the playing experience.
Symptoms of Fret Buzz
Fretting strings manifest in various ways:
- A metallic, muted sound when you play an open string.
- A “buzz” when you press a string on a certain fret, but not on others.
- The string hits subsequent frets, producing an unwanted noise before the sound fully develops.
- In severe cases, some notes might not sound at all, or have no sustain.
Probable Causes
Here too, the causes are diverse and often interconnected:
- Action too low: The strings are too close to the frets, especially in the middle of the fretboard.
- Lack of “neck relief”: The neck is too straight or even slightly curved backward (back-bow), not leaving enough space for the strings to vibrate freely.
- Nut too low: If the open strings buzz, the groove in the nut might be too deep, causing the string to touch the first fret.
- Uneven Frets: Some frets might be higher than others (high frets), or unevenly worn (worn frets), creating unwanted contact points.
- Bridge saddles too low: Similar to low action, but specific to bridge adjustment.
- Old or wrong gauge strings: Very worn strings can vibrate abnormally. A change in gauge without proper setup can cause problems.
Diagnosis: Where Does the String Rub?
To address the problem, we need to understand exactly where and why the strings are rubbing.
- Check the neck relief: Press a string (e.g., the sixth) at the first fret and then with the other hand at the fret where the neck joins the body (usually the 17th or 19th). Halfway between these two points (around the 7th or 8th fret), you should see a small gap between the string and the top of the fret. It should be about the thickness of a piece of paper or a thin pick (about 0.20-0.30 mm). If there's no space or the string touches the fret, the neck is too straight or in back-bow.
- Check the nut height: Press a string at the third fret. With the string pressed, check the space between the string and the top of the first fret. There should be a very small gap. If the string touches the first fret or the gap is too large, the nut is too low or too high.
- Check the frets: Use a “fret rocker” (a specific tool, or a small straight metal ruler) to check for frets that are higher than others. Place the rocker on three adjacent frets and check for any play. Move it along the entire fretboard.
- Check the general action: Use an action ruler (String Action Gauge) to measure the string height at the 12° fret. Typical values vary, but a good starting point è 1.5-2.0 mm for thinner strings and 2.0-2.5 mm for thicker ones.
Solutions for Fret Buzz (from least to most invasive)
Let's address the problem in order of complexity, starting with the simplest and least risky solutions.
- Adjust the truss rod (Neck Relief): If the neck è too straight or in back-bow, you will need to loosen the truss rod (turn counter-clockwise) to add some concavity (relief). If the neck has too much concavity and the action è too high, you will need to tighten it (turn clockwise). Always make very small turns (a quarter turn at a time) and wait a few minutes before checking the effect. This è one of the most delicate adjustments, but fundamental for the setup.
- Raise the action at the bridge: If the problem è generally too low action, you can raise the bridge saddles. Most bridges have small screws that adjust the height of each saddle or the entire bridge. Raise gradually, checking for the absence of fret buzz.
- Check and adjust the nut: If the open strings buzz, è likely that the nut è too low. A temporary solution can be to insert a small shim under the nut (for example, a piece of paper or plastic). The definitive solution è to replace it with a new one and work it with specific files (nut files) to obtain the correct height. This è precision work and, if you are unsure, you might want to entrust it to a professional.
- Fret Leveling and Crowning: If the problem è due to uneven or worn frets, the most effective solution è fret leveling and crowning. This implies filing the frets to make them all the same height and then re-rounding them (crowning). È an advanced job that requires specific tools (fret file, fret crowning file, abrasive stones) and a lot of practice. If you don't feel comfortable, a luthier è the best choice.
- String change: Don't underestimate the importance of fresh strings. Old and oxidized strings may not vibrate correctly and contribute to the problem.
I remember the first time I got my hands on the truss rod of my old Yamaha Pacifica. I was afraid of breaking the neck! But with caution and small adjustments, I discovered that it è a logical and rewarding process. Patience è the key to successfully repairing your electric guitar and achieving an optimal setup.
Wobbly Intonation: It's Not Your Ear, It's the Guitar
You've tuned your guitar precisely, but when you play a chord at the seventh fret, does it sound a bit out of tune? Or are the notes at the 12° fret slightly sharp or flat compared to the harmonic? This è a classic intonation problem, and it's not a defect in your ear, but in the instrument's mechanics.
Symptoms of Wobbly Intonation
The signs are clear for anyone with even a minimally trained ear:
- The guitar è tuned open, but the notes played on the higher frets (after the 5° or 7° fret) are out of tune.
- A barre chord sounds bad, even if the open strings are perfect.
- The note played at the 12° fret does not perfectly match the natural harmonic played above the same fret.
- The guitar sounds “right” only in some positions, but “wrong” in others.
Probable Causes
Intonation è one of the finest adjustments and depends on several factors:
- Incorrect bridge saddle position: This è the most common cause. Each string needs a slightly different vibrating length to intonate correctly across the entire fretboard.
- Old or wrong gauge strings: Worn strings lose their uniformity and can intonate poorly. Even a change in string gauge without re-setup will cause problems.
- Incorrect neck relief: A neck that è too straight or too concave can affect the string height and, consequently, the intonation.
- Capo too high: If the nut è too high, the strings are pulled excessively when you press the first fret, causing a slight increase in intonation in the first positions.
- Worn or irregular keys: Very worn or not perfectly leveled frets can cause the string not to stop exactly where it should, distorting the intonation.
Diagnosis: Listen and Measure
To intonate correctly, you will need a precision tuner. A strobe tuner (even a phone app can simulate it) è ideal for its accuracy.
- Tune the guitar perfectly: Use your tuner to tune all open strings as precisely as possible.
- Check the intonation string by string:
- Play the natural harmonic on the string at the 12° fret (lightly touch the string above the 12° fret and pluck). Check the tuner.
- Now press the string at the 12° fret and play the note. Check the tuner.
- Analyze the result:
- If the note at the 12° fret (fretted) è growing (sharp) compared to the harmonic and the open string, the bridge saddle è too close to the neck.
- If the note at the 12° fret (fretted) è waning (flat) compared to the harmonic and the open string, the bridge saddle è too far from the neck.
- Check the neck relief and the nut: As described in the previous section, checking these two elements è fundamental because they influence the string height and, consequently, their intonation.
Solutions for Wobbly Intonation (from least to most invasive)
Intonation adjustment è an iterative process, requiring patience and precision.
- Change the strings: Always start with new strings. It's the simplest way to eliminate a potential cause of unstable intonation.
- Adjust the neck relief: Make sure the neck has the correct curvature. A correct basic setup è fundamental before intonating.
- Adjust the nut height: If the nut è too high, the first positions will be out of tune. If it's too low, you'll have fret buzz problems. Make sure it's at the correct height.
- Adjust the bridge saddles:
- For each string, use a small screwdriver (or hex key, depending on the bridge) to move the saddle forward or backward.
- If the note at the 12° fret is sharp, move the saddle backwards (moving it away from the neck) to increase the string length.
- If the note at the 12° fret is flat, move the saddle after you (moving it closer to the neck) to decrease the string length.
- Make small adjustments, tune the open string, and then recheck the note at the 12° fret. Repeat until it’s perfect.
Remember that 100% perfect intonation on a guitar with straight frets is almost impossible due to the imperfections of equal temperament. The goal is to achieve the best possible compromise. Once you have intonated your guitar, test it by playing chords and scales in different positions to ensure the result is satisfactory.
An excellent resource to delve deeper into guitar setup, including intonation, can be found on the Fender website, with detailed guides for many of their models. You can consult a general guide here.
Mute or Intermittent Electronics: The Silence That Frightens
There’s nothing worse than plugging in your guitar and hearing… nothing. Or even worse, a sound that comes and goes, with crackles and hisses every time you touch a potentiometer or move the cable. These electronic problems can seem intimidating, but they are often simpler to diagnose and repair on an electric guitar than you might think.
Symptoms of Mute or Intermittent Electronics
The signs are unmistakable:
- Total absence of sound.
- Sound that cuts out and comes back, perhaps by moving the jack cable or touching the controls.
- Crackles or “scratching” noises when turning the volume or tone potentiometers.
- The pickup selector (toggle switch) produces noise or does not change the sound correctly.
- Very low volume or weak and thin sound.
Probable Causes
A guitar’s electronics are relatively simple, but there are several points where things can go wrong:
- Faulty or loose jack cable: The most common cause, the cable is often underestimated.
- Loose or oxidized guitar output jack: The jack nut loosens, or the internal contacts oxidize or bend.
- Cold or broken solders: Vibrations and use can cause a solder joint to break, especially on potentiometers, the selector, or the jack.
- Dirty or faulty potentiometers: Dust and dirt can accumulate inside the potentiometers, causing crackles or interruptions.
- Dirty or broken pickup selector (switch): Similar to potentiometers, switch contacts can get dirty or wear out.
- Faulty pickup or broken pickup cable: Less common, but possible.
- Broken internal cable: A wire inside the electronics cavity might have broken.
Diagnosis: Follow the Signal Flow
Diagnosis is all about isolation. We need to understand where the signal breaks.
- Cable and amplifier test: First of all, try the guitar with another cable and another amplifier that you are sure work. If the problem disappears, it’s not the guitar.
- “Wiggle test”: With the guitar connected to the amplifier (low volume!), gently wiggle the cable at the guitar’s jack input. If the sound comes and goes, the jack is the number one suspect. Then, move the potentiometer knobs and the pickup selector. If you hear crackles or interruptions, the problem is there.
- Visual inspection: Open the electronics compartment. Look for disconnected wires, dull or broken solder joints. Pay attention to the thin wires going to the pickups.
- Continuity test with a multimeter:
- Output jack: Connect the multimeter (set to continuity) between the tip of the jack and the central pin of the jack (signal) and between the ring of the jack and the outer pin (ground). There should be continuity.
- Potentiometers: Check continuity between the potentiometer terminals and the points where they should be soldered.
- Pick-up: You can test the resistance of the pickups by measuring between the hot wire and the pickup’s ground. Each pickup has a specific resistance value (e.g., 6k-16k Ohm). If there is no continuity or the value is abnormal (very high or zero), the pickup might be faulty.
- Switches: Check continuity between the switch pins in different positions.
Solutions for Mute or Intermittent Electronics (from least to most invasive)
Once the weak point is identified, the repair can be quite straightforward.
- Tighten the output jack nut: Very often, simply tightening the nut that holds the jack in place solves intermittent problems.
- Clean the potentiometers and the switch: Use a specific spray for electrical contacts (like DeoxIT D5) and spray it inside the potentiometer or switch, then move the knobs or switch back and forth several times. This can remove dirt and oxidation that cause crackles.
- Redo the welds: If you have identified cold solder joints or disconnected wires, resolder them. Make sure you have a fine-tipped soldering iron and good quality solder. Patience is essential for a clean and solid solder joint.
- Replace the output jack: If the jack is damaged, internally oxidized, or the contacts are bent, the best solution is to replace it. They are inexpensive and relatively easy to wire.
- Replace potentiometers or switches: If cleaning doesn't solve the problem or the component is physically damaged, replace it. Remember to note down or take photos of how the old components are wired before removing them. If you then feel like going beyond simple repair and really want to customize your instrument, check out our guide on how to modify your guitar, there you will find ideas for electronic upgrades.
- Repair or replace pickups: This is the most drastic step. If a pickup is silent and the multimeter confirms an open circuit (no continuity), it could be a broken internal wire (sometimes repairable) or the pickup itself is faulty. Replacement is often the simplest route, but it's a bigger investment.
It happened to me to go on stage and, halfway through the first song, the guitar started to cut out intermittently. Panic! Fortunately, it was just a loose jack cable and a quick solder backstage solved the problem. Experiences like these teach you the importance of good maintenance and knowing how to repairing your electric guitar on the fly.
Essential Tools and Tips for Your Garage Workshop
To tackle these and other problems on your electric guitar, you don't need an expensive luthier's workshop. All it takes is a set of essential tools and a bit of organization. I've learned that having the right tool at the right time saves you frustration and allows you to work with precision.
Indispensable Tools
Here is a list of tools I have accumulated over time and consider essential for anyone who wants to start working on their own guitar:
- Screwdriver set: Phillips (crosshead) and flathead of various sizes. Make sure you have small ones for pickup and bridge screws.
- Allen key set: For the truss rod and bridge saddles (especially on Floyd Rose or Tune-o-matic type bridges).
- Digital multimeter: Essential for testing continuity, resistance, and voltage. You can find good ones at affordable prices.
- Soldering iron: A 30-40W model with a fine tip is perfect for guitar electronics. Don't forget good quality solder (with rosin core, lead-free if you prefer) and a desoldering pump.
- Pliers and wire cutters: Long-nose pliers, wire cutters for cutting wires and strings, and a wire stripper.
- String Action Gauge: A small metal ruler with millimeter and inch markings for measuring string height, pickup height, and overall action.
- Feeler Gauges: To accurately measure neck relief.
- Capo: Useful for checking neck relief.
- Precision Electronic Tuner: A strobe tuner (even via app) is ideal for intonation.
- Microfiber cloths and cleaning products: To keep the guitar clean and the fretboard hydrated (lemon oil for rosewood or ebony fretboards).
- Masking tape: To protect the guitar's finish during work.
- Adjustable desk lamp: Good lighting is essential to see details well, especially inside cavities.
- Set of small files: Useful for filing the nut or small imperfections.
DIY Garage Tips
In addition to tools, there are some habits and mindsets that will help you achieve the best results and avoid costly mistakes.
- Patience is a virtue: Don't rush. Every adjustment takes time to settle and be verified. Make small adjustments and check the results.
- Document everything: Before disassembling anything, take clear photos from different angles. This will save you when you need to reassemble parts or rewire.
- Start small: Don't disassemble the entire guitar at the first problem. Follow the diagnosis step by step and tackle the simplest problem first.
- Safety first: When using the soldering iron, be careful with your fingers and eyes. Work in a well-ventilated area. Always unplug the guitar from the amplifier and power before opening cavities.
- Learn from online resources: YouTube, specialized forums, blogs like ours are full of detailed tutorials and guides. Don't be afraid to ask for advice.
- Don't be afraid to make mistakes: I've soldered wires backward, overtightened a truss rod (fortunately without serious damage), scratched the paint. It happens to everyone. Every mistake is a valuable lesson. Most damage is repairable or parts are replaceable.
- Keep it tidy: A clean and organized workbench will save you time and prevent you from losing screws or small components.
Remember, the goal is not just repairing your electric guitar, but also to understand it better, make it more yours, and enjoy the satisfaction of having fine-tuned it with your own hands.
We've explored four of the most common problems that can afflict your electric guitar and provided you with a practical approach to diagnose and solve them. From annoying hum to buzzing strings, from wavering intonation to electronic silences, every challenge is an opportunity to learn and grow as a guitarist and as a 'maintainer' of your instrument.
You don't have to be a professional to achieve excellent results. All it takes is curiosity, patience, and the willingness to get your hands dirty. Every time you solve a problem, you not only save money on a luthier, but you also build a deeper bond with your guitar. I invite you to start, even with the simplest repairs. The satisfaction of a perfect sound, achieved through your own work, is priceless. So, don't wait, your guitar is calling you!
FAQ: Frequently Asked Questions about Electric Guitar Repair
How long does it take to learn how to do these repairs?
The basics for simple diagnoses and repairs (like basic soldering, action and intonation adjustments) can be learned in a few hours of study and practice. Mastery and speed will come with experience, but after just a few weeks, you'll feel comfortable with the most common problems.
Do I need to buy expensive tools to start?
Absolutely not. You can start with a set of screwdrivers, an inexpensive multimeter, a mid-range soldering iron, and an action ruler. More specific tools like a fret rocker or nut files can be added later, as your skills and needs grow.
Download the Luthier Survival Kit
Free PDF with checklist, problem-cause table and project card template.
 English
  Italiano
Stuck on your build?
If you ran into the same problem or have a question, drop it in the comments. I read and reply to every one.
Write a comment