

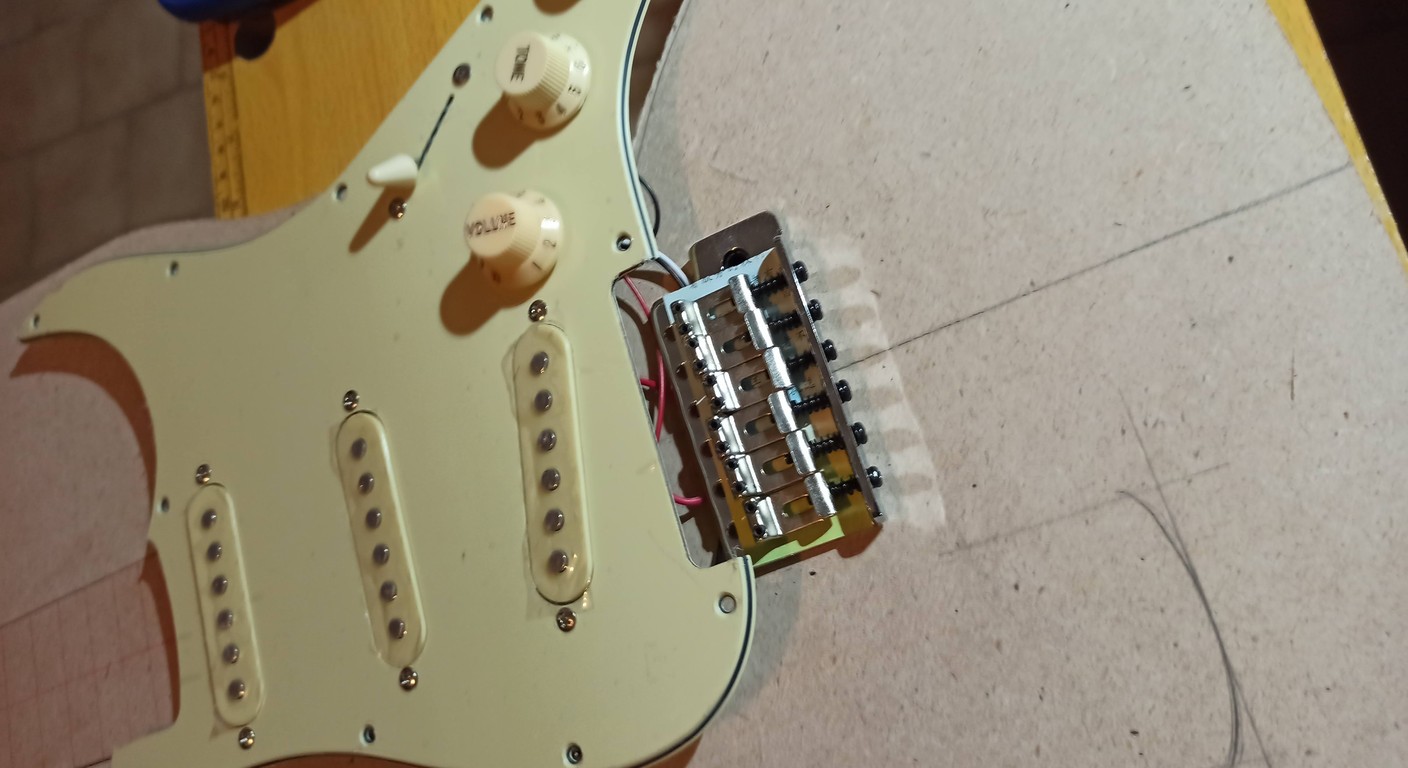
Tune the electric guitar bridge: 3 steps.
How many times have you tuned your guitar, played a chord in first position, and everything seemed fine, then moved to the twelfth fret and... disaster? Those notes sound out of tune, the harmonic doesn't match the fretted note. You're not alone, trust me. It's happened to me countless times, and every time I felt like throwing the guitar in the dumpster.The problem, almost always, is not your fault or that of your ears, but of the adjusting the intonation of the guitar bridge electric. It's one of those operations that many hobbyists dread. It seems complex, almost like a voodoo ritual, but in reality, with a little patience and the right tools, it's something you can easily do in your garage. And no, you don't need to be a luthier with years of experience. You just need to understand the Why behind the as.
I remember the first time I tried it. I had just finished assembling my first "Frankenstein" Stratocaster, a mix of salvaged parts and a body I'd poorly painted. I was thrilled, I tuned it, played the first open chords, and felt like a rock god. Then I moved up a tuning peg, and that was it. The notes were out of phase, a mess that not even a five-euro tuner would have tolerated. I spent hours twisting the screws randomly, convinced I was only making things worse. In the end, I had to start over, but that time I tried to figure it out. And now, after years of trial and error, and some success, I can tell you it's one of the most rewarding adjustments you'll ever learn. It changes your life, and more importantly, the sound of your guitar.
In this article, I will guide you through the essential steps for a proper electric guitar bridge tuning, breaking them down into three clear and precise steps. We'll look at what you need, why each step is important, and what common mistakes to avoid. Get ready to breathe new life into your guitar.
1. Preparation: The Secret of Every Good Intonation
[GRIGLIA FOTO]Okay, the guitar is ready. The strings are new and stable, the neck has the right curvature, and the action is set the way you like it. Now comes the part that interests us most: the’electric guitar bridge tuning actual, that is, the adjustment of the saddles.
The principle is simple: a string tuned at the twelfth fret should sound exactly one octave higher than the open string. If this isn't the case, the string's vibrating length is incorrect and needs to be adjusted.
The Step-by-Step Process for Intonation:
[BOX AFFILIAZIONE]1. Tuning of Precision
Tune your guitar with your precision chromatic tuner. Make sure each string is perfectly pitched, centered on the green notch. This is your starting point. Don't proceed if a string is even slightly flat or sharp.
2. Checking the Octave (Twelfth Fret)
Take one string at a time. Let's start with the low E.
- Play the open low E string and check that it is perfectly tuned.
- Now, gently press the low E string at the twelfth fret.
- Check the tuner reading.
Here are three possible scenarios:
- Scenario A: The note at the twelfth fret is flat (lower than the open note). This means the string is too long. You need to shorten it.
- Scenario B: The note at the twelfth fret is sharp (higher than the open note). This means the string is too short. You need to lengthen it.
- Scenario C: The note at the twelfth fret is perfectly in pitch with the open note. Congratulations, that string is in tune! Move on to the next one.
3. Adjusting the Saddle
Now that you know what to do, act on the saddle of the string you are tuning.
- If the note is flat (too low): Move the saddle after you (towards the neck) by tightening the adjustment screw. This shortens the vibrating length of the string.
- If the note is sharp (too high): Move the saddle backwards (towards the bridge) by unscrewing the adjustment screw. This lengthens the vibrating length of the string.
Remember: make small adjustments. A quarter turn of the screw can make a big difference. After each adjustment:
- Retune the open string.
- Check the note at the twelfth fret again.
Repeat these steps until the open string and the note at the twelfth fret (or the harmonic at the twelfth fret, which is even more precise) are perfectly identical on the tuner. The harmonic is often easier for the tuner to read because it doesn't have the interference of the fretting finger. To play the harmonic, lightly touch the string just above the twelfth fret without pressing it all the way down and pluck the string.
Do this process for all six strings. It's meticulous work, but it's the only way to achieve optimal results. The first time, it felt like it would never end, but I assure you, with practice after practice, it will become almost automatic.
Tip: The Use of the Harmonic
For greater precision, many luthiers (including me, these days) prefer to compare the note fretted at the twelfth fret with the natural harmonic at the twelfth fret. Play the harmonic, check that it's perfectly in tune, then play the note fretted at the twelfth fret. They should match.
Be aware of the different types of bridges:
The principle is the same for everyone, but the mechanism changes.
- Stratocaster/Telecaster bridges (Vintage or Modern): Each saddle has a screw that moves it back and forth. Easy to understand, but the screws can sometimes be difficult.
- Tune-o-matic (Gibson-style) bridges: The saddles are fixed, but they move back and forth. The screw is often on the back of the bridge. They're sometimes more cumbersome to adjust, but the concept is the same.
- Floating Tremolo Bridges (Floyd Rose): Here things get a little more complicated, because each adjustment can affect the entire system. To tune a Floyd Rose, you often have to loosen the string, move the saddle, tighten it, retune, and recheck. It's a longer process and requires even more patience. The basic principle, however, remains the same: tune open, check the twelfth fret, and adjust the vibrating length.
Don't be afraid of your bridge. If you have a fixed bridge, you're at an advantage. If you have a tremolo, take a few extra minutes and be even more methodical.
3. The Final Check: Refine and Verify


Why a Final Inspection?
Every time you adjust the tension of a string (by moving the saddle and retuning), it can slightly affect the tension of the others. It's like a domino effect, especially on tremolo bridges. Therefore, it's essential to do a general review.
Final Inspection Steps:
1. Retune the Entire Guitar
After tuning each string, retune the entire guitar. Check that each string is perfectly in pitch. Don't skip this step.
2. Check Your Intonations Once Again
Repeat the process at the twelfth fret for each string. Play the open string, then the twelfth fret. They should be identical. If a string is slightly off, make a very small adjustment to the saddle, then retune. the whole guitar and check again. This is where patience becomes your best friend. Sometimes, it's a tiny, almost imperceptible movement of the saddle.
3. Test the entire keyboard
Now, play the guitar. Don't just play open chords. Try chords in different positions, scales, and solos. Play single notes across the entire fretboard, from the first fret to the last. Listen carefully. Hear if there are any obvious out-of-tune notes. If the notes sound clean and in tune everywhere, you've done a great job.
One thing that often happened to me in the beginning was to focus too much on the twelfth fret and forget about the higher positions. Then, when I tried a chord like an F-sharp major at the ninth fret, it sounded like a disaster. So, test the guitar across its entire range.
4. Play and Let It Settle
Play the guitar for a while, even just 15-20 minutes. New strings need to settle under tension. Then, retune and recheck the intonation. Sometimes, after a few hours or the next day, you may need to make another small adjustment. This is normal. The wood moves, the strings stabilize. It's a dynamic process.
Common Mistakes to Avoid (and that I've made too):
- Rush: This isn't a rushed job. Take your time. Poor intonation will only lead to frustration.
- Inaccurate Tuner: An inaccurate tuner is worse than no tuner at all. Invest in a good one.
- Skip Preliminary Steps: Trying to tune with old strings, neck relief A bad or incorrect action is a waste of time. I've wasted hours like this.
- Do Not Retune After Any Adjustment: Every time you move a saddle, the string tension changes. You must open-tune before rechecking the twelfth fret.
- Adjustments Too Big: Make micromovements. It's easier to move forward and backward in small steps than to try to correct a big mistake.
- Ignore Bridge Type: As mentioned, a Floyd Rose has its own unique characteristics. Learn about your specific bridge. A good starting point is the manufacturer's manual or specialized forums like The Fretboard (English site, but full of resources).
When is the Intonation Not Perfect on the 100%?
Sometimes, no matter how hard you try, you may not be able to get a pitch absolutely perfect on Everything is fine single note on the keyboard. This can depend on several factors:
- Guitar Quality/Components: Cheap guitars or guitars with low-quality components (saddles, frets) may have construction tolerances that make perfection impossible.
- Key Wear: Worn or uneven keys can cause out-of-tune notes in specific places.
- Compromises: Sometimes, you have to find a compromise. Maybe you prefer open chords to be perfect, even if a note at the seventeenth fret is slightly off. It's a personal choice.
- Human Ear: Our ears are incredibly sensitive. Small imperfections (a few hundredths of a semitone) are often imperceptible in the context of a performance, but visible on a tuner.
The goal is to get intonation reasonably Good and consistent throughout the entire fretboard, so that your guitar sounds great and gives you satisfaction. Absolute perfection is a mirage, even for professional luthiers, unless you want to spend thousands of euros on precision instruments and radical modifications.
Conclusions: Your Guitar, Tuned by Your Hands
Here we are at the end of this journey in the’electric guitar bridge tuning. It looked like a monster, right? Instead, with a methodical approach and a little patience, you've seen that it's an operation within everyone's reach. Three steps: careful preparation, saddle adjustment, and a meticulous final check.Remember the importance of not skipping the preliminary steps: neck relief and action are the foundation. Without them, any attempt to tune the bridge will be futile. I fell for it, and wasted a lot of time and patience. Don't make the same mistake.
The satisfaction of playing a guitar that responds well, that sounds in tune in every position, is priceless. Not only will it improve your sound, but it will also make you a more aware and attentive musician to the details of your instrument. And the best part is that you made it yourself, with your own hands, in your garage. That's the true essence of DIY, right?
Take your time, follow the steps, and don't be afraid to make mistakes. Every mistake is an opportunity to learn something new. If I could do it, with my hands covered in solder and glue, you can do it too. Put these tips into practice and enjoy your finally in-tune guitar. Your ear (and the ears of others) will thank you!
See also
Oltre la Semplice Regolazione: Quando il Problema è Più Profondo
Abbiamo parlato di come accordare il ponte della chitarra elettrica e di come affinare la regolazione. Ma cosa succede se, nonostante tutti i tuoi sforzi e la pazienza di un monaco zen, la chitarra continua a suonare stonata in alcuni punti della tastiera? Non ti preoccupare, non sei matto e non hai rotto nulla. Semplicemente, l’intonazione del ponte, per quanto cruciale, è solo una tessera del puzzle che compone la configurazione perfetta di una chitarra.
Ci sono fattori strutturali o di usura che possono impedire una intonazione ottimale, a prescindere da quanto precisamente regoli le sellette. Ho imparato queste cose sulla mia pelle, dopo aver passato ore a girare viti convinto che il problema fosse sempre lì, quando invece era altrove. Vediamo quali sono le cause più comuni e come riconoscerle.
Manico “Twisted” o Tasti Irregolari
Questo è uno dei problemi più subdoli. Un manico che non è perfettamente dritto (non parlo del neck relief, ma di una torsione laterale) o dei tasti che non sono stati livellati correttamente, possono rendere impossibile ottenere un’intonazione perfetta su tutta la tastiera. Ho avuto una vecchia chitarra acustica che, per quanto la intonassi, al settimo tasto suonava sempre un po’ ‘off’. Alla fine, ho scoperto che il manico aveva una leggera torsione.
Come diagnosticarlo: Suona note singole lungo tutta la corda, dal primo all’ultimo tasto, e controlla l’accordatore. Se vedi stonature consistenti in punti specifici o che variano in modo strano, potrebbe essere un campanello d’allarme. Per i tasti, passa una riga metallica dritta su tre tasti alla volta: se la riga “balla” o c’è luce sotto un tasto centrale, hai un problema di livellamento. Questa è un’operazione che, se non hai esperienza, è meglio far fare a un liutaio, perché richiede attrezzi specifici e una mano ferma.
La Qualità del Capotasto e delle Sellette
Il capotasto (nut) e le sellette (saddles) sono i due punti di appoggio della corda. Se sono di scarsa qualità, usurati, o le scanalature non sono tagliate correttamente, possono causare problemi di intonazione.
Un capotasto con scanalature troppo alte o troppo basse, o troppo strette per le corde, può impedire alla corda di vibrare liberamente o causare attrito, portando a stonature, specialmente nelle prime posizioni. Le sellette, se sono usurate o hanno delle bave, possono “pizzicare” la corda anziché lasciarla vibrare liberamente.
What to do: Controlla visivamente il capotasto e le sellette. Le scanalature dovrebbero essere lisce e della giusta dimensione per la corda. Se il capotasto è in plastica economica, un upgrade a uno in osso o TUSQ può fare miracoli non solo per l’intonazione, ma anche per il sustain. Anche per le sellette, se sono usurate, la sostituzione è un’opzione. Questa è una delle guitar modifications che a volte faccio per migliorare le prestazioni generali.
L’Influenza del Tiracorde e dell’Angolo delle Corde
Soprattutto sulle chitarre stile Fender con paletta piatta, i tiracorde (string trees) aiutano a mantenere il giusto angolo delle corde dopo il capotasto, aumentando la pressione verso il basso. Se i tiracorde sono assenti, posizionati male o pizzicano la corda, possono causare problemi di stabilità dell’accordatura e, di conseguenza, di intonazione.
Allo stesso modo, un angolo insufficiente delle corde sul capotasto o sulle sellette può portare a risonanze indesiderate e a una minore stabilità. Assicurati che le corde si muovano liberamente attraverso il capotasto e le sellette senza impuntamenti.
Pickup Troppo Alti: Un Nemico Silenzioso dell’Intonazione
on ci crederai, ma anche l’altezza dei pickup può influire sull’intonazione. Se i pickup sono troppo vicini alle corde, la loro attrazione magnetica può “tirare” la corda, alterandone la vibrazione e causando stonature, un fenomeno noto come “string pull”.
Come verificarlo: Prova ad abbassare leggermente i pickup (un giro o due delle viti di regolazione) e ricontrolla l’intonazione. Se noti un miglioramento, hai trovato il colpevole. Trova un buon equilibrio tra volume di uscita e intonazione.
Quando Rivolgersi a un Professionista
Se dopo aver provato tutte queste regolazioni e verifiche, la tua chitarra continua a non intonarsi correttamente, non esitare a portarla da un liutaio professionista. Non è un segno di debolezza, ma di intelligenza. Alcuni problemi, come la rettifica dei tasti o la riprofilatura del manico, richiedono attrezzi specifici e anni di esperienza. Un buon liutaio può diagnosticare e risolvere problemi che a noi hobbisti sfuggono, e ti restituirà uno strumento che suona come nuovo. Io stesso, quando mi trovo di fronte a un problema che supera le mie capacità nel garage, non ci penso due volte a chiedere aiuto.
Mantenere l’Intonazione nel Tempo: Piccoli Accorgimenti
Intonare la chitarra è un processo, non un evento. Le corde si usurano, il legno si muove con i cambiamenti di temperatura e umidità, e l’uso continuo può alterare leggermente le regolazioni. Ecco alcuni consigli per mantenere la tua chitarra intonata più a lungo.
Corde Fresche, Vita Migliore
Corde vecchie e ossidate non tengono l’intonazione e non suonano bene. Cambia le corde regolarmente. Non solo il suono migliorerà, ma anche la stabilità dell’accordatura e dell’intonazione. Corde nuove e ben assestate sono la base di ogni buona regolazione.
Stabilità Ambientale
I cambiamenti drastici di temperatura e umidità sono nemici giurati della stabilità della chitarra. Se possibile, cerca di tenere la tua chitarra in un ambiente con condizioni stabili. Un umidificatore o deumidificatore può fare la differenza, specialmente per chitarre con manici in legno sensibile.
Controlli Periodici
Fai un controllo dell’intonazione ogni volta che cambi le corde. E anche tra un cambio e l’altro, se senti che qualcosa non va, non aver paura di prendere l’accordatore e fare una verifica rapida. Piccoli aggiustamenti preventivi sono sempre meglio di grandi correzioni.
FAQ: Domande Frequenti sull’Intonazione del Ponte
È necessario intonare il ponte ogni volta che cambio le corde?
on necessariamente da zero, ma è fortemente consigliato fare un controllo completo dell’intonazione ogni volta che si montano corde nuove. Le corde nuove hanno bisogno di tempo per assestarsi e stabilizzarsi, e anche se usi sempre lo stesso tipo e calibro, potrebbero esserci leggere differenze che richiedono piccoli aggiustamenti alle sellette. È una buona pratica per assicurarsi che la chitarra suoni sempre al meglio.
Posso intonare la chitarra con un accordatore da smartphone?
Per una regolazione di base e per l’accordatura quotidiana, gli accordatori da smartphone possono essere sufficienti. Tuttavia, per un’intonazione di precisione del ponte, che richiede di rilevare differenze di pochi centesimi di semitono, è sempre meglio usare un accordatore cromatico di alta qualità, magari a pedale o da tavolo. Questi accordatori offrono una maggiore sensibilità e stabilità nella lettura, riducendo il rischio di errori e garantendo un risultato più accurato. Ho provato a farlo con il telefono e il risultato non è mai stato all’altezza.
Download the Luthier Survival Kit
Free PDF with checklist, problem-cause table and project card template.
 English
  Italiano
Stuck on your build?
If you ran into the same problem or have a question, drop it in the comments. I read and reply to every one.
Write a comment