

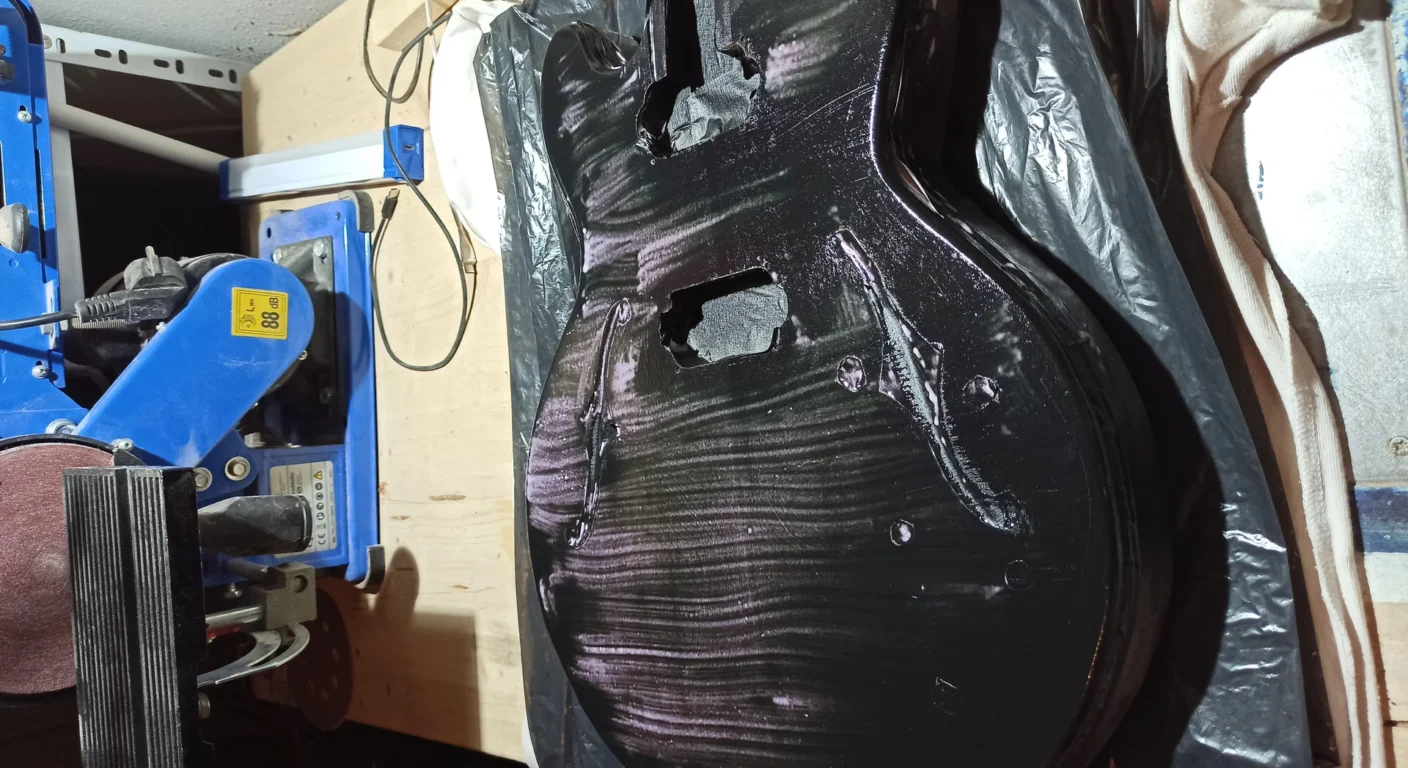
Electric Guitar Bridge: Set It Right in 3 Steps
How many times have you picked up your guitar, perhaps one you've painstakingly assembled, and felt like something wasn't right? The strings are too high, it's hard to play cleanly, the notes aren't in tune on the higher frets. A nightmare, huh? Don't worry, we've all been there. Even I, the first time I tried to fix the bridge on a Stratocaster I'd assembled from scratch, had a real sweat and ended up only making the situation worse. The truth is that the’electric guitar bridge setup it's not a mystery, but a logical process that requires patience and some tips.
You don't need to be a professional luthier with thousands of euros worth of tools. You need to understand What you are doing and Why. This is the secret I've learned after dismantling and reassembling dozens of bridges, often making mistakes and having to start all over again. If I could do it, with my salvaged drill press and a set of cheap Allen wrenches, you can do it too.
Today I'll guide you through three fundamental steps to adjusting the bridge of your electric guitar. I'll not only give you the "how," but also the "why," so you're not just doing mechanical work, but you'll understand the logic behind each adjustment. Get ready, because by the end of this article, your guitar will not only be more playable, but will be your in a way that only those who fix it with their own hands can understand.
Why a well-adjusted bridge changes everything (and why you shouldn't be afraid to touch it)



[GRIGLIA FOTO]
[GRIGLIA FOTO]
La prima cosa da capire è che il ponte non è solo un pezzo di metallo che tiene ferme le corde. È il fulcro del suono e della suonabilità della tua chitarra. Un ponte mal regolato può causare una miriade di problemi, spesso mascherati da “caratteristiche” dello strumento o, peggio, da difetti di fabbricazione. Ma la verità è che, nella maggior parte dei casi, è solo una questione di setup.
Pensa a questi sintomi:
- Action too high: Ti affatica la mano sinistra, devi premere troppo forte sulle corde, rendendo la pennata più difficile e meno dinamica.
- Buzzing (frittura delle corde): Le corde vibrano e toccano i tasti successivi, creando un suono sgradevole e distorto. A volte è solo su certi tasti, a volte su tutta la tastiera.
- Imprecise intonation: La chitarra suona bene sugli accordi aperti, ma quando sali sulla tastiera, gli accordi e gli intervalli suonano stonati. Questo è frustrante perché ti impedisce di suonare pulito e di registrare bene.
- Problemi con il tremolo: Se hai un ponte tremolo, un setup errato può causare problemi di accordatura dopo ogni uso, o addirittura rendere il tremolo inutilizzabile.
Questi sono tutti segnali che il tuo ponte ha bisogno di un po’ di attenzione. E la buona notizia è che, nella maggior parte dei casi, questi problemi si risolvono con pochi, semplici aggiustamenti. Il mio obiettivo è proprio questo: darti la conoscenza e la fiducia per affrontare queste regolazioni da solo.
Perché il segreto, credimi, non è avere la chitarra “perfetta” di fabbrica. Il segreto è conoscere il proprio strumento e saperlo adattare alle proprie esigenze. E questo inizia proprio dal ponte.
Organizzazione: Gli strumenti del mestiere (senza svuotare il portafoglio)

[BOX AFFILIAZIONE]
[BOX AFFILIAZIONE]
Okay, you understand the importance and put your fear aside. Great. Now, before you launch, you need a little organization. You don't need space gear, but the right ones will make your life much easier and prevent you from causing any damage.
Here's what I recommend you keep handy for proper guitar bridge adjustment:
- Allen key set: Essentials. You'll need them for the action (saddle height) and, if you have a tremolo bridge, to lock the saddles or adjust the spring tension. Make sure you have both the saddle and truss rod screws, if you have access to them through the headstock.
- Phillips and slotted screwdrivers: For saddle screws (intonation) and, for some bridges, for various fastenings.
- Reliable chromatic tuner: Not just any smartphone app, but a decent one. A good tuner is essential for tuning. I recommend a clip-on one, like the D'Addario Micro Tuner or similar, or a pedal tuner. Precision is everything here.
- Metal ruler or precision caliper: To measure the action, a good ruler with a millimeter scale is sufficient, but a digital caliper will give you maniacal precision. I use a 15 cm ruler with 0.5 mm graduations; it's inexpensive and does the job.
- Feeler gauges: Useful for measuring the neck relief (neck curvature), which is an integral part of the overall setup. It's not strictly about the bridge, but without the correct neck curvature, adjusting the bridge is useless.
- Capo (Movable Capo): You will need this to measure your neck relief accurately.
- New strings: It may seem obvious, but a setup should always be done with new strings, of the gauge you intend to use regularly. Old or worn strings will not hold the tuning and will distort all your measurements.
- Soft cloth: To clean your tool and protect it while you work with it.
- A stable and well-lit table: Don't work on the couch or in dim light. You need space and visibility.
- Patience and a beer (optional, but it helps): This isn't a job to be rushed. Take your time.
An important note: If your guitar has a Floyd Rose-style bridge or a floating tremolo, this article will cover the basics, but the specific procedure will be more complex. These bridges require the rear springs to be balanced with the string tension, and the process is a bit more involved. For today, we'll focus on the most common bridges: Tune-o-matics, hardtails, and non-locking Stratocaster-style tremolos.
The Order of Operations: The Sequence That Saves Your Life
Many people rush to adjust one thing at random, then another, and end up going crazy. The secret to a good setup is order. There's a logical sequence to follow, because each adjustment influences the others.
The ideal sequence is this:
- Adjusting the truss rod (neck bend): È la base di tutto. Se il manico non è dritto (o con la giusta curvatura), tutto il resto sarà falsato.
- Adjusting the action (height of the strings at the bridge): Una volta che il manico è a posto, puoi settare l’altezza delle corde.
- Adjusting the pitch (octave): The last step, which is always done last, because the action affects the intonation.
With that out of the way, you're already halfway there. Now, let's get to work!
Move 1: The Action – Finding the Right Height for Your Strings
Action, or string height, is how far the strings are from the fretboard. It's a very personal preference: some prefer it low for fast playing, others higher for more dynamics and sustain, especially with the slide. The goal is to find a compromise that allows you to play comfortably without the strings buzzing on the frets.
This is where your experience and taste come into play. I, for example, found that too low an action took away the "ring" I was looking for, even though it made bending easier. Eventually, I found my balance.
How is action measured?
Before touching any screws, you need to know where to start. Once you've tuned your guitar (with new strings, mind you!), take a ruler and measure the distance between the bottom of the string and the top of the twelfth fret. Yes, right at the twelfth fret, not the nut.
Standard sizes vary, but a good starting point for an electric guitar is:
- Low E string (E6): 2.0 mm – 2.4 mm (0.078″ – 0.094″)
- E string (E1): 1.6 mm – 2.0 mm (0.062″ – 0.078″)
These are just suggestions. You may want it slightly lower or higher. The important thing is that there's a slight slope: the low E is always slightly higher than the high E. This is to prevent the thicker string, vibrating more, from touching the higher frets.
How do you adjust the action? It depends on the bridge.
Each bridge has its own method for adjusting the height of the saddles (the individual supports for each string).
Tune-o-matic bridge (Gibson-style)
Questo è uno dei più diffusi, tipico delle Les Paul, SG e di molte altre chitarre. La sua regolazione è semplice: ci sono due viti grandi, una per lato del ponte, che ne regolano l’altezza complessiva. Non ci sono regolazioni individuali per ogni selletta (almeno, non sull’altezza).
With the guitar in tune, use a flathead screwdriver (or Allen key, if your bridge has hex screws) to turn the adjustment screws.
- To lower the action: Turn the screws clockwise.
- To raise the action: Gira le viti in senso antiorario.
Procedi per piccoli passi: gira di mezzo giro alla volta, riaccorda la chitarra e misura nuovamente. Fai in modo che entrambi i lati del ponte siano all’incirca alla stessa altezza, mantenendo quella leggera pendenza che dicevamo prima (il lato del Mi basso leggermente più alto). Verifica il buzzing: suona ogni corda su ogni tasto per vedere se ci sono “fritture” (buzzing) indesiderate. Se senti dei buzz, l’action potrebbe essere troppo bassa, oppure il manico non è settato correttamente (ma di questo parleremo dopo).
Common mistake: Lowering too quickly. Go slowly. Every small change has an impact.
Hardtail bridge (fixed, Telecaster or Stratocaster hardtail type)
Questi ponti sono fissati direttamente al body e non hanno un meccanismo di tremolo. La regolazione dell’action è individuale per ogni selletta. Ogni selletta ha due piccole viti a brugola (o a taglio, ma più spesso a brugola) che ne regolano l’altezza.
Using the appropriate Allen key:
- To lower the string: Turn both saddle screws clockwise.
- To raise the string: Gira entrambe le viti della selletta in senso antiorario.
È importante girare le due viti della stessa selletta in modo uniforme, per evitare che la selletta si inclini troppo e faccia sì che la corda poggi male, creando problemi di intonazione o rotture. Controlla la curvatura del radius: le sellette dovrebbero seguire la curvatura della tastiera. Non devono essere tutte sulla stessa linea retta. Se la tua tastiera ha un radius di 12″, le sellette dovrebbero avere lo stesso raggio di curvatura. Se non hai un calibro specifico per il radius, puoi usare l’occhio e il righello, assicurandoti che le corde centrali siano leggermente più basse di quelle esterne (Mi basso e Mi cantino). Verifica il buzzing: come prima, suona e ascolta.
Stratocaster-style tremolo bridge (vintage or modern non-locking)
Un classico senza tempo. Anche qui, la regolazione dell’action è individuale per ogni selletta. Ogni selletta ha due piccole viti a brugola che ne regolano l’altezza.
Simile al ponte hardtail, gira le due viti di ogni selletta in modo uniforme:
- To lower the string: Turn clockwise.
- To raise the string: Gira in senso antiorario.
Anche qui, le sellette devono seguire il radius della tastiera. Verifica il buzzing: controlla che non ci siano fritture.
A tip from Mimmo: Don't try to get it perfect the first time. Adjust, play, feel how it goes. Then adjust again. It's a dialogue between you and the guitar. Remember that every time you touch the action, the intonation may change slightly. But don't worry, we'll fix it later.
Move 2: Intonation – When Every Note Is in Its Place
Intonation is perhaps the most critical and underrated part of your setup. A guitar that's out of tune is a guitar that sounds bad, period. No matter how good you play, if your octaves are off, your sound will always be out of tune. The goal is for the open note to be identical to the note played at the twelfth fret (harmonic and fretted).
How do you control intonation?
This is the most methodical part. You need your chromatic tuner.
- Perfect tuning: Prima di tutto, accorda la chitarra in modo impeccabile. Prenditi tutto il tempo che serve.
- Check the harmonic at the 12th fret: Suona l’armonico naturale di ogni corda al dodicesimo tasto (sfiora la corda sopra il dodicesimo tasto senza premerla, pizzica e poi togli il dito). L’accordatore dovrebbe indicare la nota corretta, perfettamente al centro.
- Check the note played at the 12th fret: Now, press the string on the dodicesimo tasto (come faresti per suonare una nota) e pizzica.
- Compare: The tuner should indicate the same note on the harmonic and the open string, and it must be perfectly centered.
What to do if it's out of tune?
- If the played note is sharp: This means the string is too short. You need to lengthen it by moving the saddle. backwards (towards the bridge).
- If the played note is flat: This means the string is too long. You need to shorten it by moving the saddle. after you (towards the handle).
How do you adjust the intonation?
Ogni selletta del ponte ha una vite di regolazione per l’intonazione. Per i ponti Tune-o-matic, hardtail e tremolo stile Stratocaster, ogni selletta ha una vite che la sposta avanti e indietro. Per i Tune-o-matic, la vite è solitamente sul retro del ponte. Per gli altri, è una vite che attraversa la selletta stessa.
Proceed string by string:
- To move backwards (increasing -> flat): Turn the screw clockwise.
- To move forward (lower -> sharp): Gira la vite in senso antiorario.
Fai una corda alla volta. Regola, riaccorda la corda (importantissimo!), ricontrolla armonico e nota tastata. È un processo iterativo. Non aver fretta. Piccoli aggiustamenti: anche qui, mezzi giri o meno. Una piccola modifica alla selletta può avere un grande impatto sull’intonazione.
Advice from Mimmo: Sometimes, playing the string a little harder (as you normally would) will give you a more realistic reading than playing it too lightly. And don't let your ear fool you; trust the tuner.
Common mistake: Don't retune the string after every adjustment. Every time you move the saddle, the string tension changes slightly. You should always retune before checking again.
When intonation is a puzzle
There are times when intonation just doesn't seem to fall into place. Here are some things to check:
- Old or worn strings: If the strings are old, dirty, or have nicks, they won't vibrate properly and intonation will be impossible. Put on new strings!
- Capo too high: If the nut is too high, the strings will be too high at the first frets, and this can distort the intonation even at the twelfth. If you have any doubts about the nut, you might want to check out our article on how to modify your guitar, where we also talk about the capo.
- Worn keys: Very worn frets, especially on the twelfth, can prevent the string from sitting properly and cause intonation problems. This is a more advanced job, requiring rectification or re-fretting.
- Bridge to the limit: Sometimes, the saddles have reached the end of their travel and can't move far enough. This can happen with strings of a very different gauge than the original or with necks that aren't perfectly aligned.
Remember, intonation is a delicate balance. Once you've achieved it on all strings, play the guitar a bit to "settle" the strings, and then check everything again. A little tweaking may be necessary.
Move 3: The Truss Rod – The Backbone of the Setup
Ok, this is not a regulation of the bridge, but it is so intrinsically linked to the action and intonation that I can't help but include it. The truss rod is a metal bar that runs inside the neck and serves to counteract the tension of the strings, maintaining the correct curvature (or relief). Without the proper camber, adjusting the bridge is like building a house on a shaky foundation.
A neck that is too straight or too curved will cause buzzing problems or excessively high action.
How do you check neck relief?
Prima di toccare il truss rod, devi sapere qual è la curvatura attuale del manico.
- Take the capo: Mettilo al primo tasto. Questo simula la pressione del dito al primo tasto.
- Press the string at the last fret: Con l’altra mano, premi la corda del Mi basso (E6) all’ultimo tasto della tastiera.
- Measure the distance at the 7th/8th fret: Now, using the feeler gauges, measure the distance between the bottom of the string and the top of the 7th or 8th fret.
What is the right size? Again, it's a matter of preference, but the standard values are:
- Electric guitar: 0.2 mm – 0.3 mm (0.008″ – 0.012″)
This means that the string should have a very slight concave curvature, like a slight bow, rather than being perfectly straight. This slight curve allows the strings to vibrate freely without touching the frets, reducing buzzing.
How do you adjust the truss rod?
This is the most delicate part. Proceed with extreme caution. The truss rod is sturdy, but if you force it too much, you can irreparably damage the neck.
- Identify the truss rod access: Può essere alla paletta (sotto una piccola placca o a vista) o alla base del manico (spesso visibile rimuovendo il battipenna o smontando il manico dal body, come in alcune Telecaster vintage).
- Use the right key: È quasi sempre una chiave a brugola (esagonale) o una chiave a tubo specifica. Non usare mai una chiave che non calza perfettamente.
- Adjust with small movements:
- To straighten the neck (reduce relief): Turn the key clockwise.
- To increase the relief (curve the neck more): Gira la chiave in senso antiorario.
- A QUARTER OF A TURN AT A TIME: Non di più! Gira un quarto di giro, poi aspetta qualche minuto (o anche mezz’ora, se hai tempo) per permettere al legno di assestarsi sotto la nuova tensione. Poi ricontrolla il relief.
- Repeat until you get the desired measurement.
Important warnings:
- Never force: If the truss rod screw is stuck, don't bother. There may be a more serious problem that requires the intervention of a luthier.
- Loosen the strings: If the neck is very curved and you need to straighten it out a lot (turn clockwise), it is good practice to loosen the strings slightly before turning the truss rod, to reduce the tension on the neck.
- The influence on the action: Adjusting the truss rod will affect the action. That's why it's done first. Once the neck is in place, you can fine-tune the action at the bridge.
Remember, the truss rod is a dynamic element. The neck's curvature can vary slightly with changes in temperature and humidity. Once you have the ideal setup, you may need to make small seasonal adjustments. I, for example, always notice a slight variation between humid summers and dry winters.
Refinements and common problems resolution
You've made your three moves. The guitar should already sound much better. But a setup is an ongoing process, a dance of small adjustments.
What to check after the three moves:
- Residual buzzing: If you still hear buzzing, especially on the first few frets, it could be that the nut is too low (a more complex problem to fix, often requiring replacement) or that the truss rod still needs a micro-adjustment. If the buzzing is only on one or two frets, it could be that one fret is slightly higher than the others, but that's a luthier's job.
- General comfort: Play the guitar for a while. Do you feel comfortable? Are the strings too stiff? Too loose? Don't be afraid to make small adjustments to the action to suit your playing style.
- Pickup height: Non è direttamente legata al ponte, ma l’altezza dei pickup influisce enormemente sul volume, sul tono e sul sustain. Se i pickup sono troppo vicini alle corde, possono “tirare” le corde con i loro magneti, causando un calo di sustain e problemi di intonazione (il famoso “stratitis” delle Stratocaster). Se sono troppo lontani, il suono sarà debole. Cerca un buon equilibrio. Un buon punto di partenza è circa 2-3 mm tra la parte superiore del pickup e la corda premuta all’ultimo tasto.
Garage Tips:
- Mark the positions: If you're worried about getting lost, you can make small pencil marks on the saddles or screws before you start, so you have a reference point to guide you back to.
- Photographer: Take photos of the bridge from different angles before you begin. This will help you understand how everything was positioned.
- Keep track: Write down the starting and ending measurements. This will help you understand what works for you and replicate it in the future, or on other guitars.
- Don't be afraid to go back: If you're not satisfied with the result, there's no shame in starting over or resetting the settings. That's how experience is built.
One last tip on intonation for the more fussy ones
For those who want to go further, consider that "perfect" tuning is a compromise. Equal temperament, the standard tuning system, doesn't allow all intervals to be perfectly in tune at the same time. Some luthiers use compensated nut tunings or advanced intonation systems (like the Buzz Feiten Tuning System) to improve this. But for our DIY purposes, the three steps I've given you are more than enough to have a professionally playable instrument.
Per approfondire ulteriormente le specifiche di setup per la tua marca e modello specifico di chitarra, potresti consultare le guide ufficiali dei produttori. Ad esempio, Fender offre spesso guide dettagliate per i suoi modelli più iconici sul loro sito, come questa risorsa generale sull’accordatura e il setup della chitarra: Fender Support: How to Set Up Your Guitar.
Bottom line: Your guitar, your rules
Setting up your guitar's bridge, and a complete setup in general, can seem like a mountain to climb. But as you've seen, breaking the process down into these three fundamental steps—truss rod, action, and intonation—makes it much more manageable.
Remember my mantra: if I could do it, with my mistakes and my garage tools, you can do it too. It's not magic, it's method. It's patience. And it's the satisfaction of having transformed your guitar into an instrument that responds perfectly to your hands.
Take your guitar, put it on the bench, and start experimenting. Every turn of the screw, every measurement, brings you closer to understanding your instrument in a profound way. And when you finally hear it play properly, you'll know that's your guitar. Set up from you. E quella sensazione, fidati, non ha prezzo.
Good work and good music!
FAQ
Posso regolare il ponte se ho un Floyd Rose?
Un ponte Floyd Rose richiede un approccio leggermente diverso. La regolazione dell’action e dell’intonazione avviene come descritto, ma devi sempre bilanciare la tensione delle molle sul retro con quella delle corde. Questo significa che ogni modifica all’action o all’accordatura di una corda potrebbe richiedere aggiustamenti alla tensione delle molle per mantenere il ponte parallelo al body. Per i Floyd Rose, è consigliabile seguire guide specifiche o rivolgerti a un liutaio esperto se non sei sicuro.
Quanto spesso dovrei fare il setup alla mia chitarra?
Dipende da quanto suoni e da quanto le tue condizioni ambientali (temperatura, umidità) cambiano. In generale, un setup completo ogni 6-12 mesi è una buona abitudine. Tuttavia, se noti problemi di action, buzzing o intonazione, è meglio intervenire subito. Cambiare le corde è sempre un buon momento per ricontrollare e, se necessario, rifinire il setup.
Download the Luthier Survival Kit
Free PDF with checklist, problem-cause table and project card template.
 English
  Italiano
Stuck on your build?
If you ran into the same problem or have a question, drop it in the comments. I read and reply to every one.
Write a comment