

3 guitar failures: repair them at home without spending money.
How many times have you found yourself there, in the garage or in the room, perhaps in the middle of a riff that was about to rock, and your guitar Did it leave you in the lurch? A strange noise, a sound that comes and goes, a string that buzzes in an absurd way. It happens, trust me. And the first reaction è always the same: “Oh my God, I broke it. I have to take it to the luthier, and goodbye money.” Well, I'll tell you something. In my experience, which è made of many attempts and some errors (some hundred, perhaps), I've learned that a good 70% of these small domestic dramas can be solved with two tools, a little patience, and the courage to get your hands dirty. And often, without spending a cent, or almost. I'm not a professional luthier; I'm someone who has built and repaired guitars in the garage, made mistakes, redid them, and now I tell you: if I succeeded, you can succeed too. In this article, I want to tell you about three common faults, the ones that make you break out in a cold sweat but which, with the right approach, you can fix yourself, comfortably at home. We're talking about problems that a hobbyist with some guitar experience has certainly encountered, or will encounter. You don't need a degree in electronic engineering or a master luthier certification. You just need the desire to understand and to do. Ready to get your hands dirty? Let's see how repair your guitar at home for these three classic inconveniences.
Fault 1: String Buzzing (Buzzing and High/Low Action)
Ah, the infamous buzzing. That metallic noise, almost a “sizzle”, that ruins every clean note and makes you think your guitar is possessed. Or, the exact opposite: the action so high that it feels like climbing a mountain every time you try a chord. Both these problems, seemingly opposite, often share the same roots and are among the guitar malfunctions most common.
Symptoms not to be underestimated
The buzzing can manifest in different ways. Sometimes it's a single string on a specific fret, other times it's spread across the entire neck, or even on open strings. The sensation is that the vibrating string touches one or more subsequent frets, producing that undesirable sound. An action that is too high, on the other hand, does not produce strange noises, but makes the guitar uncomfortable to play, requires more force to press the strings, and makes solos a real ordeal. Conversely, an action that is too low can cause "dead" or muted notes, especially when playing with a certain attack, because the string does not have enough space to vibrate freely.
The most probable causes of “frying”
In my experience, 90% of the time the problem is related to neck adjustment (the truss rod) or to the height of the bridge saddles. The truss rod is a metal rod that runs inside the guitar neck and serves to counteract string tension, maintaining the correct curvature (the neck relief). If the neck is too straight or even bowed backward (backbow), the strings will be too close to the frets and will "fret buzz". If it is too curved forward (forward bow), the action will be high and the guitar will be hard to play. The bridge saddles, on the other hand, determine the individual height of each string. If a saddle is too low, that string will buzz. If they are all too low, you will have a buzzing generalized buzz. Less frequently, the nut (nut) can be the cause. If its slots are too deep, open strings might buzz. Worn or unleveled frets are another cause, but this is a more complex intervention that goes beyond "no cost" and DIY for beginners.
Diagnosis before treatment: what to check
To understand where the problem comes from, we must proceed by elimination.
- Check the neck relief: Place a capo (or a finger) on the first fret and a finger on the last fret of the sixth string. Look at the space between the string and the top of the 7th or 8th fret. There should be a small gap, about the thickness of a business card or a thin pick (approximately 0.008-0.012 inches, or 0.20-0.30 mm). If the string touches the fret, the neck is too straight or in backbow. If the space is excessive, the neck is too curved forward.
- Check the bridge saddles: After checking the neck relief, check the string height at the bridge. If the buzzing is only on some strings or high frets, it could be a saddle that is too low.
- Inspect the nut: If the buzzing occurs only on open strings, the problem might be there.
DIY solutions (from the simplest to the most delicate)
- Adjustment of the truss rod:
This is the most common intervention. The screw of the truss rod is usually located at the headstock (under a cover) or at the base of the neck (often accessible by removing the neck or through a hole in the body). You will need an Allen key (Allen key) of the correct size. Remember:
- To increase the neck relief (curve the neck forward and move the strings away from the frets), turn the screw counterclockwise.
- To decrease the neck relief (straighten the neck and move the strings closer to the frets), turn the screw clockwise.
Turn the screw no more than a quarter turn at a time. Tune up, wait a few minutes (the wood needs to "settle"), and recheck the neck relief. Repeat until you get the desired curvature and the buzzing disappears. Be gentle, never force it. I've seen necks ruined by those who rushed.
- Adjusting the height of the bridge saddles:
Many electric guitars (Stratocaster, Telecaster, etc.) have individually adjustable saddles with small Allen screws. Guitars with a Tune-o-matic bridge (Les Paul, SG) have two thumbwheel screws on the sides that raise or lower the entire bridge. For acoustics, the height is given by the bridge itself and the saddle (saddle), which usually requires filing or replacement, so it's not exactly "no cost".
For electrics, use the Allen key to raise the saddles of the buzzing strings, or lower them if the action is too high. Make small adjustments and recheck playability. The goal is to have the lowest possible action without buzzing.
- Nut check and lubrication (nut):
If the buzzing is only on open strings, the nut might be too low. This is a more difficult problem to solve at home without specific filing tools. However, if the strings "get stuck" in the slots and this causes tuning problems (see fault 3), good lubrication can help. You can use a pencil lead (graphite) or specific products like Big Bends Nut Sauce to reduce friction in the slots.
Useful tools: Allen key of the correct size (often supplied with the guitar), action ruler, feeler gauge (feeler gauge), tuner.
Warning: The truss rod is delicate. Never force it. If you feel excessive resistance, stop and consult a professional. A broken neck is serious and expensive damage to repair.
Fault 2: Sudden Silences and Intermittent Sounds (Simple Electronic Problems)
There's nothing more frustrating than a guitar that stops playing in the middle of a performance, or that produces strange noises, crackles, and interruptions. Often, these guitar electrical problems are not the symptom of a burnt-out pickup or complex wiring gone haywire, but rather small and trivial annoyances that we can fix with a little attention.
Symptoms that cry out “help!”
The most common signs are:
- The guitar produces no sound, despite being connected to the amp and the amp working.
- The sound that comes and goes, perhaps when you move the cable or the guitar itself.
- Crackles or rustles when you turn the potentiometers (volume, tone).
- A buzz (hum) excessive that is not normal.
The most probable causes of sound “holes”
In my career as a “garage luthier”, I have found that most of these problems boil down to three main culprits:
- The output jack (output jack): It is the point of greatest mechanical stress and is exposed to dirt and oxidation. It can loosen, contacts can bend or get dirty.
- The potentiometers (pots) for volume and tone: Over time, dust and oxidation can accumulate inside, causing crackling and interruptions when rotated.
- “Cold” or loose solders: Vibrations and temperature fluctuations can weaken solders, creating intermittent connections.
Of course, we could also talk about faulty cables, but that's always the first check to make. Do you have a spare cable? Try it! Let's immediately eliminate the most obvious “culprit”.
Diagnosis: where is the loose connection?
- Check the cable: As mentioned, try a different cable. If the problem disappears, you've found the culprit.
- Move the jack: With the guitar connected to the amp (at low volume), gently move the cable at the guitar's output jack. If the sound comes and goes or crackles, the problem is there.
- Turn the potentiometers: Rotate the volume and tone potentiometers back and forth several times. If you hear crackling or the sound cuts out, the potentiometers are dirty.
- Tap lightly: With the guitar neck facing upwards (to prevent the strings from touching the pickups), gently tap the guitar body with the palm of your hand, near the pickups and the control cavity. If you hear noises or interruptions, there might be a loose solder joint.
Solutions that get you back on track
- Tighten and clean the output jack:
Often the external nut of the jack loosens, causing a precarious contact. Use a wrench or pliers to gently tighten it (without overdoing it). If the problem persists, you will need to open the electronics compartment. Many guitars have a cover on the back. Once opened, you can see the jack. The internal metal contacts can be dirty or oxidized. Use an electronic contact cleaner spray (like DeoxIT D5 or CRC Contatto Pulito) spraying it directly onto the contacts. Insert and remove the cable several times to mechanically “clean” it. If the contacts are bent, you can try to gently straighten them with a small screwdriver, but be careful not to break them.
- Cleaning the potentiometers:
Here too, contact spray is your best friend. Open the electronics compartment. Each potentiometer has a small hole on its casing, usually on the side or back. Spray a small amount of spray directly into this hole and rotate the potentiometer back and forth about twenty times. This will help dissolve oxidation and dirt. Repeat for all problematic potentiometers. Let it dry for a few minutes before reconnecting to the amp.
- Inspection and (eventual) reflow of solders:
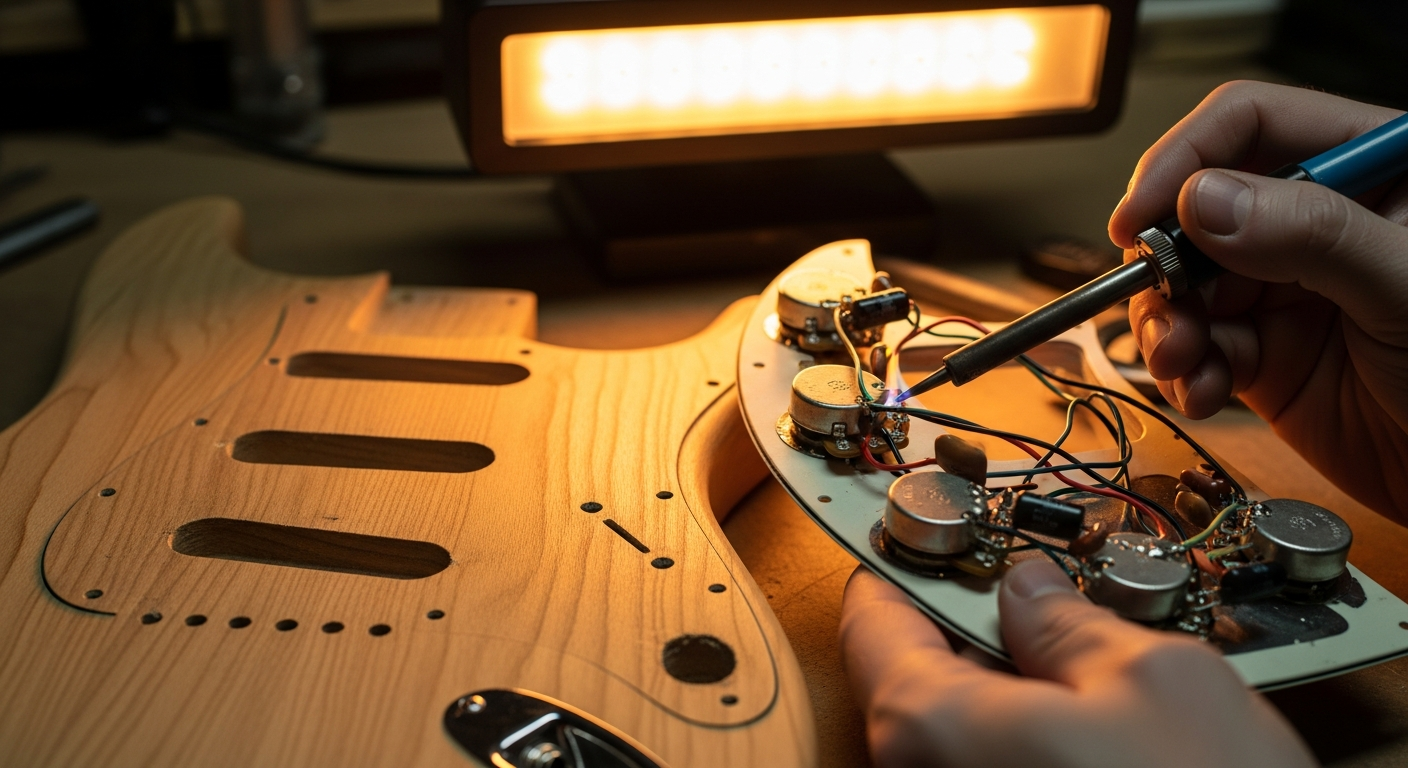
This è the solution that requires a minimum of manual skill with a soldering iron. Open the electronics compartment and visually inspect all solders. A “cold” or weak solder appears dull, grainy, sometimes with small cracks. A good solder è shiny and smooth, cone-shaped. If you have a soldering iron and feel confident, you can try to reflow the suspicious solders. Place the hot tip of the soldering iron on the solder for a few seconds, adding a pinch of fresh solder if necessary. This should create a solid connection. If you have never soldered, watch some online tutorials or ask an experienced friend for help. It è not difficult, but it requires practice.
Useful tools: Screwdrivers (Phillips and flat-head), wrench or small pliers, electronic contact spray, soldering iron and solder (optional, for those with experience).
Warning: Before working on the electronics, always disconnect the guitar from the amplifier and power supply (if it has active electronics). Do not touch hot solders. If you are not comfortable with the soldering iron, limit yourself to cleaning and tightening, and take the guitar to a technician for soldering.
Fault 3: The Guitar That Doesn't Hold Its Tuning (Tuning Instability)
If your guitar goes out of tune after every bending, every time you use the tremolo, or even just after a few minutes of playing, it's a problem that takes away your fun and makes you lose precious time. The “unstable tuning” is one of the common guitar troubles that afflict many guitarists, but often the causes are simpler than you think and easily solvable at home.
Symptoms of a “wobbly” guitar
The symptom is obvious: you've just perfectly tuned your guitar, you play a couple of chords, you do a bending and... puff, you're out of tune. Maybe the sixth string is flat, the third is sharp, a real disaster. This not only makes it difficult to play, but can also affect your intonation and overall sound.
The most probable causes of “chronic detuning”
I have noticed that unstable tuning problems are concentrated in some key points of the guitar:
- The ropes: Old, worn, or poorly strung strings are the number one cause. New strings need to be “stretched” to settle.
- The mechanics (tuning machines): They can be loose, have worn or dirty gears, or simply not be of good quality.
- The nut (nut): If the nut slots are too tight, dirty, or rough, the strings can “pinch” inside them, not sliding freely. When you bend and release, the string remains stuck and does not return to the original tuning.
- The bridge and the saddles: Similar to the nut, the string contact points on the bridge (especially with tremolo bridges) can create friction.
Diagnosis: where does the rope get stuck?
- Check the ropes: When did you change them last? Are they oxidized? How did you mount them?
- Check the mechanics: Try moving the tuning pegs of the mechanics. Do they have play? Are the screws on the back of the headstock tight? Are the front nuts secure?
- Inspect the nut: Slightly move the strings in the nut slots. Do you feel them getting stuck? Do you see signs of wear or dirt?
- Check the bridge: If you have a tremolo bridge, make sure it is free to move and that the saddles do not have sharp edges.
Solutions to keep your guitar in tune
- Changing strings correctly and stretching them:
It seems trivial, but good string installation is fundamental. When changing strings, make sure to leave only 2-3 wraps on the tuning peg to prevent them from overlapping too much and creating instability. After tuning them, “stretch” each string by gently pulling it upwards (but don’t overdo it!). Tune again and repeat until the string holds its tuning. This process is crucial for new strings.
- Tighten the mechanics:
Many mechanics have two types of screws to check:
- The small screws on the back of the headstock that hold the gears together. Tighten them gently, just enough to eliminate play, without overtightening.
- The hex nuts on the front of the headstock that secure the tuners to the wood. These can also loosen. Use a socket wrench of the correct size to carefully tighten them.
- Lubricate the nut (nut):
This è un game-changer for tuning. Friction in the nut è a huge cause of instability. You can use a simple pencil (graphite è an excellent dry lubricant) by rubbing the lead into the nut slots. Or, invest in a specific lubricant for nuts and saddles, such as Big Bends Nut Sauce or MusicNomad Tune-It. Apply a small drop in each slot and slide the string back and forth. You'll immediately see the difference.
- Lubricate the contact points at the bridge:
Similar to the nut, the bridge saddles can also create friction. A small amount of lubricant (even pencil graphite) on the points where the string rests on the saddle can help, especially with tremolo bridges. For floating bridges, make sure the pins (pivot points) are clean and lubricated.
Useful tools: String winder, wire cutters, small screwdrivers, pencil (graphite), nut lubricant (optional).
Warning: Do not overtighten the tuning machine screws, you could damage the wood or the gears. Use only suitable lubricants, never oils that are too thick or corrosive. If the nut slots are too tight or damaged, filing è a luthier's job.
When DIY Is Not Enough: The Limits of the Hobbyist
We have seen that many common guitar faults are within our reach. But è essential to know when è the time to throw in the towel and rely on a professional. There è no shame in recognizing your limits; on the contrary, è a sign of intelligence and respect for the instrument. There are situations where attempting a “DIY” repair can drastically worsen the situation, turning a small problem into a costly disaster. Here are some scenarios where è best to call the luthier:
- Bent or twisted neck (twisted neck): If the neck è not just curved (a problem of truss rod), but has a lateral twist, è a serious problem that a hobbyist cannot solve.
- Worn or uneven frets: If the frets are too worn, have deep grooves, or are uneven and require leveling (fret leveling) or even a refret (refretting), these are interventions that require specific equipment and expertise.
- Structural problems: Cracks in the body or neck, headstock breaks (especially on guitars with angled necks), bridge detachment on acoustics. These are all luthier woodworking interventions that require specific glues, clamps, and advanced techniques.
- Complex electronics: If the problem è not a simple jack or potentiometer, but concerns a faulty pickup, a complex active circuit, or an electronic board, è better to consult a technician specializing in electronics for musical instruments. However, if your passion è modify your guitar, with a bit of study and practice, some electronic upgrades can be fun to tackle.
- Nut or acoustic saddle to replace/file: If the nut è too low and the open strings buzz, or if the saddle of an acoustic needs to be filed to lower the action, these are interventions that require precision and specific tools to ensure correct intonation.
Remember, our goal è to learn and enjoy our guitars. If an intervention puts you in difficulty or you don't feel confident, don't hesitate to ask for help. A good luthier will not only solve the problem but can also give you valuable advice for future maintenance. Consider a “professional setup” like a tune-up for your car: it's needed every now and then, and it's good for the instrument.
Conclusion
We have reached the end of our journey through the common guitar faults that you can tackle at home. I hope this article has given you the confidence and knowledge needed to face those small dramas that sometimes make us fear the worst. From string buzz to sudden silence, to unstable tuning, you've seen that with the right tools, a little patience, and the desire to learn, you can solve a lot of problems without having to spend a fortune. Remember the fundamental principles: accurate diagnosis, small steps, and never force it. Every time you lay hands on your guitar, you learn something new about the instrument and about yourself as a craftsman. È a growth journey that, in my case, has transformed frustration into satisfaction. Good luck, and may the music always be with you, in tune and without hitches!
FAQ
How often should I check and set up my guitar?
The frequency depends on how much you play and the environmental conditions (humidity, temperature). Generally, a complete check and setup twice a year is good practice. However, è useful to do quick checks (tuning, action, cleaning) before or after each playing session, especially if you notice changes. To delve deeper into the topic, you can consult detailed guides on guitar setup, such as the one offered by Sweetwater.
Is it possible to permanently damage the guitar by attempting these repairs?
Yes, è possible, especially if you act with little caution or without the right knowledge. For example, forcing the truss rod can break the neck, and improper use of the soldering iron can burn the electronics. However, by carefully following the instructions, proceeding in small steps, and stopping if you are unsure, the risk of permanent damage è drastically reduced. The goal è to learn and gain experience, not perfection on the first try.
Download the Luthier Survival Kit
Free PDF with checklist, problem-cause table and project card template.
 English
  Italiano
Stuck on your build?
If you ran into the same problem or have a question, drop it in the comments. I read and reply to every one.
Write a comment