
Building a guitar on a shoestring: the guide
If you're here, you probably have the same spark that ignited me years ago: the idea of picking up a guitar you built, piece by piece, with your own hands. And maybe, like me, you've even thought, "Okay, but how much is this story going to cost me? Can I really build a guitar on a shoestring, or is it just a dream for those with an unlimited budget?”.
Let me tell you right away: yes, it can be done. You won't have a Fender Custom Shop, obviously. But you can make a decent instrument, that sounds good, that gives you satisfaction and, above all, that is your in a way that no store-bought guitar ever could. If I could do it, with a garage full of tools better suited to repairing a bicycle than milling a body, you can do it too. All it takes is a little patience, a willingness to learn, and the awareness that you'll make some mistakes. And that's okay.
This isn't an article promising you the moon for two euros. It's an honest guide, based on my experiences, my mistakes, and the solutions I've found. assemble an inexpensive musical instrument without compromising playability too much. I'll tell you where you can save money and where it's best not to be too stingy.
The Frugal Luthier Mindset: Realism and Compromise
.biafax-photo-grid { display: grid !important; gap: 12px; margin: 24px 0; }
.biafax-photo-grid-3v { grid-template-columns: repeat(3, 1fr) !important; }
.biafax-photo-grid-2h { grid-template-columns: repeat(2, 1fr) !important; }
.biafax-photo-grid a { display: block; overflow: hidden; border-radius: 6px; line-height: 0; }
.biafax-photo-grid img { width: 100%; height: 100%; object-fit: cover; aspect ratio: 4 / 3; transition: transform 0.3s ease; }
.biafax-photo-grid a:hover img { transform: scale(1.03); }
.biafax-photo-grid br { display: none; }
.biafax-photo-grid-caption { text-align: center; font-style: italic; color: #555; margin: -12px 0 24px; }
.biafax-lightbox-overlay { position: fixed; inset: 0; background: rgba(0,0,0,0.92); display: flex; align-items: center; justify-content: center; z-index: 99999; cursor: zoom-out; }
.biafax-lightbox-overlay img { max-width: 92vw; max-height: 92vh; object-fit: contain; border-radius: 4px; }
@media (max-width: 768px) {
.biafax-photo-grid-3v { grid-template-columns: 1fr !important; }
.biafax-photo-grid-2h { grid-template-columns: 1fr !important; }
}
(function() {
if (window.biafaxGridLightbox) return;
window.biafaxGridLightbox = true;
document.addEventListener(‘click’, function(e) {
var a = e.target.closest(‘a[data-lightbox]’);
if (!a) return;
e.preventDefault();
var overlay = document.createElement(‘div’);
overlay.className = 'biafax-lightbox-overlay';
overlay.innerHTML = '‘‘';
document.body.appendChild(overlay);
overlay.addEventListener(‘click’, function() { overlay.remove(); });
document.addEventListener(‘keydown’, function handler(ev) {
if (ev.key === 'Escape') { overlay.remove(); document.removeEventListener('keydown', handler); }
});
});
})();
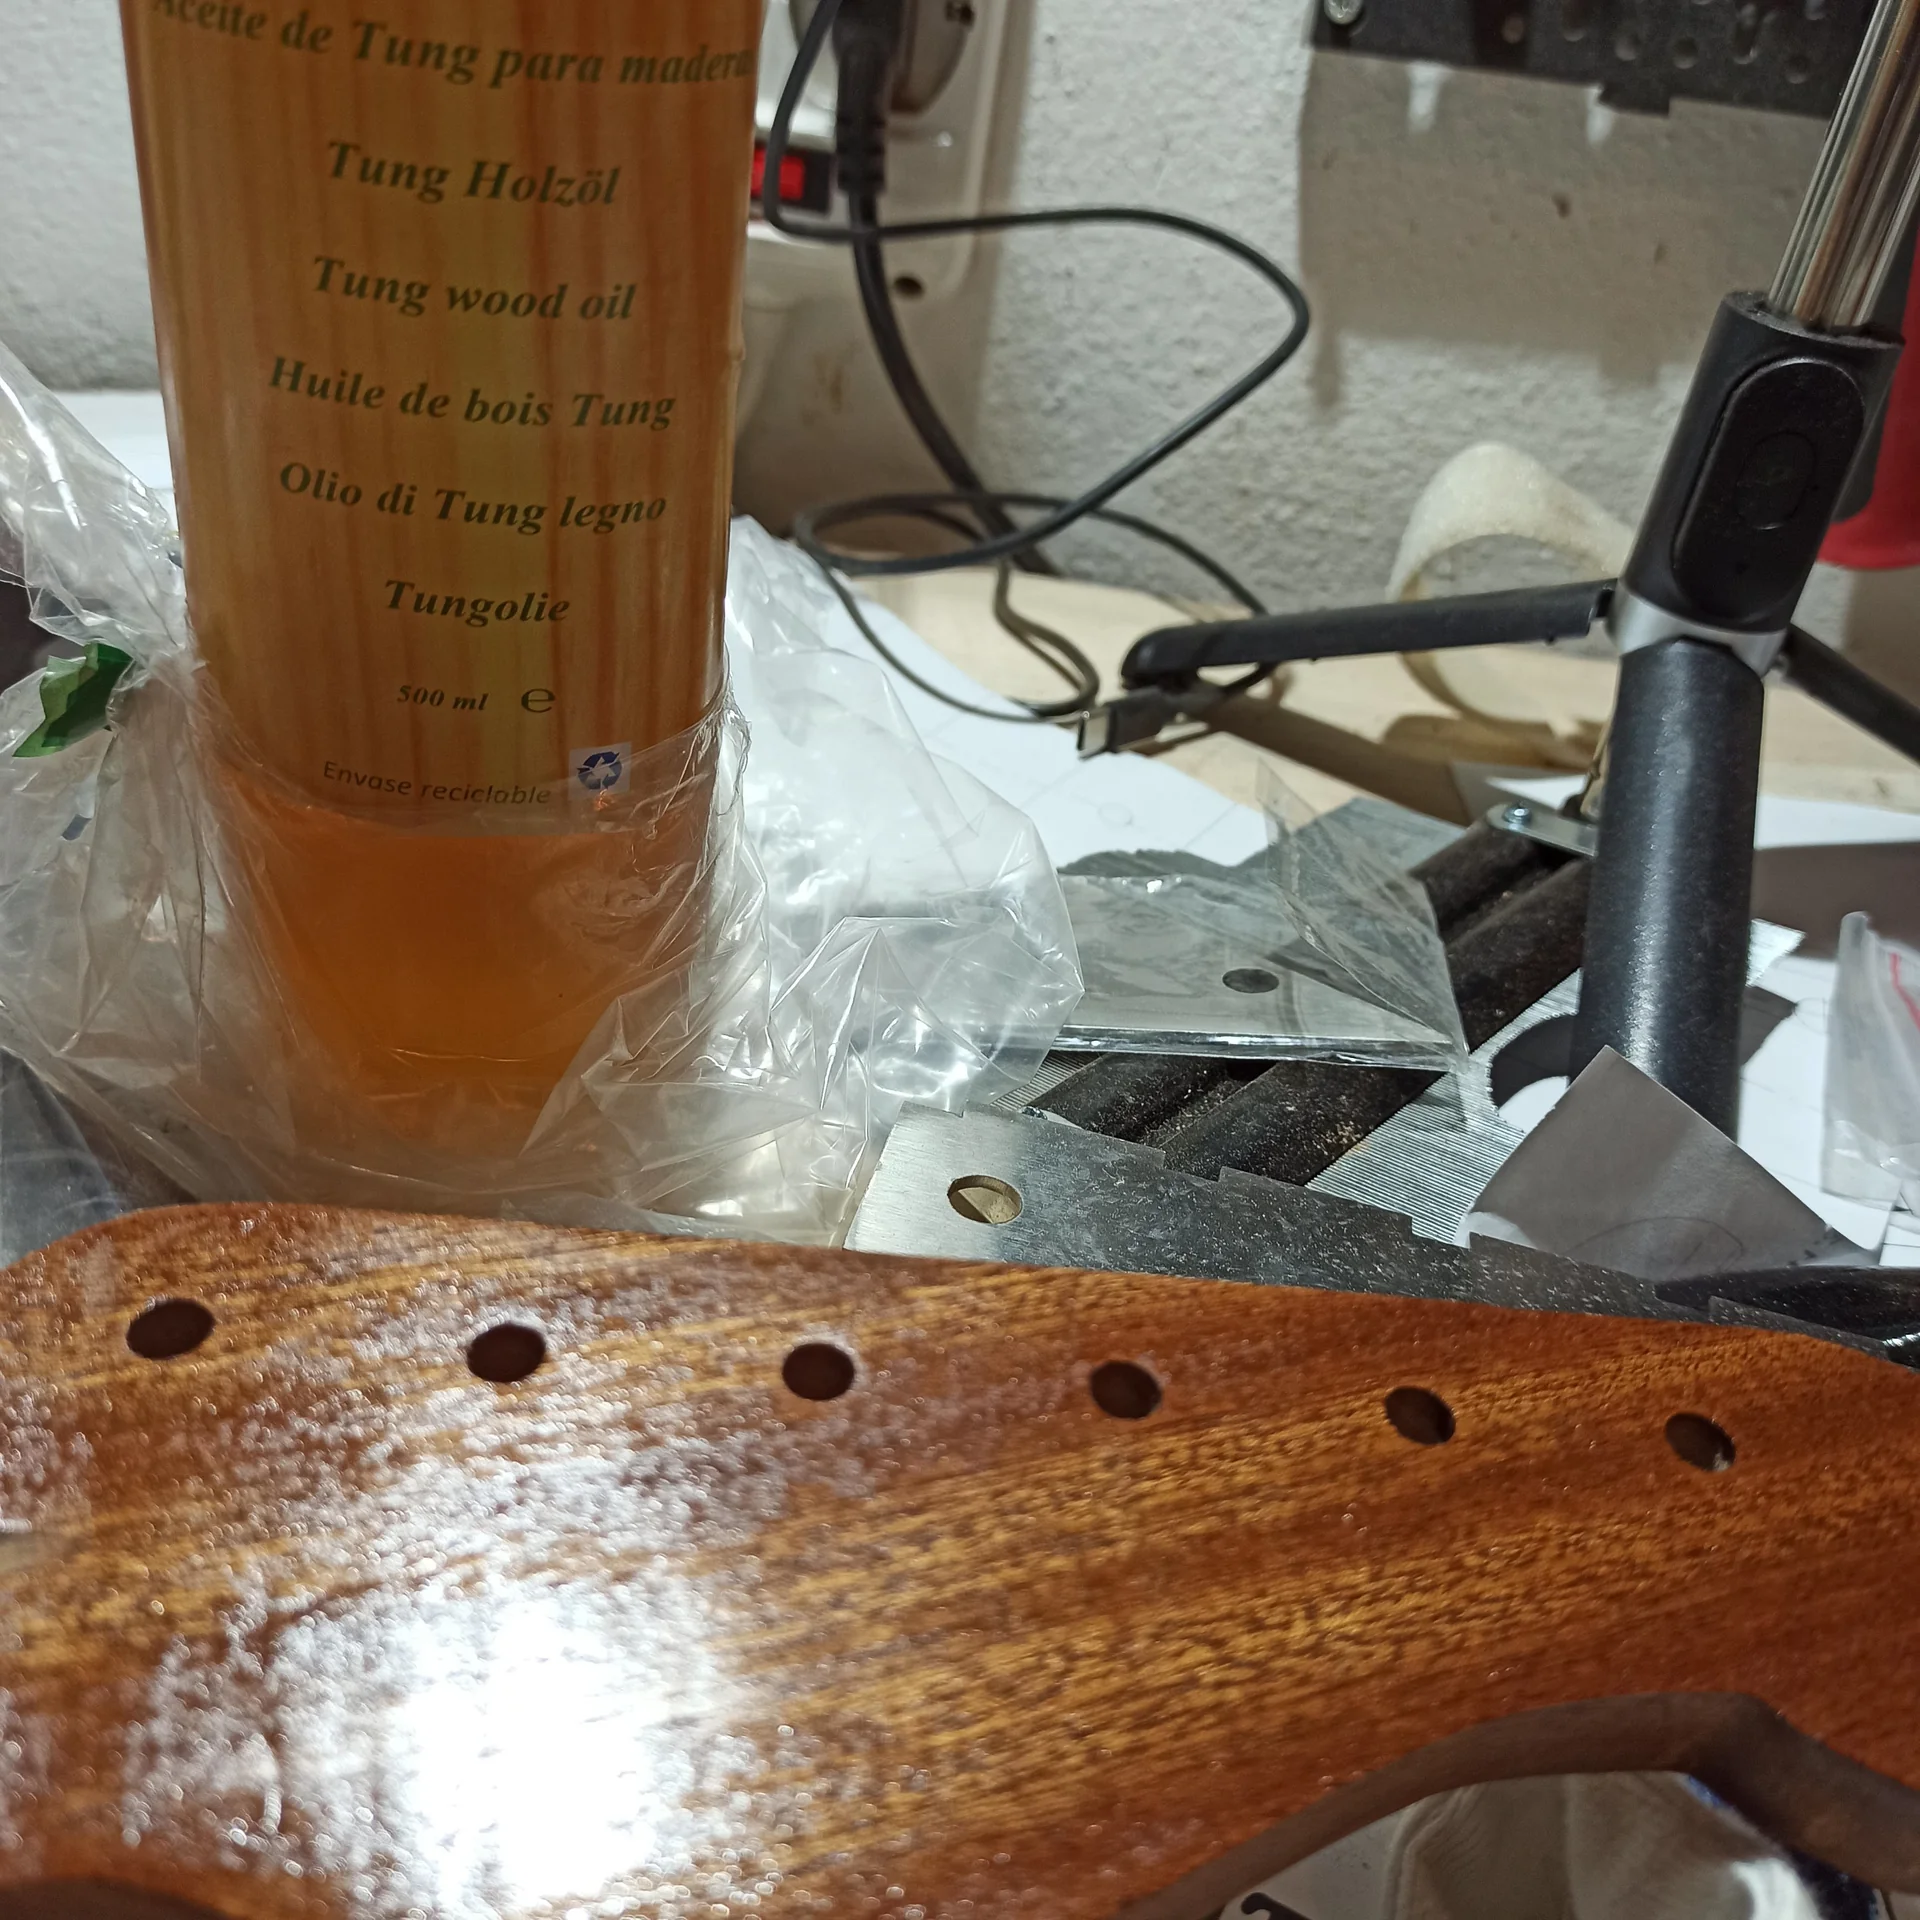
In this gallery: varnish, handle, oil, preparation and nut.
.biafax-photo-grid { display: grid !important; gap: 12px; margin: 24px 0; }
.biafax-photo-grid-3v { grid-template-columns: repeat(3, 1fr) !important; }
.biafax-photo-grid-2h { grid-template-columns: repeat(2, 1fr) !important; }
.biafax-photo-grid a { display: block; overflow: hidden; border-radius: 6px; line-height: 0; }
.biafax-photo-grid img { width: 100%; height: 100%; object-fit: cover; aspect ratio: 4 / 3; transition: transform 0.3s ease; }
.biafax-photo-grid a:hover img { transform: scale(1.03); }
.biafax-photo-grid br { display: none; }
.biafax-photo-grid-caption { text-align: center; font-style: italic; color: #555; margin: -12px 0 24px; }
.biafax-lightbox-overlay { position: fixed; inset: 0; background: rgba(0,0,0,0.92); display: flex; align-items: center; justify-content: center; z-index: 99999; cursor: zoom-out; }
.biafax-lightbox-overlay img { max-width: 92vw; max-height: 92vh; object-fit: contain; border-radius: 4px; }
@media (max-width: 768px) {
.biafax-photo-grid-3v { grid-template-columns: 1fr !important; }
.biafax-photo-grid-2h { grid-template-columns: 1fr !important; }
}
(function() {
if (window.biafaxGridLightbox) return;
window.biafaxGridLightbox = true;
document.addEventListener(‘click’, function(e) {
var a = e.target.closest(‘a[data-lightbox]’);
if (!a) return;
e.preventDefault();
var overlay = document.createElement(‘div’);
overlay.className = 'biafax-lightbox-overlay';
overlay.innerHTML = '‘‘';
document.body.appendChild(overlay);
overlay.addEventListener(‘click’, function() { overlay.remove(); });
document.addEventListener(‘keydown’, function handler(ev) {
if (ev.key === 'Escape') { overlay.remove(); document.removeEventListener('keydown', handler); }
});
});
})();
In this gallery: varnish, handle, oil, preparation and nut.
Before we reach for our wallets, or worse, the drill, we need to clarify one thing. When we talk about building a guitar on a budget, We're talking about compromises. You won't get premium woods, gold-plated hardware, or boutique pickups. And that's okay.
The goal is to create a tool working and playable, which will give you the foundation for learning, experimenting, and, why not, having fun. Your first DIY guitar, especially if you make it on a shoestring, will be a testing ground. It will be your teacher.
What does “little money” mean?
Let's define "little money" for a moment. For me, it means staying within a range of €150 to €300 for the main components. Not including tools, which you may already have or can borrow. With this amount, you can put together something solid.
If you're aiming to spend less than €100, well, I think it's going to be tough. You risk ending up with components so low-quality they'll make the guitar unplayable. And frustration, believe me, is the hobbyist luthier's number one enemy.
Where you can (really) save
You can find the greatest savings on:
Body wood: A two- or three-piece body made of alder, poplar, or basswood won't cost you an arm and a leg.
Finish: Forget about multi-layer nitro paint. A simple oil, wax, or spray paint will do the trick.
Pick-up: There are some great “no-name” pickups or pickups from lesser-known brands that sound surprisingly good for the price.
Non-critical hardware: Potentiometers, capacitors, switches, jacks. No audiophile components required.
Where it's better not to be too stingy
There are some areas where extreme savings translates into guaranteed headaches.
Handle: A crooked neck, poorly positioned frets, or a malfunctioning truss rod will ruin the experience. It's better to spend a little more here.
Mechanics (Tuners): Poor tuning machines won't stay in tune. And a guitar that goes out of tune every two minutes is a guitar that's destined for the corner.
Bridge: Here too, stability is key. A bridge that doesn't tune well or has saddles that cut the strings is a disaster.
The secret is balance. It's not about buying the cheapest of everything, but about choosing. essential components that they do their job with dignity.
The Base: Body and Handle – Where to Aim for Smart Savings
Let's start with the heart of the guitar: the body and the neck. These are the two largest and potentially most expensive parts. This is where we need to be smart.
The Body: Pre-routed Kit or Blank?
For make a low-cost six-string, you have two main ways to the body:
1. Pre-routed body: This is the wisest choice for your first low-cost project. You can find bodies already milled for pickups, electronics, and a neck. They're often made of two or three pieces of basswood, alder, or poplar. They're inexpensive, lightweight, and resonate well. You can find them on eBay, Amazon, or on sites specializing in DIY parts.
Advantages: No complicated milling, save time and specific tools.
Disadvantages: Less design freedom, you have to adapt to standard routings (Strat, Tele, LP).
My advice: Go pre-routed. I started out that way, and it saved me a lot of headaches and expenses for routers and templates.
2. Body Blank: A piece of solid wood from which to obtain the shape.
Advantages: Total freedom of design.
Disadvantages: It requires specific tools (band saw, milling cutter, jig) and much more experience. It's not for those who want to build a guitar on a shoestring and little experience.
Which wood? Basswood, poplar, and alder are your best budget options. They're lightweight, easy to work with, and offer a balanced sound. Don't be fooled by those who say they're "cheap woods." Many mid-range guitars, and even some professional ones, use them.
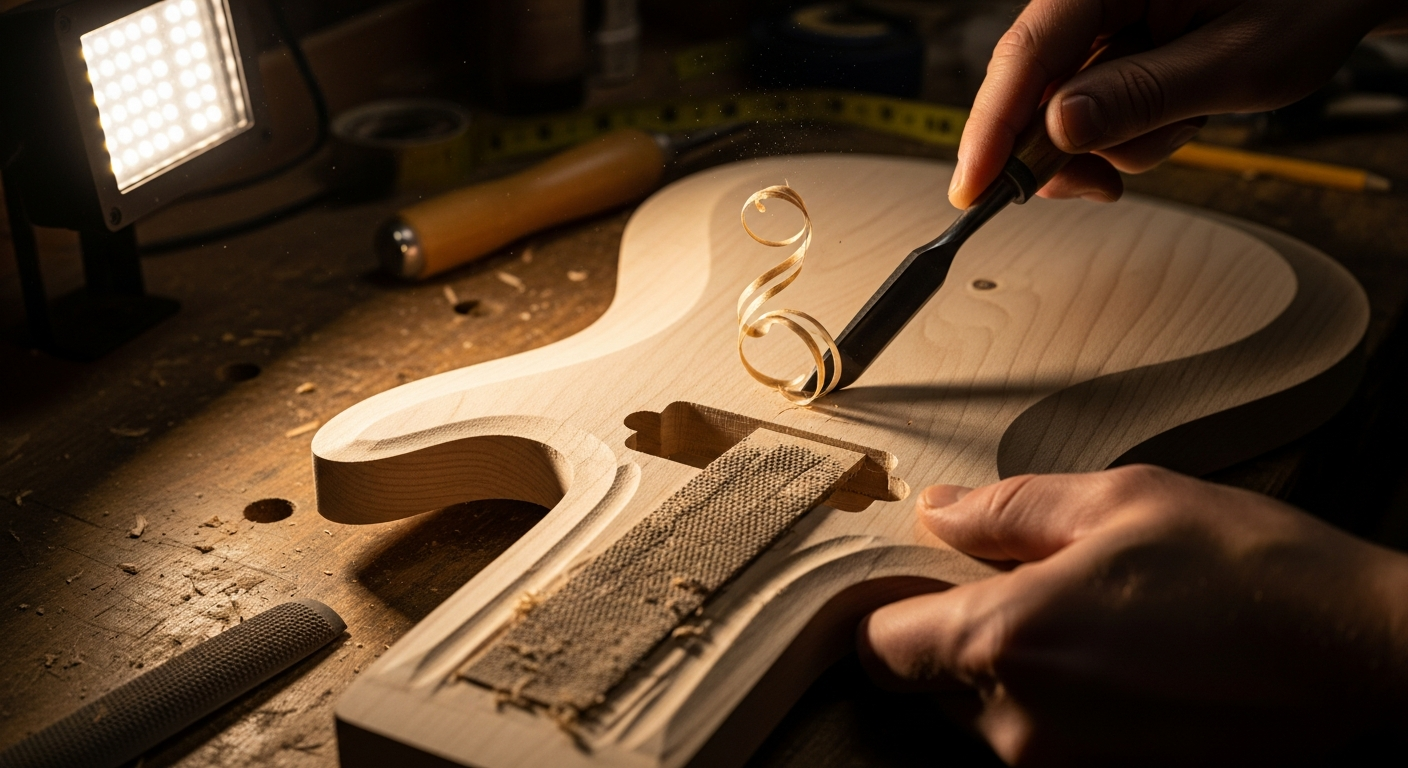
The Handle: The Crucial Point
The neck is, in my opinion, the most critical element. A good neck makes the guitar playable, a bad neck makes it a torture. For a budget project:
Pre-fretted neck: It's almost a must. Fretwork is one of the most difficult and tool-intensive tasks in luthiery. Buying a pre-fretted neck, preferably with pre-leveled and beveled frets, saves you hours of work and potential disasters.
Wood: Maple is the standard for affordable, sturdy necks. The fingerboard can be made of maple, rosewood, or jatoba (a good, affordable alternative to rosewood).
Profile and scale: Choose a profile that feels comfortable. The most common scale lengths are Fender (25.5 inches) for Strats/Teles or Gibson (24.75 inches) for LPs. Make sure the neck is compatible with the body you choose (standard Fender bolt-on or set-neck/neck-through for other models, but the latter are more complex and expensive).
Truss Rod: Make sure you have a working truss rod. This is essential for adjusting the neck curvature.
Where to buy? Always eBay, Amazon, or sites like GuitarFetish, Thomann (for generic components), or other European DIY parts retailers. Sometimes you can find good deals on used guitars, too, but pay attention to the condition of the neck. Make sure it's straight and the frets are in good condition.
The Handle-Body Mating: The First Real Test
Once you have the body and neck, the first step is to make sure they fit together properly. If you've got a standard body and neck (like a bolt-on Stratocaster), the fit should be fairly precise.
Check the fit: The neck should fit into the body pocket without excessive play, but also without having to force it too much. If there's a little lateral play, it's not the end of the world; you can use thin shims or simply center it well before screwing it in.
Alignment: Rest the neck on the body without screwing it in. Using a taut string or string, check that the centerline of the neck aligns with the centerline of the body and the bridge you will be using. This is essential to avoid having strings misaligned.
Handle angle: Sometimes, the neck can be at a slightly incorrect angle to the body, making it difficult to adjust the action (string height) correctly. If the strings are too high even with the bridge at its lowest setting, you may need a shim in the bottom of the neck pocket. If they're too low, a shim in the front of the pocket can help. It's a garage trick that works.
Advice from Mimmo: Don't be afraid to use shims. I spent hours struggling with handles that wouldn't give the right action, before discovering that a thin strip of stiff cardboard or a piece of wood veneer strategically placed in the handle pocket can work wonders.
Essential Electronics – Decent Sound Without Emptying Your Wallet
Electronics is another field where you can save a lot, but also where you risk making a mess if you don't have a minimum of basic knowledge. build a guitar on a shoestring, the goal is functionality and clean sound, not studio-quality perfection.
Pickups: The Heart of the Sound
This is the area where opinions are most divided. Pickups can cost from 15 euros to 300 euros (or more) each.
Cheap Pickups: There are sets of Chinese humbucker or single-coil pickups that cost a pittance (20-40 euros for a complete set). Many are surprisingly good. They won't have the definition of a Seymour Duncan or a DiMarzio, but they're a great starter. Look for reviews online, especially on forums and YouTube.
What to watch: For budget pickups, resistance (measured in ohms) is key. For single coils, 6kOhm to 8kOhm is a good range. For humbuckers, 7kOhm to 16kOhm is a good range, depending on whether you want a more vintage or punchier sound. Ceramic magnets are common in budget pickups and offer a powerful but less nuanced sound than alnico magnets. Don't worry, they're a great starting point.
My experience: I installed a set of €30 humbuckers that sounded punchy and full, perfect for rock and blues. Sure, they didn't have the dynamics of high-end pickups, but for a first DIY guitar, they were a blast. If you want to upgrade, pickups are the easiest thing to change later. Check them out. How to improve your guitar sound, often a pickup change is the first step.
Potentiometers, Capacitors, Switches and Jacks
Saving money is easy here. No "boutique" components are needed.
Potentiometers (Pots): Use Alpha potentiometers. They cost a few euros each and are reliable.
Values: 250k Ohm for single coils (Strat, Tele) and 500k Ohm for humbuckers (Les Paul).
Type: Linear (B) for volume, logarithmic (A) for tone. I sometimes use logarithmic for volume too, depending on how I like the response. Experiment!
Capacitors (Caps): Ceramic disc capacitors are the cheapest and work great for tone. Typical values: 0.022uF or 0.047uF. Don't waste your money on Orange Drop or other "esoteric" capacitors for a budget first build. You won't hear the difference.
Switch: A standard 3- or 5-position switch (for a Strat or Tele) or a good-quality 3-position toggle switch (for an LP) costs just a few euros. Make sure it's sturdy.
Jack Output: A standard 6.35mm (1/4″) mono jack is more than sufficient.
Wiring: Use regular 22 AWG (American Wire Gauge) wire. Gold-plated wire isn't necessary. The key is to solder well.
Welding: If you're new to soldering, I recommend practicing on old circuit boards or scrap wire. Good solder is shiny and conical, not dull and lumpy. Cold solder is one of the most common causes of noise and signal interruptions. I burned a potentiometer on my first soldering attempt, so don't worry if it doesn't come out perfect right away. Practice makes perfect.
Shielding: This is a cheap and super effective trick for reducing noise. Line the cavities of the electronics and pickups with self-adhesive copper tape or, if you're even more budget-friendly, aluminum foil. Ground everything. It makes a huge difference, especially with single coils.
Hardware and Finish – Functionality Before Aesthetics
The hardware is what makes the guitar playable and stable. The finish, on the other hand, is the aesthetic aspect. create an electric car without spending a fortune, we focus on functionality for the hardware and simplicity for the finishing.
Bridge: Stability and Intonation
The choice of bridge depends on the type of guitar you are building.
Hardtail (fixed bridge): The most economical and stable choice for a Strat or Tele. Fewer moving parts, fewer tuning problems. A Wilkinson or generic "vintage-style" fixed bridge is inexpensive and does the job. Make sure the string spacing is compatible with the pickups and neck.
Tune-o-matic: For Les Paul-type guitars. Here too, there are inexpensive but functional versions. They are often sold in sets with the tailpiece.
Tremolo: If you want a tremolo, a 6-bolt vintage-style tremolo (like a Strat) is the cheapest option. Cheap tremolos can have tuning stability issues, but they're fine for beginners. Avoid Floyd Roses or similar ones; they're complex to install and expensive.
Advice from Mimmo: On the first project, I went with a hardtail. No problems, no tuning hassles, and the sustain was excellent. Less is more, sometimes.
Tuners: Don't Save Too Much
Machine heads are crucial for tuning stability. Don't buy the cheapest ones available.
Sealed tuners: Even the budget ones (like Wilkinson, or generic ones for €20-30 a set) are a good choice. They're more precise and hold their tuning better than super-cheap open-gear ones.
Ratio: A ratio of 14:1 or 18:1 is optimal. This means you have to turn more to adjust the tuning, ensuring greater accuracy.
Assembly: Make sure the diameter of the holes on the neck's headstock is compatible with the tuners you buy. They're usually 10mm.
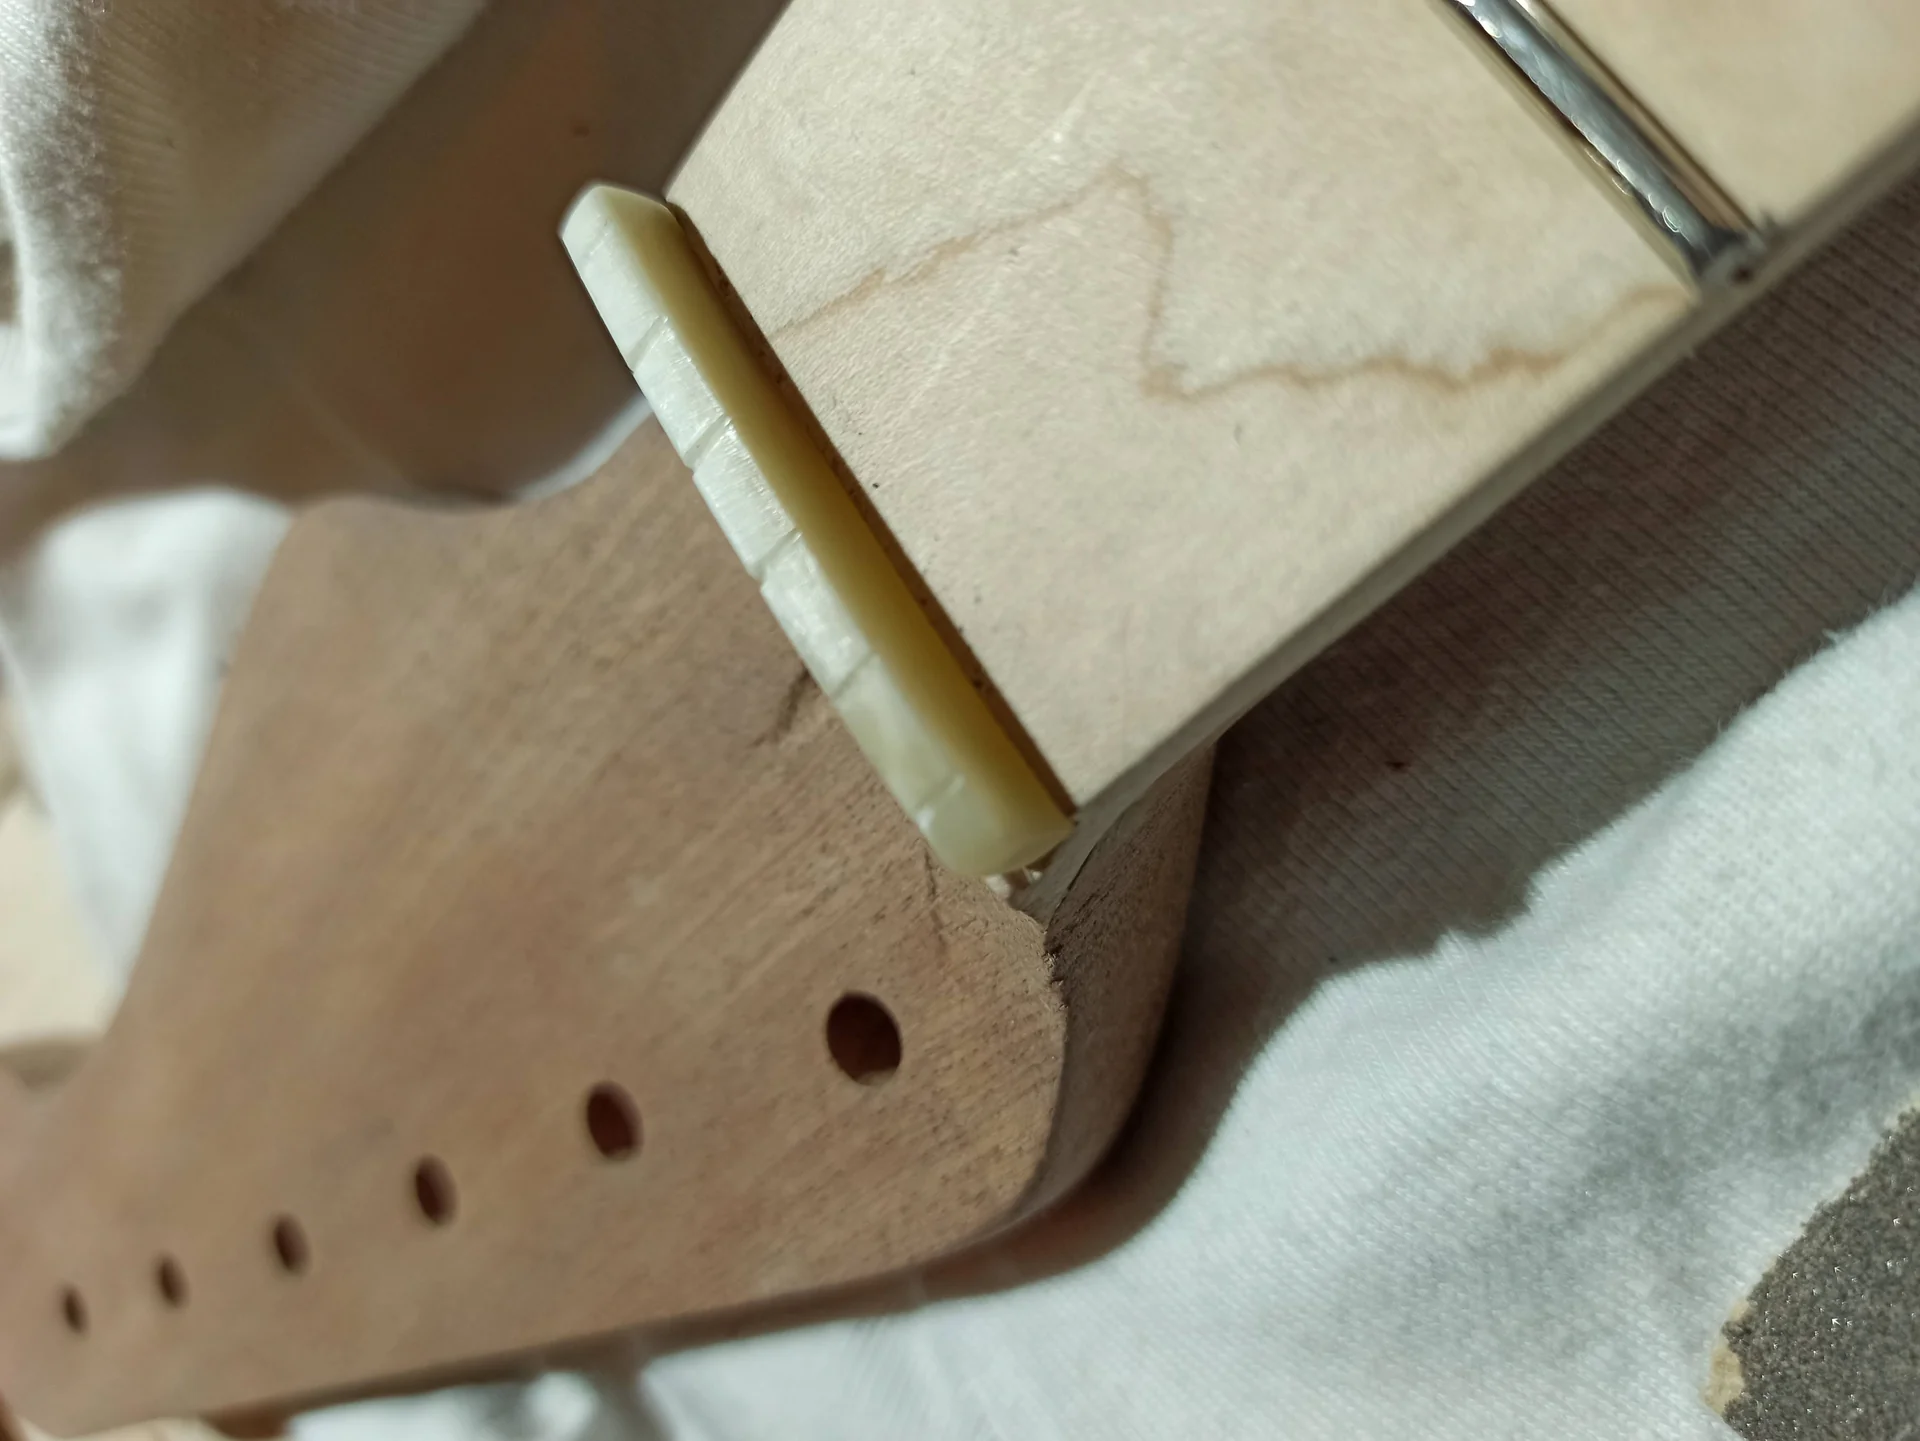
Nut: Small but Important
The nut is small but has a huge impact on playability and tuning.
Material: For build a guitar on a shoestring, A pre-slotted plastic nut (already slotted for the strings) is the most practical choice. It costs just a few euros. If you want a small upgrade without spending too much, a TUSQ or synthetic bone nut (such as Graph Tech) is an excellent solution and improves sustain and stability.
Adjustment: If you buy an unslotted nut, you'll have to carve it yourself. This requires specialized files and a lot of patience. For your first project, I highly recommend a pre-slotted nut for your neck type (e.g., Fender-style). It may still require a little filing to lower the string height at the first fret, but it's less invasive.
Finish: Oil, Wax, or Spray?
The finish is where you can really unleash your creativity without spending a fortune. And it's where you can hide any small imperfections in the wood.
Oil or Wax: My favorite finish for budget projects. Products like Tru-Oil or Danish oils are easy to apply (in thin coats, with a cloth), forgiving, and give the wood a beautiful feel. They don't require special equipment and are relatively inexpensive. The result is a natural look and excellent sustain.
Spray Paint: If you want a full color, you can use spray cans (acrylic or nitrocellulose). It requires a lot of patience, many thin layers, sanding between coats, and a dust-free environment. Don't expect a professional finish on your first try. I've had some messes with spray paint, but I've also achieved some decent finishes. The important thing is to take your time.
No Finish: Yes, you could also leave the wood bare. Some do. At least protect it with a wax or oil to prevent the wood from absorbing moisture.
My advice: For your first guitar, use oil. It's easy, gives a great aesthetic and functional result, and allows you to focus on other aspects of the build.
Assembly and Setup – The Moment of Truth
You have all the pieces on the table. Your hands are itching. It's time to put the puzzle together and feel your creation come to life. This is the most rewarding step, but also the one where patience is paramount.
Step-by-Step Assembly
Here's a logical sequence for assembling your guitar:
1. Mounting the Handle: Screw the neck to the body. Make sure it's centered and there's no excessive play. Use the appropriate screws and don't tighten too hard to avoid stripping the wood. 2. Body Hardware Assembly: Attach the bridge and tuners. For the bridge, make sure it's properly aligned with the neck and that the saddles are centered. Mark the holes precisely before screwing them in. 3. Pickup and Electronics Assembly: Insert the pickups into their cavities. Mount the potentiometers, switches, and jacks in the pickguard or directly in the body.n4. Wiring: Now it's time to solder. Follow a simple wiring diagram (you can find plenty online, search for "wiring diagram [guitar type] [pickup number]"). Connect the pickups, potentiometers, switch, and jack. Don't forget the ground! A good ground point is essential to avoid hum. String and Nut Assembly: Insert the capo (if you haven't already) and string it. Start with a set of light strings for your initial setup.
Common mistake: Forgetting a ground connection or making a cold solder. The result? A terrible buzzing sound or no sound at all. Check each solder joint with a multimeter if you have any doubts. And make sure the jumper is grounded!
The First Setup: Don't Be Afraid
Setup is the set of adjustments that make the guitar playable. It's an iterative process; it won't be perfect the first time.
1. String Tensioning and Initial Tuning: Install the strings and tension them, tuning roughly. Let the neck settle for a few hours. 2. Truss Rod Adjustment: Check the neck curvature. The strings should have a slight upward "bow." If the neck is too straight or curved backward (bow), loosen the truss rod. If it is curved forward too much (excessive relief), tighten the truss rod. Make small adjustments (a quarter turn at a time) and wait a few minutes before checking again. 3. String Height (Action): Adjust the height of the bridge saddles to achieve the desired string height. Not too high (difficult to play).
It's too low (it whips on the keys). The ideal height is a compromise.n4. Intonation: This is essential to making the guitar sound in tune across the entire fretboard.
Play the open string and tune it.
Play the same string at the 12th fret (harmonic and fretted).
If the 12th fret is higher than the harmonic, move the saddle away from the neck.
If it's more serious, move the saddle closer to the neck.
Repeat until the two sounds are identical. Do this for each string.
My first setup: I spent an entire afternoon tuning my first guitar. Every time I thought I was done, something wouldn't quite work. But finally, when I heard every note sound right, it was an indescribable satisfaction. Don't give up!
Costs and Final Considerations – How Much Do You Really Spend?
Let's do a little summary of the costs for building a guitar on a budget, based on average prices I've found online for acceptable quality components.
Pre-routed body: 40-70 euros (lime/poplar/alder)
Pre-fretted neck: 60-100 euros (maple/rosewood)
Pickup (set): 30-60 euros (generic Chinese, but decent)
Hardware (bridge, tuners, nut): 40-80 euros (hardtail, sealed tuners, plastic/TUSQ nut)
Electronics (potentiometers, capacitors, switches, jacks, wire): 15-30 euros Finish (oil/wax): 10-20 eurosEstimated Total Cost: 195 – 360 euros.
As you can see, the range is quite wide, but we can fall within our 150-300 euro range if you make careful choices and look for the best deals.
Tools: A Separate Investment
I didn't include tools in the cost, because you may already have many of them. Here are the essentials to get started:
Screwdrivers (cross-head and flat-head)
Allen keys (for truss rod and bridge saddles)
Soldering iron and tin Wire cutter and wire stripper Tape measure or ruler, caliper Drill (with wood bits)
Sandpaper of various grains A set of small files (for nut, if needed)
A tuner (essential!)
If you don't have any of these, you'll have to budget another €50-100 for a basic kit. But these are tools you'll need for a thousand other DIY projects.
The Value of Experience
Beyond the final cost, the true value of make a low-cost six-string It's not so much the instrument itself, but the process. You'll learn a ton of things: how guitars are made, how pickups work, the importance of setup, the patience it takes to work with wood.
When you pick up your guitar, the one you built with your own hands, you will feel a special bond. It won't be the most beautiful or the most expensive, but it will be the your guitar. And I guarantee it will sound better than any guitar you could buy in a store for the same price, simply because you made it yourself.
Don't be afraid of making mistakes. I drilled a hole in the body in the wrong place, soldered a pickup the wrong way, painted a neck too thickly, making it look like rubber. Every mistake was a lesson. And every lesson made me a little better.
So, what are you waiting for? Be brave, choose your parts, and start building. Your garage awaits.
