

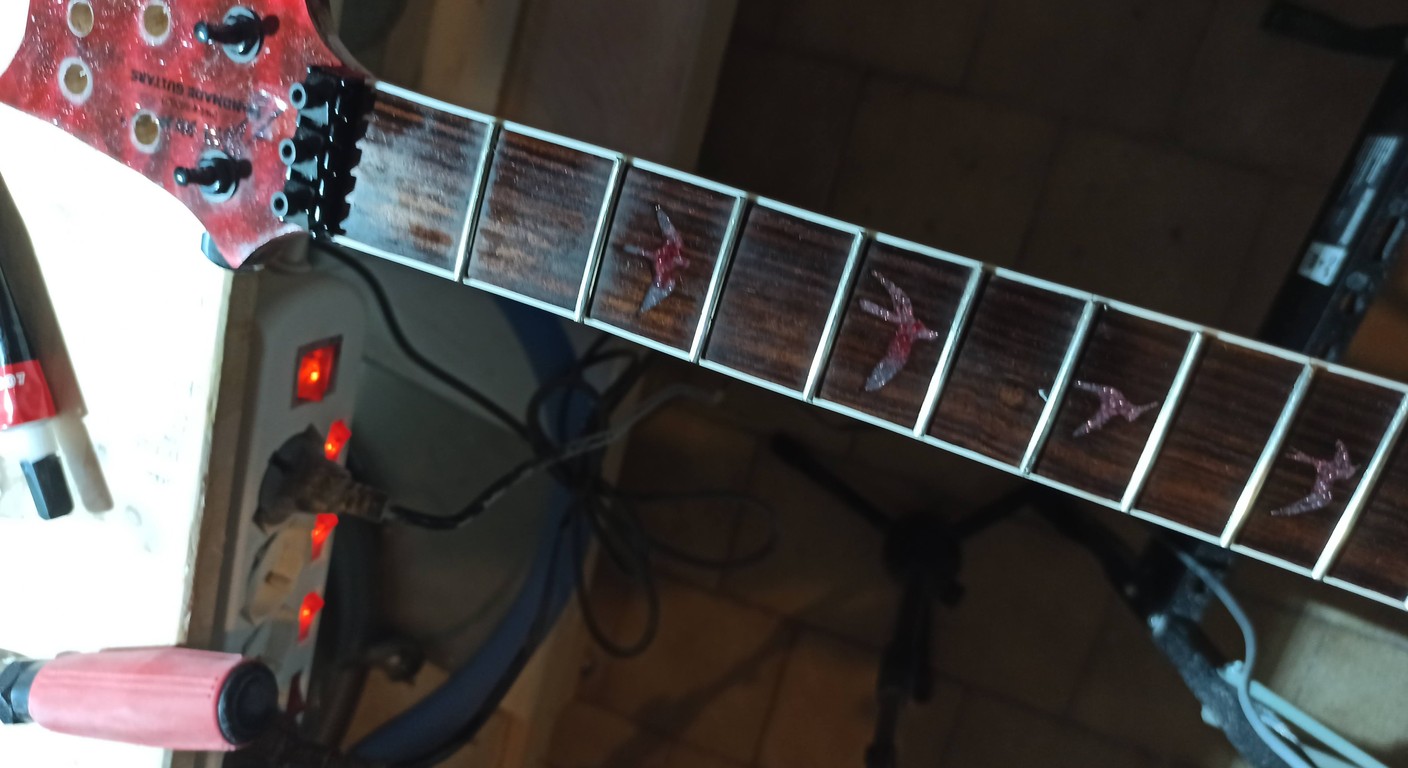
Guitar fretboard inlay: Practical step-by-step guide
When I started getting my hands on guitars, the idea of creating a neck from scratch seemed like something for magicians, or at least for professionals with tools that cost as much as a small car. Then, one day, I found myself with a piece of maple and an idea in my head: why not try? The first neck, I admit, was a disaster. But the most frightening part for me wasn't so much shaping the wood, but inserting those small decorations, the keyboard inlay guitar. They seem like details, but they are the touch that gives soul to an instrument. That little mother-of-pearl dot at the fifth fret, that abalone block… that's where the guitar begins to tell its story. At first, the fear of ruining everything with a crooked cut or a too-deep rout stopped me. I read, I watched videos, I messed up a couple of fretboards (yes, it happened!), and in the end, I found my method. And, believe me, if I managed it in my home garage, you can do it too. This is not a manual for conservatory luthiers. It's a practical, step-by-step guide, designed for those who, like me, want to get their hands dirty and create something unique. We'll talk about materials, measurements, the mistakes I made, and how to avoid them. Forget expensive tools: with a little patience and the right tools (even inexpensive ones), the result will surprise you.
Why Inlays Matter (and why you shouldn't be afraid of them)
There's a reason even the cheapest guitars have fret markers. They're not just an aesthetic whim; they help you orient yourself on the fretboard. But when we talk about guitar fretboard inlay customized, we enter a different league. We are giving a unique identity to our instrument. The first time I tried to do an inlay, I was terrified. I had a Dremel in my hand that seemed like a crazy chainsaw and a piece of wood that cost more than a pizza. The fear of making too big a hole, of going outside the edges, of ruining hours of work on the neck, was palpable. But you know what? It's just wood. And mistakes can (almost always) be corrected. The point is to understand that precision is not a matter of magic, but of method and the right tools. You don't need a thousand-euro CNC robot. You need a steady hand, a good workbench, and, above all, calm. I learned it the hard way: haste is the number one enemy when working with precision. A well-done inlay job not only improves the aesthetics of the guitar but also increases the sense of personal satisfaction. You'll feel like a true craftsman.
Choosing the Right Materials for Your Inlays
Before starting to rout, we need to decide what we are going to insert. There are a lot of materials for our inlays on the fretboard, each with its own characteristics and working difficulties.
Types of Inlay Materials
The most common are:
- Mother of Pearl (Mother of Pearl, MOP): Classic, elegant, with iridescent reflections. It is relatively fragile and requires care when cutting.
- Abalone (Paua Abalone, Green Abalone): Even more iridescent than mother-of-pearl, with shades ranging from green to blue to purple. More expensive and, in my opinion, a bit more difficult to work with because it tends to flake more easily.
- Plastic (Celluloid, Acrylic): Economical, easy to cut and work with. It's an excellent choice for first experiments or a vintage look. The typical rectangular blocks of Gibson are often made of celluloid.
- Exotic Wood: Contrasting woods can be used with the fretboard, such as ebony on maple or maple on rosewood. It requires a lot of precision in cutting to prevent it from breaking.
- Metal: Brass, silver, copper. It's rarer, but gives a unique look. Requires specific tools for cutting and polishing.
To start, I recommend trying plastic or mother-of-pearl. They are a good compromise between cost, aesthetics, and processing difficulty. Remember that these materials are thin, usually 1.5mm or 2mm thick, so they are delicate.
Adhesives and Fillers
No less important are the materials you will use to fix your position markers and to fill the empty spaces.
- Cyanoacrylate Glue (Super Glue): It is the glue par excellence for inlays. It dries quickly and creates a strong bond. Use medium or high viscosity to have some time to position the inlay.
- Filling Powder: To fill small gaps between the inlay and the fretboard, a fine powder mixed with cyanoacrylate glue is used. The most common options are ebony powder, mother-of-pearl powder, or, for a more neutral effect, black plastic powder or carbon black. A trick I learned is to use ebony powder for dark fretboards; it blends in perfectly.
The secret is to have a filler that matches the color of the fretboard well, so that the inlay looks like an integral part of the wood.
Essential Tools (and some tips for saving money)
When I started, I thought I'd have to rob a tool store. Instead, with a few targeted tools, you get excellent results. You won't need industrial machinery.
The Router (or Dremel)
This is the heart of the operation. We need to create a precise cavity in the fretboard.
- Inlay Router (Palm Router): If you have some budget, a small palm router (like Makita RT0701C or Dewalt DWP611) with an inlay base is ideal. These bases are designed to work with guide bushings and ensure precision.
- Dremel (or rotary tool): For those on a limited budget, a Dremel can work. The challenge is keeping it stable and perpendicular to the surface. There are router bases for Dremel that help a lot, like the Dremel Router Attachment 335. I started with this setup and, with a lot of patience, you get good results.
Whatever your choice, make sure it's stable. A router that 'dances' is a disaster waiting to happen.
Milling Bits (Router Bits)
You will need to get specific bits for wood or inlay.
- 2-Flute Straight Bit (Straight Bit): For most jobs, a straight tungsten carbide bit with an appropriate diameter (e.g., 1.5mm or 2mm, depending on the inlay thickness) is perfect. Make sure it's sharp! A dull bit burns the wood and does a messy job.
- Spiral Bit (Up-cut Spiral Bit): If you want maximum cleanliness and have a more powerful router, a 1.5mm or 2mm up-cut spiral bit is fantastic. It pulls out the chips and leaves a clean cut.
Remember: the quality of the bit greatly affects the final result. Don't skimp too much on this.
Guide Bushings (Guide Bushings) and Templates (Templates)
To replicate the shape of the inlay, we will use templates.
- Guide Bushing: It's a metal ring that attaches to the base of the router. The router bit passes through the center of the bushing. The bushing slides along the edge of the template, and the bit cuts the wood inside.
- Templates (Templates): These are the shapes that will guide your router. You can buy them pre-made (kits with classic dot or block shapes exist) or make them yourself. To make templates, I use thin plywood (like 3-4mm birch plywood) or MDF. The key is that the inner edge of the template must be perfectly smooth and perpendicular.
There's an important thing to know about guide bushings: they cause an 'offset'. The router bit cuts at a certain distance from the edge of the bushing. This means the template must be slightly larger than the actual inlay.
Offset Calculation: The difference between the diameter of the bushing and the diameter of the bit divided by two. For example, if the bushing has an outer diameter of 10mm and the bit is 2mm, the offset is (10-2)/2 = 4mm. This 4mm is the distance between the edge of the bushing and the edge of the cut. So, if your inlay is 6mm wide, the shape on the template will need to be 6mm + 2*4mm = 14mm wide. It's a bit convoluted at first, but once you understand the concept, it's simple.
Other Useful Tools
- Clamps (Clamps): To secure the fretboard and templates to the workbench. Essential for safety and precision.
- Paper Adhesive Tape: To protect the fretboard and temporarily secure the templates.
- Precision Pencil or Fine Marker: To mark the position of the inlays.
- Caliper (Caliper): For precise measurements.
- Carving blades or scalpels: To refine corners or remove small excesses.
- Precision files and fine sandpaper: For finishing the inlays.
- Safety glasses and dust mask: Safety first! Mother-of-pearl or abalone dust is irritating to the respiratory tract.
Planning and Design: The Heart of the Work
Before turning on any tool, spend some time planning. This is when most mistakes are avoided.
Inlay Design and Layout
Decide the shape and position of your decorative inserts. The classic dots are at frets 3, 5, 7, 9, 12 (double), 15, 17, 19, 21. But you can do whatever you want! A good practice is to draw the inlays on paper and then cut them out to position them on the fretboard. This gives you a visual idea of the final result.
Fretboard Preparation
The fretboard must be flat and sanded. If you are working on an already fretted fretboard, you will need to remove the frets. I prefer to work on unfretted fretboards; it's much simpler. Clean the surface thoroughly from dust or grease.
Marking the Positions
Use a caliper to measure the exact distance between the frets. Each fret has a precise position, and the inlays should be positioned between one fret and the next. For example, an inlay at the fifth fret will be centered between the fourth and fifth frets.
A tip: Measure from the nut to the center of the desired fret position. Then, for double frets (like the 12°), make sure they are symmetrical with respect to the center line of the fretboard.
Mark the positions with a precision pencil. Do not press too hard to avoid leaving permanent marks.
Preparation of Templates (Templates)
If you use prefabricated templates, you can skip this step. If you make them yourself, è fundamental precision.
- Draw the shape of the inlay on your template (plywood or MDF). Remember the offset! The shape on the template must be larger than the inlay itself.
- Cut the shape with a coping saw or a band saw.
- File and sand the inner edge of the shape until it is perfectly smooth and perpendicular. This è crucial: any imperfection on the template will be reproduced on your inlay.
The Step-by-Step Process: From Milling to Gluing
Now for the fun part. Let's get to work.
Phase 1: Securing the Template
Position the template on the fretboard exactly where you want the inlay to be. Use strong paper tape to hold it in place. Make sure it is centered and oriented correctly. For added security, you can also secure the template with a couple of drops of super thin cyanoacrylate glue at the edges, which will break off easily after routing.
Phase 2: Adjusting the Router Depth
This è a critical step. The inlay must be flush with the surface of the fretboard,
it's too deep
it's too protruding.
Measure the thickness of the inlay (e.g., 1.5mm). Adjust the depth of your router so that the bit cuts to about 1.2-1.3mm. We want the inlay to be slightly below the fretboard level, so that we can sand it flush after gluing.
Mistake to avoid: Do not rout too deep! Once the wood è gone, è gone. It's better to be slightly shallow and rout a little more.
Phase 3: Milling the Cavity
Wear safety glasses and a dust mask. Turn on the router and, with slow and controlled movements, guide the bushing along the inner edge of the template.
- Start with a shallow cut. Do not try to reach the final depth in a single pass.
- Make multiple passes, gradually increasing the depth. This reduces stress on the router bit and the wood, and prevents chipping.
- Always work clockwise when routing the inside of a shape (climb milling) to reduce the risk of tear-out, especially with hard woods like ebony.
- Regularly remove dust and chips to have a clear view of your work.
Once the desired depth è reached, check the cavity. The corners may not be perfectly square (depends on the bit diameter). You can gently refine them with a scalpel or a precision file.
Phase 4: Cutting and Fitting the Inlays
Now that the cavity è ready, we need to cut the inlay.
- Position the piece of mother-of-pearl (or other material) on the routed cavity.
- With a fine pencil or marker, trace the outline of the cavity onto the inlay.
- Cut the inlay with a coping saw or a Dremel with a small cutting bit. Be slightly generous with the cut, leaving a small margin.
- Now comes the most delicate part: fitting the inlay into the cavity. This is done by slowly sanding and filing the edges of the inlay until it fits perfectly into the cavity. It should enter with slight pressure, without forcing.
This step requires patience. An inlay that enters too easily will leave too large a gap. An inlay that doesn't fit risks splitting if forced.
Tip: Keep a modeling file or fine sandpaper (320-400 grit) mounted on a rigid block close at hand.
Phase 5: Gluing the Inlays
When the inlay fits perfectly, è time to glue it.
- Clean both the cavity and the inlay thoroughly from any trace of dust.
- Apply a drop of medium viscosity cyanoacrylate glue to the bottom of the cavity. Don't overdo it, a little è enough.
- Gently insert the inlay into the cavity. Press lightly to secure it. The glue should rise slightly along the edges.
- Now, take your filler powder (e.g., ebony dust) and spread it generously over and around the inlay, especially in the small gaps between the inlay and the wood.
- Spray a cyanoacrylate activator (accelerator) on the powder and glue. You will see the powder and glue solidify instantly, creating a solid fill.
- Remove excess powder and glue with a spatula or a blade.
Repeat for all inlays. Let dry completely for at least an hour, preferably longer, before proceeding.
Finishing and Refinishing: The Secret to a Clean Job
The gluing è done, but now we need to make sure the inlay è one with the fretboard.
Sanding and Leveling
- Start with medium grit sandpaper (around 220 grit) on a flat, rigid sanding block. The goal è to remove excess glue and dust and bring the inlay flush with the fretboard.
- Sand with long, even strokes along the entire length of the fretboard, not just on the inlay. This ensures that the fretboard remains flat and that the inlay blends perfectly.
- Progressively move to finer grits: 320, 400, 600, up to 800 or 1000 grit. Each pass must remove the marks from the previous one.
- Check the work against the light: there should be no protrusions or depressions. The inlay must be smooth and continuous with the surface of the fretboard.
This è where patience pays off. Don't rush to move to the next grit.
Final Cleaning and Oiling
Once the sanding è perfect, thoroughly clean the fretboard of any dust residue. Use a clean cloth, possibly slightly dampened with isopropyl alcohol (but be careful, not on all types of wood or finishes). Finally, apply a fretboard oil (Lemon Oil or Fretboard Conditioner) to nourish the wood and bring out the beauty of the inlays. This è also the time to re-hydrate the fretboard after all the sanding.
Common Mistakes and How to Avoid Them (My scars teach you)
I've made almost every possible mistake, and I'm here to tell you about them.
1. Imprecise Milling
The problem: The cavity è crooked, too large, or has irregular edges.
The solution: Always use well-made templates and guide bushings. Practice on scrap pieces before tackling the final fretboard. Work slowly, with multiple light passes. Check the stability of the router.
2. Incorrect Milling Depth
The problem: The inlay è too deep or protrudes too much.
The solution: Precisely measure the thickness of the inlay. Adjust the router depth carefully, testing on a scrap piece. It's better to be a little shallow and make a minimal final pass, rather than going too deep.
3. Broken or Chipped Inlay
The problem: Especially with mother-of-pearl or abalone, the material breaks during cutting or insertion.
The solution: When cutting the inlay, use sharp blades and do not force it. During fitting, file and sand gently. If the inlay does not fit, do not force it: it means it is still too large. Go back to the file.
4. Visible Gaps Around the Inlay
The problem: After gluing, gaps are visible between the inlay and the wood.
The solution: This is often due to imprecise cutting of the cavity or an inlay that is not perfectly fitted. Make sure the inlay fits with slight pressure. Use a good mixture of cyanoacrylate glue and filler powder. For a flawless result, the powder should be the same color as the wood or a color that blends in well.
5. Scratches or Marks on the Fretboard
The problem: During sanding, the fretboard gets scratched or depressions are created.
The solution: Always use a flat, rigid sanding block. Change sandpaper regularly. Move from one grit to the next gradually, making sure to eliminate the marks from the previous grit. Work with long, uniform strokes across the entire fretboard, not just on the inlay area. And always protect the rest of the neck with masking tape.
6. Inlay that Drains (Literally)
A classic mistake I made, and one that almost made me cry, was not adequately protecting the fretboard when I applied the cyanoacrylate glue activator. The activator, if used in excess and allowed to drip, can leave whitish, opaque stains on the wood, which are difficult to remove.
The solution: Use the activator sparingly and only where needed. Protect surrounding areas with masking tape. If it happens, try sanding gently with a very fine grit (1000-2000) and then polish with a cloth.
These are just some of the obstacles I've encountered. Every mistake has been a lesson, and it has allowed me to refine my approach. Don't be discouraged if the first attempt isn't perfect. It's part of the learning process.
Beyond Dots: Complex Inlays and Customization
Once you've mastered basic inlays, you can explore more complex designs. I've seen DIY enthusiasts create true masterpieces, from dragons to band logos, using the exact same method. The key is always the same: meticulous planning, precise templates, and a lot of patience. You can combine different materials, create 3D effects (although it's more difficult) or use more advanced inlay techniques. Remember that every guitar you build or modify is an extension of your personality. Inlays are a fantastic way to leave your signature. If you want to delve deeper into modifications and customizations, take a look at our guide on how to modify the guitar for more ideas. Another fantastic resource for inspiration and advanced techniques, which I often consult, is the StewMac lutherie forum. There are in-depth discussions and galleries of incredible works that show the potential of inlays. You can find the forum here. It's a goldmine for anyone who wants to push further.
Conclusions
Making the inlays on the fretboard of your guitar is a project that requires time and precision, but it is incredibly rewarding. Don't be intimidated by the apparent complexity. With the right tools, a good plan, and a dose of patience, you too can transform a piece of wood into a personalized work of art. I still remember the satisfaction of seeing the first inlay perfectly flush, a small point of light that seemed to have always been there. It's an emotion I wish all of you to experience.
FAQ
What is the easiest material to work with for the first inlays?
For the first attempts, I recommend plastic (celluloid or acrylic) or mother-of-pearl. They are less expensive than other exotic materials and offer a good balance between ease of cutting and resistance during insertion.
Can I do inlays on an already fretted fretboard?
Yes, it is possible, but it is definitely more complicated. You will need to remove the frets before routing the cavities and then refret them after gluing and sanding. This adds several steps and requires specific tools for fret removal and installation.
Download the Luthier Survival Kit
Free PDF with checklist, problem-cause table and project card template.
 English
  Italiano
Stuck on your build?
If you ran into the same problem or have a question, drop it in the comments. I read and reply to every one.
Write a comment