

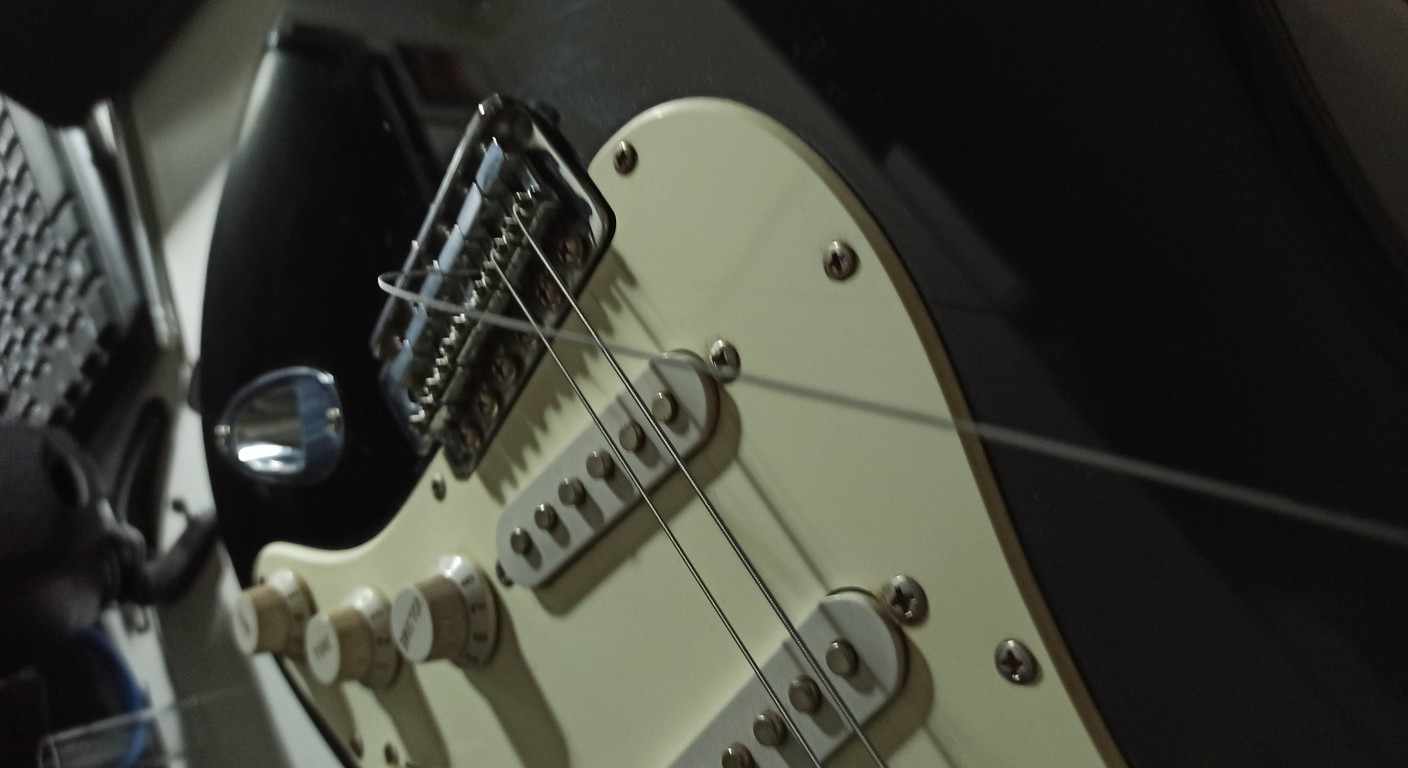
Installing guitar pickupsAvoid these 3 mistakes
Ok, I know. That feeling when you have your new set of pickup for guitar, Maybe a nice pair of smoking humbuckers or some vintage single coils you've been dreaming about for months. The desire to hear them play is so strong that you'd be tempted to solder them on the spot, without thinking twice. And that, my friends, is where you risk getting into trouble.I've been there. Many times. The first guitars I assembled in my garage were a mix of enthusiasm and ignorance. I'd install the pickups, tighten the screws, solder them roughly, and then... silence. Or a buzz that made my guitar sound like an angry beehive. Or a sound so thin it seemed to be coming from a radio. I wasn't a professional, and I still am not. I'm someone who's taken apart, reassembled, made mistakes, figured it out, and redid it. And I assure you, if I could do it, you can too.
The beauty of DIY is precisely this: you learn from mistakes. But if we can avoid the most common ones, all the better, right? I don't want to bore you with abstruse theories, let's get to the point. I've put together the three mistakes I've made most often, the ones I see being made and remade in forums, the ones that make you waste time and make you want to throw your guitar out the window. And, of course, I'll tell you how to stay away from them.nn
1. Underestimating Space: Cavities and Imprecise Routing
nn nnnnnn[GRIGLIA FOTO]nnnnnn nThis is the sore point for many. Electronics can seem like a minefield, full of colorful wires and tiny components. But in reality, with a little care and the right tools, it's much simpler than it seems. The most common mistakes here are twofold: poorly placed soldering and incorrect electrical connections.
Cold solder joints are enemy number one. These are the ones that, at first glance, appear fine, but in reality haven't made good electrical contact. The result? Intermittent signal, buzzing, loss of volume, or simply... no sound at all.
Wrong connections, on the other hand, are the result of a distracted reading of the diagram or an excess of confidence in one's mnemonic abilities. “Oh yes, this goes here, that goes there…” and then you discover that the volume doesn't work or that the pickup selector does strange things.nn
My first soldering: a nightmare of tin and smoke
nnnnnI still remember my first attempt to wire a Stratocaster. I had a cheap soldering iron, dubious quality solder, and zero experience. My solders looked like balls of solder resting on the contacts, dull and fragile. Every time I moved a wire, something came loose. It took me hours to figure out why it wasn't playing. It was a festival of cold solders and reversed wires. A real nightmare.nnHow to avoid them:
nn1. Basic but good equipment: Welder: You don't need a soldering station costing thousands of euros, but a good soldering iron with a fine tip, with at least 30-40W of power, is essential. It's best if it has temperature control. Clean tips are a must.Pond: Don't skimp on quality. A good solder (like 60/40 tin/lead for nostalgics, or a good lead-free solder with flux) makes a huge difference. Avoid thick solder; 0.8mm or 1mm is perfect for guitar electronics.
Third hand: A small holder with clips to hold the wires in place while you solder is a godsend.
Desoldering pump or braid: To fix mistakes without causing damage.n2. The technique for perfect (or almost perfect) welding: Clean: Make sure the contacts and wires are clean. If they are oxidized, scrape them gently.
Pre-waterproof: Apply a little solder to the tip of the wire and the contact where you'll be soldering. This helps create a stronger bond.
Heat the component, not the solder: Place the tip of the soldering iron on the contact and the wire at the same time. After a second or two, bring the solder closer. It should melt immediately and flow around the contact, creating a smooth, shiny joint, shaped like a small volcano.
Don't move: Hold the component still for a few seconds while the solder cools.
Inspect: The weld should be shiny and well-formed. If it's dull or grainy, it's a cold weld. Redo it. #3. Follow the diagram to the letter: Each pickup manufacturer (DiMarzio, Seymour Duncan, Lollar, Bare Knuckle, etc.) provides specific wiring diagrams for their products, often with different color codes for the wires. Use them! Don't improvise.
Download the diagram that best suits your configuration (HSS, SSS, HH, with split, with push-pull, etc.).
Print the diagram and check it off as you connect the wires.
If you're unsure, use Google Images to search for your exact pickup model and the type of setup you're looking for. Online resources, like those from Seymour Duncan or DiMarzio, are a goldmine.
A common mistake is to reverse the ground wires with the hot wires, or to connect the phase wire incorrectly (especially with pickups of different brands).n4. Grounding: All metal components (bridge, tailpiece, cavity shielding) must be grounded. This reduces hum and improves signal stability.
Create a common ground point (often on the back of a potentiometer) and connect all the ground wires there.
Remember that the guitar's bridge must be grounded via a wire running under the bridge or through the body. If you forget this, you'll end up with a terrible hum that only goes away when you touch the strings.
Good wiring is invisible, but its effect on sound is enormous. Don't skimp on precision and cleanliness. A job well done will last a long time and save you a lot of frustration. And if you're interested in learning more about how modify the guitar from an electronic point of view, we have a lot of resources on the blog.nn
“It’s never the pickup that’s buzzing, it’s almost always your ground wire.” – A maxim I learned the hard way.nnLittle tip: Before closing the guitar, do a “dry” test. Connect the guitar to the amplifier and gently touch the top of each pickup with a screwdriver. You should hear a clear and distinct “thump”. This tells you that the pickup is connected and generating a signal. If you hear nothing, there's a problem.nn
3. The Underrated Adjustment: Pickup Height and Tilt
[AFFILIATE BOX] nnnnnnYou've installed the pickups, you've soldered everything perfectly. Finally, the sound comes out, loud and clear. But does it sound good? Or is it too aggressive, or too weak, or unbalanced between the strings? This is the third big mistake: considering the job finished once the pickups are “in”.The height and inclination of the pickups are crucial parameters that drastically influence the sound, sustain, balance between the strings, and even playability. Many think it's enough to screw them all the way down or place them “by eye”. Big mistake!nn
My pickup height revelation:
For years, I believed that the closer a pickup was to the strings, the more powerful it would be. So I'd crank it all the way up. The result? A mellow, undefined sound with little sustain and a lot of slack. string pull (the magnetic attraction of the pickups on the strings, which alters their intonation and sustain). Then, one day, I read an article by a luthier (one of the real ones, not a garage one like me!) who explained the importance of distance. I started experimenting and… a world opened up. My guitar started to “breathe” in a way I had never heard before.nnHow to optimize height and tilt:
nn1. Start from the manufacturer's recommendations: Many pickup manufacturers provide recommended starting heights.For Fender-style single coils, a good starting point is about 2.4mm below the low E string and 1.6mm below the high E string, fretting the last string at the last fret.
For humbuckers, you can start around 3.2mm below the low E and 2.4mm below the high E.
These are just starting points. Your ear is the final judge.n2. Adjust the overall height: Pickups too high: The sound becomes more powerful, but also more compressed, less dynamic, and sometimes "muddy." Magnetic attraction on the strings (string pull) can cause intonation problems, especially at the higher frets, and reduce sustain.
Pickups too low: The sound is weaker, thinner, with less sustain. Dynamics improve, but it can lack body and presence.
The goal is to find the balance between power, clarity, dynamics and sustain.n3. Adjust the tilt (balance of the strings): A pickup rarely sounds its best if it is perfectly parallel to the strings.
Generally, you tend to hold the side of the pickup under the low E strings slightly higher than the side under the high E strings. This compensates for the greater amplitude of vibration of the thicker strings and their lesser propensity to "cut" the magnetic field.
Play the guitar and listen carefully to the volume of each string. If one string is too loud or too soft compared to the others, adjust the pitch.n4. Adjust the pole pieces (if present): Some pickups (especially humbuckers with adjustable screws) have the pole piece (The small individual magnets) are height-adjustable. This allows for even finer adjustment of the balance between the strings.
Use a small screwdriver to raise or lower the individual pole pieces. Again, small adjustments make a big difference.n5. Try and try again: Make small adjustments (half a turn of the screw at a time).
Play the guitar for a few minutes, trying out different styles (clean, crunch, lead, rhythm).
Listen carefully. Is the sound more open? More powerful? More balanced?
Take your time. This step can take hours, but it's essential to getting the most out of your pickups.
Pickup tuning is an art, not an exact science. It depends on the guitar, the type of pickup, your amp, the effects, and, above all, your personal taste. Don't be afraid to experiment. This is where your guitar really starts to sound its best. your.nn
“The right pickup at the right height can transform a mediocre guitar into a stage beast. I learned the hard way that it's not enough to buy expensive ones, you also have to know how to make them work.” – Mimmo, after spending a fortune on pickups and making them sound like crap for months.nn
Extra Tips for Avoiding Mistakes (or Making Fewer Mistakes)
Ok, we've seen the three biggest mistakes. But there are a couple of things that, over the years, have helped me a lot and that I want to share with you.nn Patience is the virtue of luthiers (and garage owners): Don't rush. Every step, from routing to soldering to fine-tuning, requires time and patience. If you feel frustrated, take a break. Grab a coffee, go for a walk. Coming back to work with a fresh mind works wonders. I've ruined more things because I was in a hurry than because I was truly incompetent.Document yourself ad nauseam: Before you begin, watch YouTube videos, read forums, and search for schematics. Don't be afraid to do too much research. The more you know, the fewer mistakes you'll make. Look for reviews and advice specific to your pickups. There's a ton of information out there, free and accessible.
Invest in good tools (but don't overdo it): You don't need a professional lab, but a good set of screwdrivers, a digital caliper, a multimeter (very cheap and essential for checking connections), and a decent soldering iron will save you time and money in the long run. I started with cheap tools and always had to buy new ones.
Don't be afraid to disassemble: If something doesn't work, it's not the end of the world. Reassemble, check, test. That's the beauty of DIY. Every time you disassemble something to figure out what went wrong, you learn a lot of new things. And next time you'll be faster and more precise.
* Pay attention to the shielding: If your guitar still hums after checking the solders and grounding, the problem might be cavity shielding. You can use conductive paint or copper tape to line the pickup and electronics cavities. This creates a “Faraday cage” that blocks electromagnetic interference. It's extra work, but if you play in environments with a lot of electronics, it makes a huge difference.nnOne last thing: Don't look for absolute perfection at the first try. It doesn't exist. Every guitar is an evolving project. The beauty of building and modify your guitar It's just that you can always tinker, improve, and experiment. The sound you like today might not be the one you like tomorrow. And that's okay. The important thing is to have fun with the process and learn something new every time.
I hope these tips are useful to you and help you avoid my own mistakes. Now, grab your soldering iron, your pickups, and get to work! And let me know how it goes, maybe by leaving a comment below with your experiences or tricks. The DIY community thrives on this, on sharing and dirty hands.nnUseful external source: For reliable wiring diagrams and pickup recommendations, I recommend checking out the Seymour Duncan website: Seymour Duncan Wiring Diagrams. It's an incredible resource for every type of configuration and pickup.nn
nn
Don't Underestimate Accessories: Potentiometers, Capacitors, and Jacks
Ok, we've talked about pickups, soldering, and height. But there's another fundamental aspect that many underestimate, and which is fully among the mistakes to avoid when deciding to install pickups on your guitar: the quality and choice of accessory electronic components. I'm talking about potentiometers, capacitors, switches, and jacks. They are the “traffic controllers” of your signal, and if one of them doesn't do its job, even the most expensive pickup will sound bad.
My battle with cheap potentiometers
I remember when, as a kid, I bought electronic kits on eBay for a few euros. They came complete with everything: potentiometers, capacitors, selector. It seemed like a bargain. I carefully assembled everything, happy to have saved money. Then, after a few months, the problems started: the volume potentiometer crackling, the tone one not changing anything until the last quarter turn, or the jack loosening and causing signal loss. I spent more time replacing cheap components than playing. A classic example of “you get what you pay for”.
Potentiometers: the right choice makes a difference
The potentiometer (or “pot”) is a variable resistor that controls volume and tone. There are mainly two types:
- Linear (B or Linear Taper): The resistance changes uniformly throughout the rotation. They are often used for volume, but they sound a bit “on-off”, with little control in the intermediate zones.
- Logarithmic (A or Audio Taper): The resistance changes non-linearly, simulating the logarithmic perception of volume by the human ear. They are the most common for guitar volume and tone, offering a more gradual and musical progression.
Generally, for volume, 250k Ohm logarithmic pots are used for single coils and 500k Ohm for humbuckers. For tone, logarithmic pots are often used, but some prefer linear for more predictable control.
Build quality: Not all potentiometers are created equal. CTS potentiometers, for example, are considered a quality standard in the industry, known for their durability, smooth progression, and tight tolerance (i.e., the nominal value is very close to the actual value). Alpha potentiometers are an excellent, more affordable alternative with a good reputation.
“A good potentiometer is like a good brake: you don't think about it until you need it. But when you need it, you want it to work without fail.” – My experience with pots breaking mid-concert.
Cheap potentiometers, on the other hand, can have wide tolerances (a “500k” could actually be 400k or 600k), an irregular progression, and limited durability, with the risk of crackling or getting stuck.
Capacitors: Small but Influential
The capacitor (or “cap”) is a passive component that, in the tone circuit, serves to “cut” high frequencies to ground as the tone knob is turned down. Its value is expressed in microfarads (µF) or nanofarads (
F).
- Common values: For single coils, 0.022µF or 0.047µF is often used. For humbuckers, 0.022µF is very common. Higher values cut more high frequencies, making the tone darker. Lower values have a more subtle effect.
- Types: There are different types of capacitors: ceramic (the cheapest, but sometimes less precise), polyester, Orange Drop (very popular for their sound and reliability), and Paper-in-Oil (PIO) (often sought after for a “vintage” and smooth sound, but more expensive).
The truth is that, for the same value, the sonic differences between various types of capacitors are often subtle and debated. For most guitarists, a good polyester capacitor or a reliable brand Orange Drop is more than sufficient. Avoid the cheapest ceramic ones, which can be noisy or unstable.
The durability and stability of the value over time are more important than the supposed “sonic magic” of an exotic capacitor. A good brand capacitor costing a few euros will do its job excellently.
Switches and Jacks: Reliability is the Watchword
The pickup selector and output jack are mechanical components subject to wear. A low-quality selector can cause signal interruptions or noise when changing positions. A cheap jack can easily loosen, causing intermittent contacts or cable breakage.
- Selectors: For Stratocasters, 5-way CRL or Oak Grigsby selectors are the standard. For Les Pauls, 3-way Switchcraft selectors are the most reliable. Make sure they have robust contacts and a solid mechanical action.
- Jack: Switchcraft jacks are the benchmark for reliability and durability. They have a robust design that securely holds the cable and withstands countless insertions and extractions.
don't skimp on these components. A selector that jams or a jack that breaks during a live performance can ruin the evening. Investing a few extra euros here is an investment in peace of mind and the longevity of your instrument.
My clear advice: For potentiometers, go with CTS or Alpha. For capacitors, Orange Drop or a good branded polyester. For selectors and jacks, Switchcraft, without thinking twice. You'll save yourself a lot of headaches.
Choosing the Right Pickup: Beyond the Numbers, Listen to Your Hands
Once you have all the right tools and accessory components, comes the most subjective but equally crucial part when deciding to install pickups on your guitar: the choice of the pickup itself. It's not a technical installation error, but an evaluation error that can render all the work done in vain. Buying the “trendy” pickup or the one your favorite guitarist uses, without considering your guitar and your style, is a mistake I've made many times.
Active vs. Passive Pickups: The First Big Choice
This is one of the first decisions to make, and it will drastically influence the sound and wiring:
- Passive Pickups: The vast majority of pickups on the market. They do not require external power, generating the signal directly from the vibration of the strings. They are known for their dynamics, touch response, and the ability to “clean up” by lowering the guitar's volume. They have a wide range of sounds, from vintage to modern high-output.
- Active Pickups: They require a 9V battery (often hidden in a dedicated cavity) to power an integrated preamplifier. They offer a more powerful signal with very reduced background noise. They are often used in high-gain genres like heavy metal, where clarity and power are priorities. The sound tends to be more compressed and with less dynamics than passive ones, but extremely defined.
My experience: I tried putting active EMGs on a Les Paul with which I played blues-rock. The result? A cold sound, powerful yes, but lacking that “woodiness” and dynamics I was looking for. For metal they were perfect, but not for my purpose. I understood that the choice must be functional to the genre and the feeling you are looking for.
Magnets: The Heart of the Sound
The type of magnet used in the pickup is one of the most important factors for its sonic character:
- Alnico II: Weaker magnets produce a warm, soft sound, with less attack and a rounder sustain. Excellent for blues, jazz, and classic rock, where a vintage and dynamic response is sought.
- Alnico V: The most common. They offer a brighter, more powerful sound, with a more pronounced attack and good definition. Versatile, suitable for almost all genres, from rock to pop.
- Alnico VIII: Less common, they offer high output and a more aggressive sound compared to Alnico V, but with a more organic character than ceramic ones.
- Ceramics: Very powerful magnets. They produce a bright, aggressive sound, with high output and a strong mid-range response. Often used for high-gain and metal genres, where power and clarity are essential, but they can be less dynamic and more “cold”.
There isn't one “best” magnet, just the one most suitable for the sound you have in mind. Try reading reviews and listening to specific audio samples for the type of magnet and pickup model you are interested in.
Output and DC Resistance: Numbers to Interpret
Often, only the DC resistance value (expressed in kOhms) is looked at to understand a pickup's “power”. It's a useful indicator, but not the only one. A pickup with high DC resistance usually has more windings and higher output, but it doesn't always translate into a “better” sound.
- Low Output: More dynamics, clarity, a more “open” sound. Requires more gain from the amplifier.
- Medium Output: A good balance between power and dynamics, very versatile.
- High Output: More power, compression, sustain, ideal for distorted sounds. Can be less dynamic in clean.
Output is also influenced by the type of magnet and the pickup design. Don't rely solely on numbers. A lower output pickup can sound huge through a good tube amplifier pushed to its limit. A high output pickup might sound muddy if not paired with the right electronics and amplification.
The Influence of Wood and Bridge
Don't forget that the pickup is only one part of the equation. The guitar's wood, the type of bridge (tremolo, tune-o-matic, hardtail), and even the quality of the strings influence the final sound. A bright pickup on an already bright guitar might sound shrill. A dark pickup on a guitar with little sustain might become too “muddy”.
My approach: Listen to your “acoustic” guitar. Does it have a bright or dark sound? Does it have a lot of sustain or little? This will give you an idea of the type of pickup that could balance it or enhance its desired characteristics. Don't try to transform a Telecaster into a Les Paul just with pickups; work with the instrument's intrinsic characteristics.
The Golden Rule: Listen, Listen, Listen!
There's no substitute for listening. If possible, try guitars with the pickups you're interested in, watch comparative videos, read honest reviews (not sponsored ones). And once the pickup is installed, take the time to adjust it and familiarize yourself with its sound. Don't judge it after five minutes. Sometimes, a pickup that doesn't convince you at first, after some adjustments and time to get used to it, becomes your favorite.
FAQ on Guitar Pickup Installation
1. Can I mix pickups from different brands on the same guitar?
Absolutely yes! Many guitarists do this to achieve unique sound combinations. The important thing is to pay attention to signal compatibility and phase. Output differences can be balanced with pickup height, and for phase, consult the wiring diagrams of the respective manufacturers to ensure that the “hot” and “ground” wires are connected correctly to avoid frequency cancellations.
2. Is it necessary to change potentiometers and capacitors when changing pickups?
It's not strictly necessary if the existing components are of good quality and the correct value for the new pickups. However, it's an excellent opportunity to upgrade the electronics. If you're switching from single coil to humbucker (or vice versa) or if your pots and capacitors are old or cheap, an upgrade can significantly improve the sound and overall reliability of the circuit.
I hope this extended guide is useful for you to tackle the task of installing pickups on your guitar with greater awareness and fewer mistakes. Remember, every guitar is a journey, and every modification is a step forward in discovering your sound. Don't be afraid to get your hands dirty, learn, and most importantly, have fun.
Download the Luthier Survival Kit
Free PDF with checklist, problem-cause table and project card template.
 English
  Italiano
Stuck on your build?
If you ran into the same problem or have a question, drop it in the comments. I read and reply to every one.
Write a comment