

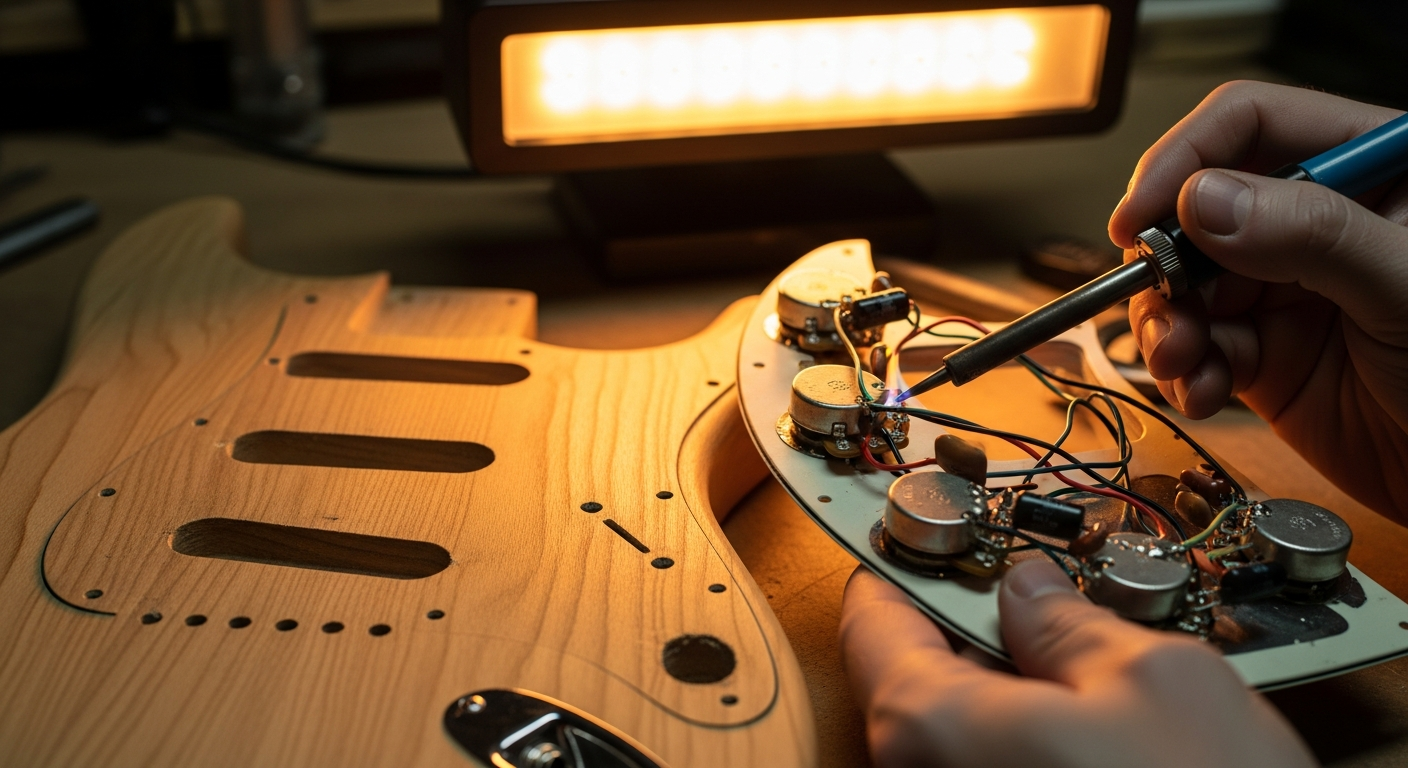
Broken guitar jack? Fix it yourself in 3 steps.
How many times has it happened? You're playing, you move a little, and suddenly... crrr... silence. Or an annoying buzz that covers everything. The first thing you think is: "The amp? The cable?" Then, with a cold shiver, you realize it's your guitar. And the number one suspect is almost always it: the output jack.I spent years taking my guitars to the repair shop for every little problem. Then one day, with an old Squier that wasn't worth paying for repairs, I decided, "It's either make or break." And so I learned that repairing a guitar jack input electric It's a job you can easily do in your garage. And if I could do it, with my Sunday luthier's hands, you can do it too. It's not a surgical procedure, I assure you. It requires a little patience, the right tools, and the willingness to get your hands dirty. But the satisfaction of hearing your guitar scream again, knowing you've fixed it yourself—well, that's priceless. And you'll save yourself the luthier's bill, too!
This article will guide you step by step. I'll tell you what you need, how to do it, and most importantly, the mistakes I've made that you can avoid. Because that's the beauty of DIY: learning from the mistakes of others (or mine, in this case!).
Diagnosis: Understanding “why” your jack is acting up
Ok, the diagnosis is made. Our faulty output connector Its days are numbered. Now we need the hardware. Don't worry, we're not building a rocket. You'll already have many of these tools, or they're easily available at a low cost.
Essential tools:


- Soldering iron: A 25-40W fine tip is perfect. You don't need a thousand-euro soldering station. The important thing is that the tip is clean and heats up well.
- Pond: A good solder with a flux core, preferably lead-free (if you want to be eco-friendly) or leaded (if you want to be on the safe side with soldering, it's easier to use). A diameter of 0.8mm or 1mm is ideal.
- Desoldering pump or desoldering braid: Essential for removing old solder and getting a clean job. I prefer braided solder; it gives me more control.
- Wire stripper: To prepare the wires, pliers that strip without cutting the internal wires are essential.
- Screwdrivers: Cut and cross-shaped, to open the guitar.
- Fine-nose pliers: Useful for holding cables or bending terminals.
- Multimeter: As mentioned before, to test continuity.
- Goggles: A must when soldering. Solder spatter or smoke is no joke.
- Damp cloth or sponge to clean the tip of the soldering iron.
Consumables:
- Replacement Jack: This is the highlight. Don't skimp here! I'll explain more below.
- Electric cable: If the original cables are too short or damaged, you will need a short piece of shielded instrument wire or, alternatively, two single leads (one for signal, one for ground).
- Heat shrink tubing: Small plastic tubes that shrink when heated, excellent for insulating solder joints and making them stronger. A diameter of 3-4mm is perfect for internal wiring.
- Contact cleaner (optional): If you also want to clean the potentiometers or switches, it's a good idea to have some.
Choosing the right jack: don't buy the first one you come across!
This is where the problem lies for many. guitar jack It's not just a jack. I learned the hard way that an extra euro on this component can mean the difference between a clean signal and years of frustration.There are mainly two types of jacks you will come across:n1. Standard (or Open Frame): These are the most common and least expensive jacks. They have exposed terminals. They work, but are more prone to dirt and wear.n2. Switchcraft 11 (or similar): These are the industry standard. They're more robust, the contacts are more solid, and they last a lifetime. They cost a little more (a couple of euros), but they're an investment that pays off in reliability. I use Switchcraft 11s almost exclusively for my builds and repairs.
Make sure it's a mono (TS) jack if your guitar has passive pickups. If it has active pickups, you need to make sure it's a stereo (TRS) jack and that you know how to connect the third terminal for the battery.
One more thing: barrel jacks are different. They're often found on Ibanez-type guitars or some Telecaster models. They're cylindrical in shape and screw directly into the body. The soldering logic is the same, but the assembly is different. Check what type of jack your guitar has before ordering a replacement.
The Process: Jack Repair Step by Step
Well, we have the tools, the spare parts, and the determination. It's time to get our hands dirty and get going. replacing the jack connector. Remember: calm and precision.Step 1: Disassembly and Preparation
This is the stage where the ground is prepared.- Unplug your guitar and loosen the strings: It seems obvious, but it's not. Never work on a guitar plugged into an amp! Loosen the strings just enough to keep them out of the way, or, if necessary, remove them entirely.
- Access the electronics compartment: Unscrew the pickguard screws (if Strat-style) or the back cover screws (if Les Paul-style or similar). Set the screws aside in a container; they're small and easily lost.
- Photograph everything! This is the most important advice I can give you, and I learned it the hard way. Before you desolder anything, take a nice, clear photo of the current wiring. It will save your life when you need to reconnect the wires to the new jack, especially if the wire colors aren't standard.
- Unsolder the old jack:
- Heat the tip of the soldering iron well.
- Place the hot tip on the solder point you want to remove, while simultaneously placing the desoldering pump or braid on it.
- Suck up the molten solder with the pump or absorb it with the braid.
- Repeat until the thread comes off clean.
Remember that there are usually two wires: one for signal (often a center wire) and one for ground (often the outer shielded wire). If it's a stereo jack, there will be a third wire for the Ring. - Remove the old jack from the body: Once the wires are disconnected, unscrew the nut holding the jack to the guitar body. Gently pull it out.
- Clean the area: If there is dirt or dust in the hole or surrounding area, clean it with a cloth.
Step 2: Soldering the New Jack
This is where things get serious. Soldering is where many hobbyists get stuck, but I assure you that with a little practice and attention, it's doable. Don't worry, it's just practice!- Prepare the cables:
- If the original cables are in good condition and the right length, use them. Otherwise, cut two new pieces (or one shielded one) of the same length.
- Strip about 5-7mm of insulation from each end of the wires that will go into the jack.
- “Tin the exposed ends of the wires: heat the wire and melt a little solder on it. This strengthens the wire, makes soldering easier, and prevents fraying.
- Identify the terminals of the new jack:
- Mono jack (TS): It will have two terminals. A longer one, which makes contact with the cable's "sleeve" (the ground). The other, shorter and often insulated, makes contact with the "tip" (the hot signal). Check your replacement jack; the ground terminal is usually the larger one and connected to the body of the jack.
- Stereo jack (TRS): It will have three terminals: Sleeve (ground), Tip (signal), and Ring (usually for the battery in active circuits). Consult your guitar's schematic or the photo you took!
- Prepare the heat shrink tubing (optional, but recommended):
- Cut two small pieces of heat shrink tubing (about 1-1.5 cm) for the two cables.
- Put them on the cables Before to solder! This is a common mistake: you solder, and then you remember the sheath.
- Solder the wires to the new jack:
- Place the tip of the soldering iron on the terminal of the jack you want to solder.
- As soon as you see the metal of the terminal heating up, place the solder on the contact point between the terminal and the tinned wire. Not on the tip of the soldering iron!
- The solder should melt and flow, forming a shiny, “mounded” solder. It should not be dull or ball-like (cold solder).
- Remove the solder first, then the soldering iron. Hold the cable still for a couple of seconds until the solder solidifies.
- Repeat for the other cable (ground).
For shielded cables, the center wire goes to signal (Tip), and the shield braid (or a separate wire connected to it) goes to ground (Sleeve). - Insulate the solder joints (with heat shrink tubing):
- Slide the sheath you had previously inserted over the welds, covering them well.
- Use a lighter (carefully!) or a heat gun to shrink the sheath. This will insulate the contacts and make them more durable.
Common mistake to avoid: Cold solder joints or bridges. Cold solder is brittle and doesn't conduct well. It looks cloudy and lumpy. Do it again! A "bridge" is when solder accidentally connects two terminals that shouldn't be connected. Check carefully, using a magnifying glass if necessary.
Step 3: Reassembly and Final Testing
The hard work is done! Now we need to put everything back together and make sure it works.- Attach the new jack:
- Insert the jack into the hole in the body.
- Put on the washer and nut.
- Finger-tighten the nut until it's snug, then give it a final tightening with a wrench or pliers. Don't overtighten! Overtightening can strip the jack's threads, crack the body's paint, or cause the jack itself to rotate, breaking the internal wires. It should be firm, not stuck.
- Final visual inspection: Take a final look at all the solder joints. Are they bright? Are there any frayed wires touching where they shouldn't be?
- Continuity test with multimeter (again):
- Insert the jack cable into the guitar.
- Check the continuity between the tip of the cable and the “hot” terminal of the soldered jack.
- Check the continuity between the cable ground and the soldered jack “ground” terminal.
- There should be perfect continuity.
- Acoustic test: This is the moment of truth!
- Connect the guitar to the amplifier.
- Turn on the amp.
- Touch the pickups or play a few notes. If everything went well, the sound should be loud and clear, with no hum or dropouts.
- Try wiggling the cable slightly into the jack. The sound shouldn't come and go.
- Put everything back together: If the test is positive, you can put the lid or pickguard back in place.
Warning: Don't close everything up before testing! If there's a problem, it's much easier to fix it with the guitar open. If you close it up and then discover it doesn't work, you'll have to start over.
Common Mistakes and Garage Tips
As I was saying, I've made a lot of mistakes. Here I'll list the most common ones, so you don't fall for them.- “Cold” or “ball” welds: I mentioned it before. These are weak, opaque solder joints that don't make good contact. It means you didn't heat the terminal enough before applying the solder. Do it again!
- Heat damage: The soldering iron is hot! Don't leave the tip resting on a component or wire for too long, as you could melt the insulation or damage other components. Be quick and precise.
- Reversing the signal and ground wires: If you swap the "hot" and "ground" wires, your guitar may sound very weak, buzz, or not play at all. Check the photo you took at the beginning!
- Do not use heat shrink tubing: It's a small detail that makes a big difference. Without it, the solder joints are exposed and can easily touch other metal parts inside the electronics compartment, creating short circuits or noise.
- Overtightening the jack nut: I once tightened it so much that I cracked the paint around the jack hole. You don't need to tighten it to death, it just needs to be firm.
- Insufficient or excessive pond: Too little solder won't make a solid contact. Too much solder can create unwanted bridges. The right amount is the one that creates a small shiny "mound" around the wire and terminal.
A piece of advice that changed my life (and saved my patience)
When working in the electronics compartment, especially on guitars with large pickguards, it's easy for wires to get tangled or components to move while you're trying to solder. A simple trick is to use masking tape (like masking tape) to secure the potentiometers or switches to the pickguard or guitar body so they stay stable while you solder. This gives you more hands and less frustration.If you feel like getting your hands on electronics, perhaps for a more advanced modification, take a look at our guide on electric guitar modifications. There you'll find tons of ideas and tips for customizing your instrument.
When Jack Isn't the Problem: Advanced Troubleshooting
Okay, you've done everything, you've followed the steps, but your guitar still doesn't sound the way it should. Don't worry, it happens. Sometimes the guitar jack fix It's not the solution because the problem lies elsewhere. For an intermediate hobbyist, it's essential to know how to isolate the cause.Other common suspects:
- The jack cable: The most obvious but often overlooked cause. Have you tried a different cable? Sometimes it's simply the cable itself that's faulty or has a loose connection.
- The amplifier: Same thing. Have you tried the guitar with another amp or another guitar?
- Potentiometers (Volume/Tone): Potentiometers can get dirty or broken. If you hear a hissing sound when turning the knob or the sound comes and goes, it could be the pot. You can try spraying a little contact cleaner (like DeoxIT D5) inside the potentiometer and turning it a bit.
- Pickup switch: If you have a 3-way or 5-way switch, it too can become dirty or have worn contacts, causing signal interruptions on some positions.
- Pick-up: A pickup rarely fails completely, but it can happen when a wire becomes unsoldered or the winding is broken. If the problem only occurs with a specific pickup, that's a strong indication. You can test the pickup's resistance with a multimeter (usually between 5kΩ and 15kΩ for passive pickups).
- Internal wiring: Sometimes a wire comes loose from a potentiometer, switch, or pickup. Check all visible solder connections in the electronics compartment.
How to isolate the problem:
n1. Cable Test: Try a cable that you know works well.n2. Direct pickup test: If you're handy with a soldering iron, you can try temporarily soldering the pickup wires directly to the output jack, bypassing the potentiometers and switches. If that works, the problem is in the DC link.n3. Section Circuit Test: If the problem is intermittent, try gently moving individual components (potentiometers, switches, wires) while the guitar is plugged into the amp. If moving something makes the sound come back or disappear, you've found the culprit.Remember, diagnosis is half the battle. Understanding Exactly Finding the problem saves you time and effort. Don't always assume it's Jack. Sometimes, the real culprit is hidden well!
To delve deeper into wiring and better understand how guitar electronics work, a great resource is the Seymour Duncan website. They have a section dedicated to wiring diagrams and troubleshooting tips that's a veritable goldmine: Seymour Duncan Wiring Diagrams. There you can compare your circuit to standards and better understand each connection.
The satisfaction of doing it yourself
Here we are at the end of this journey. We have diagnosed, prepared, and repaired your broken guitar jack. I hope you've understood that this isn't something for scientists, but something that anyone with a little bit of manual skill and a desire to learn can do.The beauty of DIY, of guitar jack maintenance Made with your own hands, that's exactly what it is: not only do you save money, but you gain a deeper understanding of your instrument. Every time you touch your guitar, it will become a little more "yours," a unique piece shaped by your experiences and small successes. Don't be afraid to make mistakes. I've burned wires, made horrendous soldering, and had to redo the job several times. But every mistake was a lesson, and every lesson made me more capable. The next time your jack input he'll throw a tantrum, you'll know exactly what to do. And you'll be able to proudly say, "I fixed it!".
Now all you have to do is grab your soldering iron, arm yourself with patience, and give your guitar a new lease of life. Good luck!
See also
- Electric Guitar Bridge Height: Adjust it in 3 Steps
- Intonation problems? Adjust your saddle in 3 steps.
Download the Luthier Survival Kit
Free PDF with checklist, problem-cause table and project card template.
 English
  Italiano
Stuck on your build?
If you ran into the same problem or have a question, drop it in the comments. I read and reply to every one.
Write a comment