

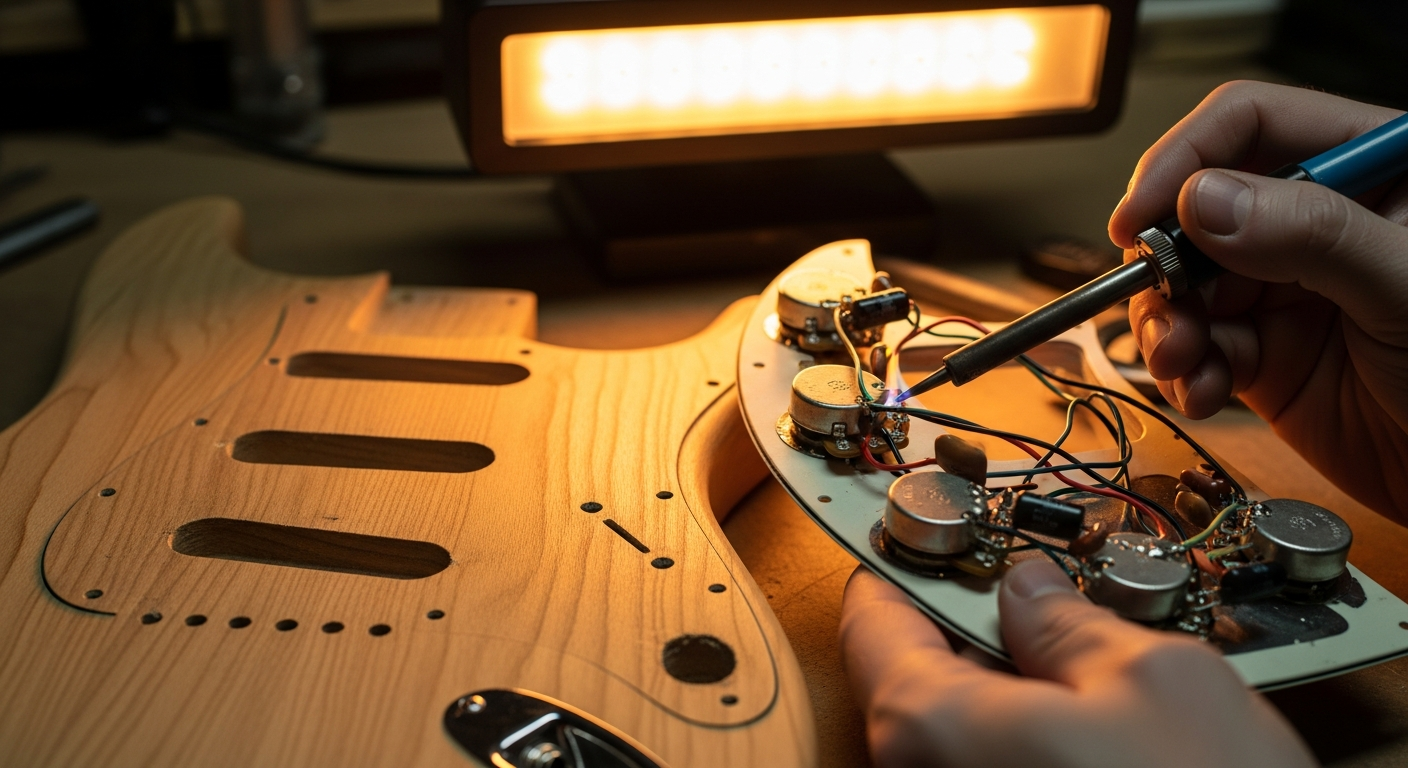
Electric Guitar Repair: 4 Faults You Can Fix
How many times have you picked up your favorite guitar, perhaps after not using it for a while, and heard a strange rustling sound? Or noticed that a potentiometer scratches, or that theintonation has gone to hell? Believe me, an infinite number of times. Every time I picked up a used guitar, or even one I had assembled myself, there was always something wrong. And every time the first reaction was: “Oh my god, I have to take it to the luthier, who knows how much it will cost me, who knows how long it will take.”
Then I started getting my hands dirty. I realized that many of these problems, the ones that seem complicated and make you want to look for a service electric guitar repair near me On Google, actually, these are interventions you can do yourself, in your garage, with a little patience and the right tools. You don't need to be a professional luthier with years of experience. You just need to want to understand how things work and not be afraid to make mistakes. Because yes, you make mistakes. I've burned more than one potentiometer and I made a cold solder joint that looked like it was made by a child. But that's how you learn.
Today I want to tell you about four common faults that you can face without panic. These are things I've solved many times, and each time they've given me immense satisfaction. If I succeeded, you can do it too. You'll see that with a methodical approach and a bit of courage, your guitar will play properly again. And the next time you hear a problem, instead of immediately looking for a technician, you'll already know where to start.
1. The background noise you don't expect: Hiss, Hum and Buzz
One of the most frustrating problems for those who play electric guitar is unwanted background noise. Whether it's a constant hiss, a deep hum or an annoying buzz, these sounds can ruin even the best solo. The good news is that often the cause is simpler than it seems and the electric guitar repair is within your reach.
Symptoms and diagnosis
Before acting, we need to identify the type of noise and when it occurs. Is it a constant white noise? A 50/60 Hz hum (typical of network interference)? A sharp buzz that changes if you touch the strings or metal parts? These details are crucial for diagnosis.
A low-frequency hum (hum) often occurs with single coils and may reduce or disappear if you touch the strings or the bridge. This is an indication that there might be a grounding problem (grounding). A sharper hiss or buzz, on the other hand, could indicate radio frequency interference (RFI) or electromagnetic interference (EMI) picked up by unshielded electronics.
To diagnose, follow these steps:
- Isolate the problem: Connect the guitar directly to the amplifier, without pedals or effects. Does the noise persist? If not, the problem is in the pedals or external cables.
- Try another cable: Sometimes the guitar-amplifier cable is the main cause of noise. A poor quality or damaged cable can act as an antenna for interference.
- Touch the strings/bridge: If the hum decreases or disappears when you touch the strings or the bridge, it's almost certainly a grounding problem.
- Move around the room: Try playing in different positions relative to the amplifier or other electrical sources (computer, dimmable lights). Some positions can minimize interference.
- Check the power supply: Make sure the amplifier and effects are connected to properly grounded power outlets.
Probable causes and solutions
Now that we have some clues, let's look at the most common causes and how to deal with them, starting with the simplest and least invasive solutions.
- Faulty cables: If the noise disappears with another cable, you've solved it. Invest in good quality, well-shielded cables. Never underestimate this aspect.
- Grounding problems: This is the most frequent culprit. Grounding serves to convey unwanted noise towards the earth, away from your audio signal. If a ground connection breaks or loosens, the noise can become evident.
- Visual inspection: Open the guitar's electronics compartment. Carefully look for detached wires or solders that appear “cold” (dull, lumpy, not shiny and well-fused). Check the wire connecting the bridge to ground and all ground connections on the potentiometers and the jack.
- Redo the welds: If you find a suspicious solder joint, redo it. Use a fine-tip soldering iron (25-40W) and good quality solder. Heat the pad and the wire simultaneously, apply the solder and let it cool without moving.
- Apply the shielding: You can shield the electronics compartment with copper tape or conductive paint. Make sure all pieces of tape are in contact with each other and that the shielding is connected to ground. This creates a “Faraday cage” that blocks interference. It’s a bit more laborious but extremely effective for many noise problems.
- Wax potting: Pickups can be “wax potted”, that is, immersed in hot wax to immobilize the coils. This is a delicate job that you can try to do yourself with a bit of research and caution, or have it done by a specialized technician. Alternatively, you can consider replacing them with better quality pickups, perhaps with an eye on the models noiseless for your guitar modifications.
Remember, patience is your best ally. Every intervention must be done calmly, testing the results at each step to understand what worked.
2. Capricious potentiometers: When they scratch or don't respond
The scratchy potentiometer è a classic. You turn the volume or tone knob and hear an annoying “crackle” or “scratch” coming from the amplifier. Sometimes, the volume doesn't go up or down smoothly, or the tone doesn't seem to change at all. These are clear signs that your potentiometer needs attention. Fortunately, è one of the electric guitar faults simpler to solve.
Symptoms and diagnosis
The symptoms are quite evident:
- Scratching noise: The classic “scratch” when you turn the volume or tone knob. This is the most common symptom and almost always indicates dirt or oxidation.
- Intermittent volume or tone: The sound disappears and reappears as you turn the knob, or only appears in certain positions.
- Non-linear adjustment: The volume goes from zero to ten too quickly, or the tone does not have a gradual effect.
- Absence of function: The potentiometer does absolutely nothing, regardless of its position.
For diagnosis, try to isolate the problematic potentiometer. Turn all the knobs one at a time and listen carefully to which one causes the noise or malfunction. If the general volume is unstable, it could be the master volume potentiometer. If a specific pickup has tone problems, check the tone potentiometer associated with it.
Probable causes and solutions
The main cause of scratching potentiometers is the accumulation of dust, dirt, and oxidation inside the component. The resistive element of the potentiometer, on which a movable contact slides, can get dirty and prevent good electrical contact.
- Cleaning with specific spray: This è the first and most effective solution in most cases.
- Unplug your guitar: Always the first rule of safety.
- Access the potentiometer: Remove the backplate or pickguard to access the electronics.
- Apply the spray: You will need an electrical contact spray, such as DeoxIT D5 or a good quality equivalent. Do not use WD-40 or non-specific products, they can leave oily residues that worsen the situation in the long term. Look for the small slit on the potentiometer body (often where the solder pins protrude) and spray a small amount of product inside.
- Turn the knob: After spraying, vigorously turn the knob back and forth about twenty times. This helps distribute the product and clean the internal surface.
- Let it act and test: Let the solvent evaporate for a few minutes and then reconnect the guitar. In most cases, the problem will be solved.
- Visual inspection: Check the three terminals of the potentiometer and any ground connection. Look for dull solder joints or wires that appear detached.
- Redo the welds: If you find a suspicious solder joint, redo it carefully. Make sure the soldering iron is hot and that the solder flows evenly.
- Identify the type: Potentiometers have resistance values (e.g., 250kΩ, 500kΩ) and response curves (linear “B” or logarithmic “A”). Volume potentiometers are almost always logarithmic (Audio Taper), while tone potentiometers can be both logarithmic and linear, although logarithmic ones are more common. Replace it with one of the same type and value.
- Desolder and replace: With a soldering iron and a desoldering pump, remove the solder from the pins and the potentiometer from the circuit. Insert the new component, solder the wires exactly as they were before. Take photos before starting to have a reference.
Replacing a potentiometer is a common and not too difficult operation, one of the first real electric guitar repairs that you will learn to do, and will give you great confidence for future interventions.
3. The Input Jack: The Achilles' heel of your guitar
The guitar input jack is a component that undergoes significant stress. Every time you insert or remove the cable, the internal contacts are rubbed and stressed. It's not uncommon for it to start causing problems after a while, becoming a source of frustration for the guitarist. But even here, the solution is often simple and quick.
Symptoms and diagnosis
Input jack problems manifest in various ways:
- Intermittent signal: The sound comes and goes, especially if you move the guitar or the cable near the jack.
- Popping noises or “crackle”: Every time the cable moves in the jack, you hear loud and unwanted noises.
- Cable that comes out easily: The cable does not stay firmly in place, indicating that the internal contact tab è loose or deformed.
- Total absence of signal: Even though the guitar is on and the amplifier is working, no sound comes out.
For diagnosis, try using a different cable and moving it in the jack. If the problem persists, it is almost certainly the guitar jack. Also make sure the problem is not in the cable itself or the amplifier, by testing the guitar with another setup.
Probable causes and solutions
The most common causes are contact oxidation, deformation of the tab that holds the cable, or solders that have loosened or broken due to mechanical stress.
- Cleaning the jack: Sometimes, simple oxidation on the internal contacts prevents a good signal passage.
- Unplug your guitar: Crucial for safety.
- Apply contact spray: Use the same electrical contact spray (e.g. DeoxIT D5) that you used for the potentiometers. Spray a small amount directly inside the jack.
- Insert and remove the cable: Insert and remove a jack cable several times to help clean the contacts.
- Head: Reconnect and check if the problem è solved.
- Unplug and open: Remove the jack plate (often fixed with two screws) or the pickguard to access the inside of the electronics compartment.
- Inspect the tab: Look carefully at the internal metal tab that makes contact with the tip of the jack cable. It should be slightly bent inwards, so as to make good pressure on the cable.
- Bend with caution: With a small flat-head screwdriver or thin-nose pliers, gently bend the tab inwards. Be very careful not to bend it too much or break it. The goal è to restore good pressure on the cable.
- Head: Insert a cable and check the tightness. If è too tight, loosen it slightly.
- Visual inspection: Check the solders on the two (or three, if è a stereo jack used as mono for a battery system) terminals of the jack. Look for dull solders, detached wires, or loose connectors.
- Redo the welds: If you find faulty solders, redo them carefully. Make sure they are clean, shiny, and have a good connection.
- Buy a replacement: Make sure to buy a jack of the same type (mono or stereo) and size. Switchcraft jacks are considered a quality standard.
- Desolder and replace: Desolder the wires from the old jack, remove it, and solder the new jack, connecting the wires exactly as they were before. Once again, photos are your best friends to remember the connections.
The jack è an inexpensive component and its replacement è one of the electric guitar repairs most rewarding, because it solves a very annoying problem with minimal expense.
4. The Mute or Weak Pickup: When the sound disappears (or almost)
Imagine playing and suddenly, a pickup stops working, or its sound becomes faint and lifeless. It’s a moment of panic, but don’t despair. Even if a pickup doesn’t sound, it’s rarely “dead” completely. Often the problem lies elsewhere in the circuit, and it’s something you can diagnose and solve with the right tools.
Symptoms and diagnosis
Symptoms of a problematic pickup can vary:
- No sound: The pickup produces no signal, even if the others are working.
- Very weak sound: The volume è extremely low compared to other pickups.
- Intermittent signal: The sound comes and goes, especially if you move the pickup selector or the potentiometers.
- “Thin” or lifeless sound: The pickup sounds strange, without the low frequencies or fullness it should have.
Diagnosis è crucial here. We need to understand if the problem è in the pickup itself, in the selector, in the potentiometers connected to it, or in the solders.
- Testing the pickup selector: Move the selector back and forth quickly. If the sound of the problematic pickup appears and disappears, or you hear noises, the selector might be dirty or faulty.
- Testing the potentiometers: Turn the volume and tone potentiometers associated with the pickup. If you hear scratching or the signal è intermittent, the problem might be there (see previous section).
- Continuity test (with multimeter): This is the definitive test for the pickup.
- Unplug your guitar: As always, safety first.
- Access the electronics: Open the electronics compartment.
- Set the multimeter: Select the resistance measurement function (Ohm, Ω).
- Measure the pickup: Identify the two main wires of the pickup (the “hot” and the “cold” or ground). Touch these two wires with the two multimeter probes (or the solder points where they are connected). If the pickup is working, you should read a resistance value (e.g., 6kΩ, 8kΩ, 12kΩ, depending on the pickup model). If you read “OL” (Open Line) or a value very close to zero, the pickup has an open or short circuit, and is almost certainly defective.
- Measure the solder joints: If the pickup itself has a correct resistance value, it means the problem is upstream or downstream. Measure the continuity from one point to another in the circuit to identify where the signal breaks.
Probable causes and solutions
The causes can be multiple, from the simplest to the most complex.
- Broken or cold solder joints: This is the most common cause. Vibrations and wear can cause a solder joint to break, interrupting the circuit.
- Visual inspection: Check all solder joints connecting the pickup to the selector, potentiometers, and ground. Look for detached wires or dull/cracked solder joints.
- Redo the welds: Re-do all suspicious solder joints. Make sure they are hot and shiny.
- Selector cleaning: With the same contact spray, spray a small amount inside the selector mechanism. Move it back and forth many times to clean the contacts. This often solves intermittency or noise problems.
- Selector replacement: If cleaning doesn't work, the selector might be internally damaged and needs to be replaced. There are many types of selectors (3-way, 5-way, blade switch, toggle switch). Buy a compatible replacement and solder the wires exactly as they were before.
- Visual inspection: Check the wires coming out of the pickup. If you see a cut or very thin wire, it could be the cause.
- Repair: If the wire is broken outside the coil, you might be able to solder it. If the break is inside the coil, the repair is much more complex and often requires rewinding the pickup, a job for specialists.
- Pickup replacement: If all tests indicate that the pickup is the problem, and it's not a vintage or particularly valuable pickup to justify a rewind, the most practical solution is to replace it. It's a great opportunity to experiment with new sounds and perhaps give a twist to the character of your guitar. You can explore upgrade options in our guide on how to modify your electric guitar.
Diagnostics with the multimeter is the key to the repair of electrical faults on guitars that involve pickups. Don't be afraid to use it, it will give you precise answers.
Essential tools for your repair corner
To address these common electric guitar problems And not only that, you don't need a super equipped workshop, but some tools are truly indispensable. Consider them an investment that will pay for itself in a few repairs, avoiding costly visits to the luthier.
Here is an essential list:
- Fine-tip soldering iron: A 25-40W model is perfect for guitar electronics. Make sure it has a clean and well-tinned tip.
- Tin for electronics: Choose flux core solder, preferably lead-free for health and environmental reasons, although many professionals still prefer 60/40 lead/tin. A diameter of 0.8mm is ideal.
- Desoldering pump or desoldering braid: To remove old solder and correct errors. The pump is often easier to use for beginners.
- Digital multimeter: Essential for testing continuity, resistance (Ohm) and voltage. It doesn't have to be an expensive model, it just needs to be reliable.
- Electrical Contact Spray: Like DeoxIT D5 or an equivalent. Don't skimp on the quality of this product, it makes a difference.
- Precision screwdrivers: Both slotted and Phillips, of various sizes, for small and large screws.
- Hex keys (Allen keys): To adjust the truss rod and the height of the bridge saddles.
- Pliers and wire cutters: To cut wires, bend terminals or grasp small components. A pair of long, thin-nosed pliers are very useful.
- Electrical Insulation Tape: To insulate connections and prevent short circuits.
- Safety glasses: To protect eyes from solder splashes or jumping wires. They are not optional!
- Gloves: To protect hands and not leave dirt or grease residues on components.
With these tools, you will be able to tackle most of the electric guitar faults and feel like a real sound engineer in your garage.
The importance of patience and documentation
When you embark on a electric guitar repair, haste è your worst enemy. No matter how simple an intervention may seem, always take your time. Every step must be performed calmly and carefully. Remember, your goal is not only to solve the problem, but also to learn and gain confidence for the future.
One aspect I cannot stress enough è documentation. Before disassembling anything, take photos. Many photos, from different angles. Make a video if you can. It seems like a waste of time, but I assure you that when you have a tangle of wires in front of you and can no longer remember where that black cable went, those photos will become your savior. I myself learned the hard way how easy è to forget an seemingly insignificant detail.
Furthermore, don't be afraid to consult electrical diagrams. Many manufacturers like Fender, Gibson, Seymour Duncan or DiMarzio provide wiring diagrams for their pickups and standard guitar configurations on their website. They are an invaluable resource for understanding how the circuit works and where the wires should be connected. For example, an excellent resource for detailed diagrams è the support section of Seymour Duncan.
If you encounter a difficoltà, stop. Take a break. Research online. Watch video tutorials. Don't be afraid to ask for help in forums or groups dedicated to DIY guitar. There are fantastic communities ready to share their experience. È how I learned, and how you can learn too.
Conclusion
Tackling the electric guitar fault repair may seem intimidating at first, but as we have seen, many of the most common problems are within reach of anyone with a minimum of manual skill and a desire to learn. From background noise to scratchy potentiometers, from a capricious jack to a silent pickup, with the right tools and a methodical approach, you can restore your guitar to its original splendor.
Every time you solve a problem yourself, you not only save money and time, but you gain a deeper understanding of your instrument. You build a more intimate relationship with your guitar and develop confidence in your abilities that will push you to explore even more complex interventions in the future. Don't be afraid to make mistakes: every error è a valuable lesson. The satisfaction of hearing your guitar play perfectly thanks to your intervention è priceless, and I assure you that the next time a problem arises, you will know exactly where to start.
FAQ – Frequently Asked Questions about Electric Guitar Repair
Is it normal for my guitar to make background noise with single coils?
Sì, single coil pickups are inherently more susceptible to background noise (hum) than humbuckers, due to their design. However, excessive noise often indicates a grounding problem or insufficient shielding. You can significantly reduce it by ensuring that the electronics are well shielded and that all ground connections are solid, or by considering the installation of noiseless pickups.
When should I replace a potentiometer instead of cleaning it?
If after cleaning the potentiometer with a specific spray and checking the solders the problem persists (scratching noise, intermittence or lack of response), è likely that the component è mechanically worn or internally damaged. In this case, replacement è the most reliable solution to restore full functionality and linear response of the potentiometer.
Download the Luthier Survival Kit
Free PDF with checklist, problem-cause table and project card template.
 English
  Italiano
Stuck on your build?
If you ran into the same problem or have a question, drop it in the comments. I read and reply to every one.
Write a comment