

Electric guitar maintenance: 3 flaws and solutions
I still remember my first "serious" guitar, a Squier Stratocaster that an older cousin had left me. It played, but it didn't play Well. It had a strange buzz, the strings were as high as mountaineering ropes, and when I tried a chord at the seventh fret it sounded like I was playing an out-of-tune piano. At the time I thought it was my fault, that I wasn't good enough. Then I discovered that the problem was the guitar, or rather, its almost total lack of maintenance. At first, the idea of getting my hands on an instrument that cost more than a month's allowance terrified me. I was afraid of causing damage, of "unscrewing the wrong screw" and messing everything up. I think it's a common fear, that block that makes you keep your guitar hanging on the wall even if you know it could sound much better. But I'll tell you one thing: if I, who at first couldn't distinguish a potentiometer from a capacitor, managed it, you can too. All it takes is a little patience, the right tools (often already at home, or costing next to nothing) and the desire to understand why how something is done in a certain way. In this article, I'll take you into my garage, among wood dust and flying cables, to tackle three of the most common defects that make life difficult for us guitarists and for those who venture into do it yourself on your six-string. We'll talk about how to solve them, step by step, with a focus on the mistakes I've made myself and that you can easily avoid. guitar maintenance electric it's not rocket science, it's craftsmanship, and like any craftsmanship, it's learned.
Defect #1: Action is high and Intonation a disaster (or vice versa)
This is the classic basic "setup". How many times have I heard friends complain that their guitar was "hard" to play, or that it sounded out of tune even if the tuner said otherwise. Often, the fault is not the guitarist's, but a adjustment absent or poorly done. An action that is too high makes every bending a torture and every chord an exercise in brute force. Incorrect intonation, on the other hand, makes you sound "out of tune" even when the tuner is solid green.
Symptoms and Probable Causes
The symptoms are quite evident:
- The strings are very far from the fretboard, especially on the high frets.
- It is difficult to press the strings, causing finger pain.
- Notes played on high frets sound sharp or flat compared to open string tuning.
- The guitar is uncomfortable to play, even for short periods.
The causes behind these problems can be diverse, and often interconnected:
- Truss rod not adjusted correctly: The truss rod is a metal bar inside the neck that controls its curvature (the "relief"). If the neck is too curved forward (bow), the action will be high. If it is too straight or even curved backward (back bow), you will have fret buzz problems.
- Incorrect bridge saddle height: The bridge saddles are the resting points for the strings. If they are too high, the overall action will be high.
- Incorrect nut height: The nut is the resting point for the strings at the end of the neck, near the headstock. If the string slots are too high, the action will be high on the first frets, making it difficult to play open chords.
- Uncalibrated intonation: The vibrating length of the string from the nut to the bridge must be precise. If the saddles are not positioned correctly, the guitar will be out of tune as you go up the fretboard.
The Diagnosis: What to Check Before Acting
Before picking up any tool, we need to understand what the real problem is.
- Check the neck relief: Press the sixth string (the thickest one) at the first fret and simultaneously at the last (or where the neck joins the body, usually the 17th or 19th fret). Look at the space between the string and the 7th-9th fret. There should be a very small space, about the thickness of a business card or a thin string (0.010"). If there is no space or it's too much, the truss rod needs to be adjusted.
- Measure the action: With a metal ruler or a specific luthier's gauge, measure the string height at the 12th fret. Specifications vary, but a good starting point is about 1.5-2.0 mm for the low string and 1.0-1.5 mm for the high string on an electric guitar.
- Check the nut height: Press a string at the third fret and check the space between the string and the first fret. It should be minimal, just enough to pass a thin sheet of paper. If the space is greater, the nut is too high.
- Check the intonation: Perfectly tuning the open string, play the same string at the 12th fret. The tuner should indicate the same note, without variations. If it is sharp or flat, the intonation is wrong.
Solutions, from Least Invasive to Most Complex
Let's address these problems following a logical order, to minimize risks.
1. Truss Rod Adjustment
This is the first step, because it influences everything else.
- Prepare the guitar: Remove the case, place it on a workbench mat or a soft cloth. Slightly loosen the strings (half a step or a full step).
- Find the truss rod screw: It can be on the headstock (under a cover plate, as in Gibson or many Ibanez) or at the base of the neck (as in Stratocasters, often requiring neck removal).
- Turn the wrench: Use the Allen key or socket wrench provided with the guitar (or buy one of the correct size).
- To reduce relief (neck too curved forward, high action), turn clockwise (tighten).
- To increase relief (neck too straight or curved backward, fret buzz), turn counter-clockwise (loosen)
- Check and repeat: Retune the guitar, wait a few minutes for the wood to settle, and recheck the relief as described in the diagnosis. Repeat if necessary, with small adjustments.
Warning: Never force the truss rod. If you feel a lot of resistance, stop. It could be blocked or damaged, and in that case, it's best to consult a luthier. A broken truss rod is serious trouble.
2. Bridge Saddle Height Adjustment
Once the neck has the correct relief, you can adjust the overall action.
- Identify the screws: Each saddle has one or two small screws (usually hex or Phillips) that adjust its height.
- Adjust the height:
- To lower the action, screw in the screws (turn clockwise).
- To raise the action, unscrew the screws (turn counter-clockwise).
- Test and refine: Play the guitar, check for excessive fret buzz. If the action is too low, you might hear the strings buzzing on the frets. Raise it slightly until you find the right compromise.
3. Intonation Adjustment (Octave)
This step is always done last, after adjusting relief and action.
- Perfect tuning: Make sure each string is perfectly tuned open.
- Check the 12th fret: Play the string at the 12th fret (natural harmonic) and then the fretted note at the 12th fret. The tuner should read the same note.
- Adjust the saddle:
- If the note at the 12th fret is sharp, the string is too short. Lengthen the string by screwing in the saddle intonation screw (moving the saddle back, away from the neck).
- If the note at the 12th fret is flat, the string is too long. Shorten the string by unscrewing the saddle intonation screw (moving the saddle forward, towards the neck).
- Repeat for all strings: Each string has its own saddle and its own adjustment.
4. Nut Adjustment (or Replacement)
This is more delicate. If the nut is too high, the action on the first frets will be excessive.
- Lowering: If it's bone or Tusq, you can delicately file the underside or the slots with specific nut files. This operation requires precision and appropriate tools.
- Replacement: If the nut is made of cheap plastic or is too low/damaged, it's better to replace it with one made of bone or quality synthetic material. This can improve sustain and tuning stability.
Warning: Filing the nut too much can irreversibly damage it, making the action too low on the first frets and causing fret buzz. If you are unsure, it's best to leave this job to a professional.
Useful Tools for Setup
For these operations of instrument care, you will need:
- Set of hex keys (metric and/or imperial, depending on the guitar).
- Phillips and flathead screwdrivers.
- Precision metal ruler or lutherie gauge (for measuring action and relief).
- Good quality electronic tuner.
- Soft cloth and work mat.
- Optionally, specific nut files.
Defect #2: Hums, Hisses and Voices from the Beyond (Electrical Problems)
Ah, background noise. How many of us have cursed that constant hum or that hiss that won't leave you alone? Electric guitars are electro-mechanical instruments, and electrical problems are common. They can range from a slight hum to a deafening whistle. I remember when my guitar had a hum that only disappeared when I touched the strings: it was a classic grounding problem.
Symptoms and Probable Causes
Symptoms are varied and can be misleading:
- Constant Hum: Often 50/60 Hz, typical of single coils or grounding problems.
- Hum that disappears when touching metal parts: Classic grounding problem.
- Hiss or crackles: Often associated with dirty potentiometers, faulty cables, or cold solder joints.
- Feedback: Especially at high volume, it can be caused by microphonic pickups (unwaxed) or poor shielding.
- Volume or tone that 'scratches' or jumps: Dirty or worn potentiometers.
The most common causes include:
- Grounding problems: The guitar must have a common ground for all components. If a ground point is interrupted, hums are generated.
- Insufficient shielding (shielding): Unshielded electronic cavities are perfect antennas for picking up electromagnetic interference.
- Dirty or oxidized potentiometers and switches: Time and dust can cause contact interruptions, generating crackles or signal drops.
- Faulty cables: Jack cables or internal cables with loose solders or damaged insulation.
- Microphonic pickups: Some pickups, especially unpotted vintage ones, can vibrate with the amplifier's sound, creating unwanted feedback.
- External interference: Neon lights, computer monitors, transformers, and other electronic devices can induce noise.
The Diagnosis: Listen and Isolate the Problem
Diagnosing electrical problems is often an elimination process.
- Change cable and amplifier: Before disassembling the guitar, try another jack cable and, if possible, another amplifier. Often the problem is not the guitar!
- Move around the room: Walk around with the guitar in different positions. If the noise changes intensity, it's likely an external interference picked up by the guitar.
- Touch the metal parts: If the hum reduces or disappears when you touch the strings, the bridge, or the jacks, it's almost certainly a grounding problem inside the guitar.
- Rotate potentiometers and switches: If you hear crackles or interruptions while rotating the potentiometers or moving the switches, these components are dirty or faulty.
- Visual inspection: Open the electronic cavity (with the guitar disconnected from the amplifier!) and look for loose solders, broken wires, or burnt components.
Solutions, from Least Invasive to Most Complex
Let's tackle these problems with caution, starting with the simplest solutions.
1. Cleaning Potentiometers and Switches
This is the most common solution for crackles and hisses.
- Unplug your guitar: Make sure it is not connected to the amplifier.
- Access the components: Remove the pickguard or backplate to access the potentiometers and switches.
- Spray the cleaner: Use a specific spray for electronic contacts (e.g., WD-40 Specialist Contact Cleaner or an equivalent residue-free product). Spray a small amount directly inside the potentiometer, where you see the shaft rotate. For switches, spray where the contacts move.
- Operate the components: Rotate the potentiometers from zero to maximum several times and operate the switches back and forth. This helps the cleaner to clean the internal tracks.
- Let it dry: Wait a few minutes before reconnecting the guitar.
Warning: Do not use generic products or lubricants not specific for electronics. They can leave residues that attract dust or damage components.
2. Checking and Restoring Grounds
If the hum disappears when touching the strings, the problem is almost always a ground issue.
- Check the jack: Check the ground wire solder on the output jack. It must be solid.
- Bridge and strings: The bridge ground is fundamental. A wire should connect the bridge (or the tremolo spring, if present) to the guitar's ground circuit. Check that this solder is intact and that the metal contact is good.
- Check all solders: Visually inspect every solder joint inside the electronic cavity. Look for 'cold' solders (dull, lumpy) or loose wires.
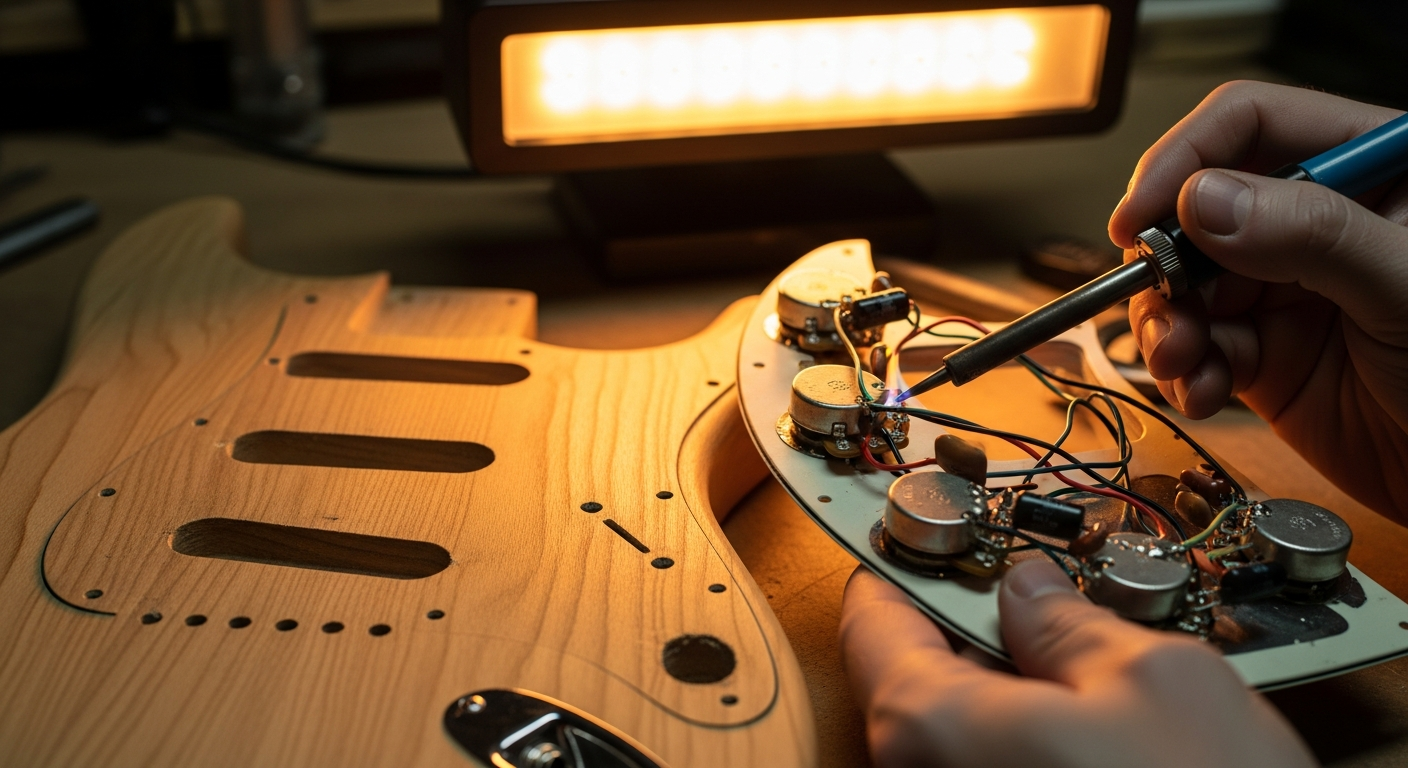
- Redo the welds: If you find a faulty solder, heating it with a soldering iron and adding some fresh solder can fix it. If you are not familiar with soldering, practice on old circuits before working on your guitar.
3. Shielding of the Electronic Cavity
If the guitar is particularly noisy in environments with a lot of interference, shielding can work wonders.
- Materials: You can use self-adhesive copper tape or conductive graphite/nickel-based paint. Copper tape is often more effective.
- Preparation: Remove all components from the cavity (pickups, potentiometers).
- Application: Completely line the inside of the cavity with copper tape, ensuring that each piece slightly overlaps the previous one to ensure electrical continuity. If you use paint, apply multiple layers.
- Grounding: All shielding layers must be grounded. Connect a wire from the shielding to the common ground of the circuit (e.g., to the back of a potentiometer).
- Reassemble and test: Reassemble the components and check for noise reduction.
Warning: Working with a soldering iron requires attention. Make sure not to touch other components with the hot tip and not to create short circuits. If you have never soldered, watch tutorials and practice.
Useful Tools for Electronics
For the electrical maintenance, these tools will help you:
- Screwdriver to open the cavity.
- Electronic contact spray.
- Fine-tip soldering iron and good quality solder.
- Wire cutters and long-nose pliers.
- Tester/multimeter (useful for checking continuity and grounds).
- Copper tape or conductive paint (for shielding).
If you are interested in further customizing the sound of your guitar, perhaps by changing pickups or adding special switches, I recommend you take a look at our guide on how to modify your guitar, where we also delve into more advanced aspects of electronics.
Defect #3: Fret Buzz and Dead Notes: When the Guitar "Mutes"
This is one of the most frustrating problems, because it directly affects the playability and sound of the instrument. Fret buzz means that the string, when vibrated, touches one or more subsequent frets, producing a metallic buzzing sound. A dead note, on the other hand, is when a string does not sound at all or produces a muffled sound without sustain. I spent years thinking my touch was too aggressive, only to find out the problem was in the frets.
Symptoms and Probable Causes
The symptoms are unmistakable:
- Metallic buzzing: Especially when playing the strings with a certain force, a 'frying' or 'sizzling' sound can be heard coming from the fretboard.
- Notes that don't sound: Pressing a string on a fret, the note emits no sound or dies out immediately.
- Fret out: When bending, the note dies out before reaching the desired pitch.
- Difficulty finding a low action: If you try to lower the action, fret buzz immediately appears.
The causes behind these problems can be more complex and often require more specific intervention on the frets:
- Action too low: Sometimes it's simply a matter of adjustment. If the action has been lowered excessively without considering the relief or fret height, fret buzz is inevitable.
- Insufficient neck relief: A neck that is too straight (or even with 'back bow') causes the strings to touch the upper frets.
- Unleveled frets: It is the most common cause. Some frets may be higher than others, creating unwanted contact points for the strings.
- Worn or 'grooved' frets: With use, frets wear down, creating small grooves where the strings rest. This can affect intonation and cause fret buzz.
- Raised frets: Sometimes, a fret can lift slightly from the fretboard, creating a high spot that causes buzzing.
The Diagnosis: Identify the Guilty Fret
To address fret buzz, it is essential to understand where the problem occurs.
- Check the relief: As with the general setup, make sure the neck has the correct relief. Insufficient relief is a frequent cause of fret buzz on the first frets.
- Pressed string test: Press a string on a fret and play it. If you hear buzz, try pressing the same string on the previous fret. If the buzz disappears, the problem is probably on the fret you just pressed or the next one.
- The 'fret rocker' test: This is a specific tool (or a straight, thin piece of metal with 3 sides of different lengths) that is placed on three adjacent frets. If it rocks, it means that the middle fret is lower than the other two, or one of the outer frets is higher. Move it along the entire fretboard to identify 'high' spots.
- Visual inspection: Look carefully at the frets. Look for signs of excessive wear, deep grooves, or frets that appear lifted from the fretboard.
Solutions, from Adjustment to Luthier Work
Here, solutions can become more complex and require specific tools.
1. Action and Relief Adjustment
Always the first step. If the fret buzz is slight and only occurs with very low action:
- Slightly increase the action: If you have lowered the bridge saddles too much, try raising them slightly. This often solves general buzzing problems.
- Adjust the truss rod: If the neck is too straight or bowed backward, increase the relief by loosening the truss rod (counter-clockwise), as described in Defect #1. This will give the strings more room to vibrate.
2. Identification and Repair of Raised Frets
If a single fret has lifted:
- Locate the fret: Use the fret rocker or a straightedge to identify it.
- 'Tapping' the fret: With a luthier's hammer (with a nylon or rubber head) and a wooden block or a piece of rigid plastic to protect the fretboard, you can try to gently 'tap' the fret to seat it back into place. Apply a small amount of cyanoacrylate glue (super glue) under the fret before tapping, to secure it.
Warning: Applying too much force or using an unsuitable hammer can damage the fret or the fretboard. Proceed with extreme caution.
3. Fret Leveling
This is the most effective operation for unleveled frets, but also the most delicate for a DIYer.
- Protect your keyboard: Apply paper masking tape to the sides of the frets to protect the fretboard.
- Mark the frets: Use a permanent marker to color the top of each fret.
- Leveling: Use a specific leveling bar (or a perfectly straight aluminum or wooden block with fine sandpaper glued to it) and pass it with long, uniform movements over all the frets, following the curvature of the neck. The goal is to remove material only from the highest points, until the marker is uniformly removed from all frets.
- Recrowning: After leveling, the frets will have a flat surface. They must be restored to their original rounded ('crown') shape with a recrowning file. This is fundamental for intonation and sustain.
- Polishing: Finally, the frets must be polished with increasingly fine-grit sandpaper (up to 1500-2000) and then with a polishing compound, to make them smooth and slippery.
Warning: Fret leveling and recrowning are advanced luthier operations. If done incorrectly, they can irreversibly damage the frets, making a refretting (re-fretting) necessary, which is a job for a professional luthier and very expensive. If you don't feel confident, don't hesitate to consult an expert.
Useful Tools for Frets
To address fret-related problems, you might need:
- Fret rocker (or straightedge).
- Luthier's hammer (with nylon/rubber head).
- Paper masking tape (to protect the fretboard).
- Leveling bar (or straight block with sandpaper).
- Fret recrowning file.
- Fine-grit sandpapers (from 400 to 2000).
- Metal polishing compound.
When to Call the Luthier? The Limit of DIY
We have seen that many common problems of maintenance and adjustment can be addressed with a bit of goodwill and the right tools. But it is essential to recognize your limits. DIY is rewarding, but it is not a solution for everything.\n\nThere are situations where the risk of causing irreversible damage far outweighs the potential economic savings. For example:
- Stuck or broken truss rod: Attempting to force it can destroy the neck.
- Structural problems with the neck or body: cracks, neck breaks, or wood stability issues require the intervention of a professional.
- Refretting (Re-fretting): If the frets are too worn or damaged to be simply leveled and recrowned, their replacement is a complex operation that requires specific equipment and a lot of experience.
- Complex electronic problems: If you have tried the basic solutions and the problem persists, there might be a deeper fault that requires instrumental diagnostics that only an experienced technician can provide.
- Painting and finishing: If your goal is an impeccable paint job or a particular finish, it is a field where professional experience and equipment truly make a difference.
There is no shame in saying “I stop here”. Indeed, it is a sign of wisdom. A good luthier will not only solve the problem but could also give you valuable advice on instrument care. Consider the cost of a professional intervention as an investment in the longevity and playability of your guitar. Often, an annual “professional setup” can prevent many of the problems we have discussed. You can find more information and guides on general guitar care on reliable resources such as Premier Guitar’s maintenance tips.
Conclusion
I hope that this immersion into the most common defects and their solutions has taken away some of that initial fear I also had. The electric guitar maintenance is not a mystery, but a set of small attentions and interventions that, if done with judgment, can transform your musical experience. Remember: always start with the diagnosis, then proceed with the simplest and least risky solutions. Every guitar is a world unto itself, and learning to know it, understand its quirks, and solve them, is an integral part of every guitarist's journey. Don't be afraid to get your hands dirty, and you will see that your six-string will repay you with a sound and playability you never thought possible.
FAQ
How often should I maintain my guitar?
There is no hard and fast rule, but a general check (setup) should be done at least once or twice a year, especially if the guitar is subject to temperature and humidity variations. Cleaning and checking electrical components can be done every time you change strings or notice a problem.
Can I use the same tools for all guitars?
Many tools are universal (screwdrivers, rulers), but Allen and socket wrenches can vary between brands and models (metric for Asian/European guitars, imperial for American ones). It is always best to have a complete set or check the specific measurements of your guitar.
Download the Luthier Survival Kit
Free PDF with checklist, problem-cause table and project card template.
 English
  Italiano
Stuck on your build?
If you ran into the same problem or have a question, drop it in the comments. I read and reply to every one.
Write a comment