
DIY Hollow Body Electric Guitar: 5 Steps
When I first started thinking about building a guitar DIY hollow body electric, The idea seemed like one of those ventures for luthiers with a historic workshop, tools that cost as much as a small car, and years of apprenticeship behind them. Sitting in my garage, with a table saw, a Dremel, and a second-hand drill press, I felt like a bit of an impostor. And yet, you know what? With patience, a few mistakes, a fair amount of finishing touches, and a desire to understand... Why things work out (or don't work out), I finally got there.
It wasn't easy, I'll tell you right away. I glued a top poorly, I milled a chamber too deep, I cursed the binding for hours. But every mistake was a lesson, and the final result, imperfect as it is, sounds wonderful and has a soul that no production model can give you. If I could do it, with my skills and my stubbornness, you can do it too. The important thing is not to be afraid and proceed one step at a time.
Let's look at the 5 fundamental steps to making your own hollow-body instrument, along with all the tips and mistakes I've learned the hard way.
1. Planning: Don't rush in
.biafax-photo-grid { display: grid !important; gap: 12px; margin: 24px 0; }
.biafax-photo-grid-3v { grid-template-columns: repeat(3, 1fr) !important; }
.biafax-photo-grid-2h { grid-template-columns: repeat(2, 1fr) !important; }
.biafax-photo-grid a { display: block; overflow: hidden; border-radius: 6px; line-height: 0; }
.biafax-photo-grid img { width: 100%; height: 100%; object-fit: cover; aspect ratio: 4 / 3; transition: transform 0.3s ease; }
.biafax-photo-grid a:hover img { transform: scale(1.03); }
.biafax-photo-grid br { display: none; }
.biafax-photo-grid-caption { text-align: center; font-style: italic; color: #555; margin: -12px 0 24px; }
.biafax-lightbox-overlay { position: fixed; inset: 0; background: rgba(0,0,0,0.92); display: flex; align-items: center; justify-content: center; z-index: 99999; cursor: zoom-out; }
.biafax-lightbox-overlay img { max-width: 92vw; max-height: 92vh; object-fit: contain; border-radius: 4px; }
@media (max-width: 768px) {
.biafax-photo-grid-3v { grid-template-columns: 1fr !important; }
.biafax-photo-grid-2h { grid-template-columns: 1fr !important; }
}
(function() {
if (window.biafaxGridLightbox) return;
window.biafaxGridLightbox = true;
document.addEventListener(‘click’, function(e) {
var a = e.target.closest(‘a[data-lightbox]’);
if (!a) return;
e.preventDefault();
var overlay = document.createElement(‘div’);
overlay.className = 'biafax-lightbox-overlay';
overlay.innerHTML = '‘‘';
document.body.appendChild(overlay);
overlay.addEventListener(‘click’, function() { overlay.remove(); });
document.addEventListener(‘keydown’, function handler(ev) {
if (ev.key === 'Escape') { overlay.remove(); document.removeEventListener('keydown', handler); }
});
});
})();
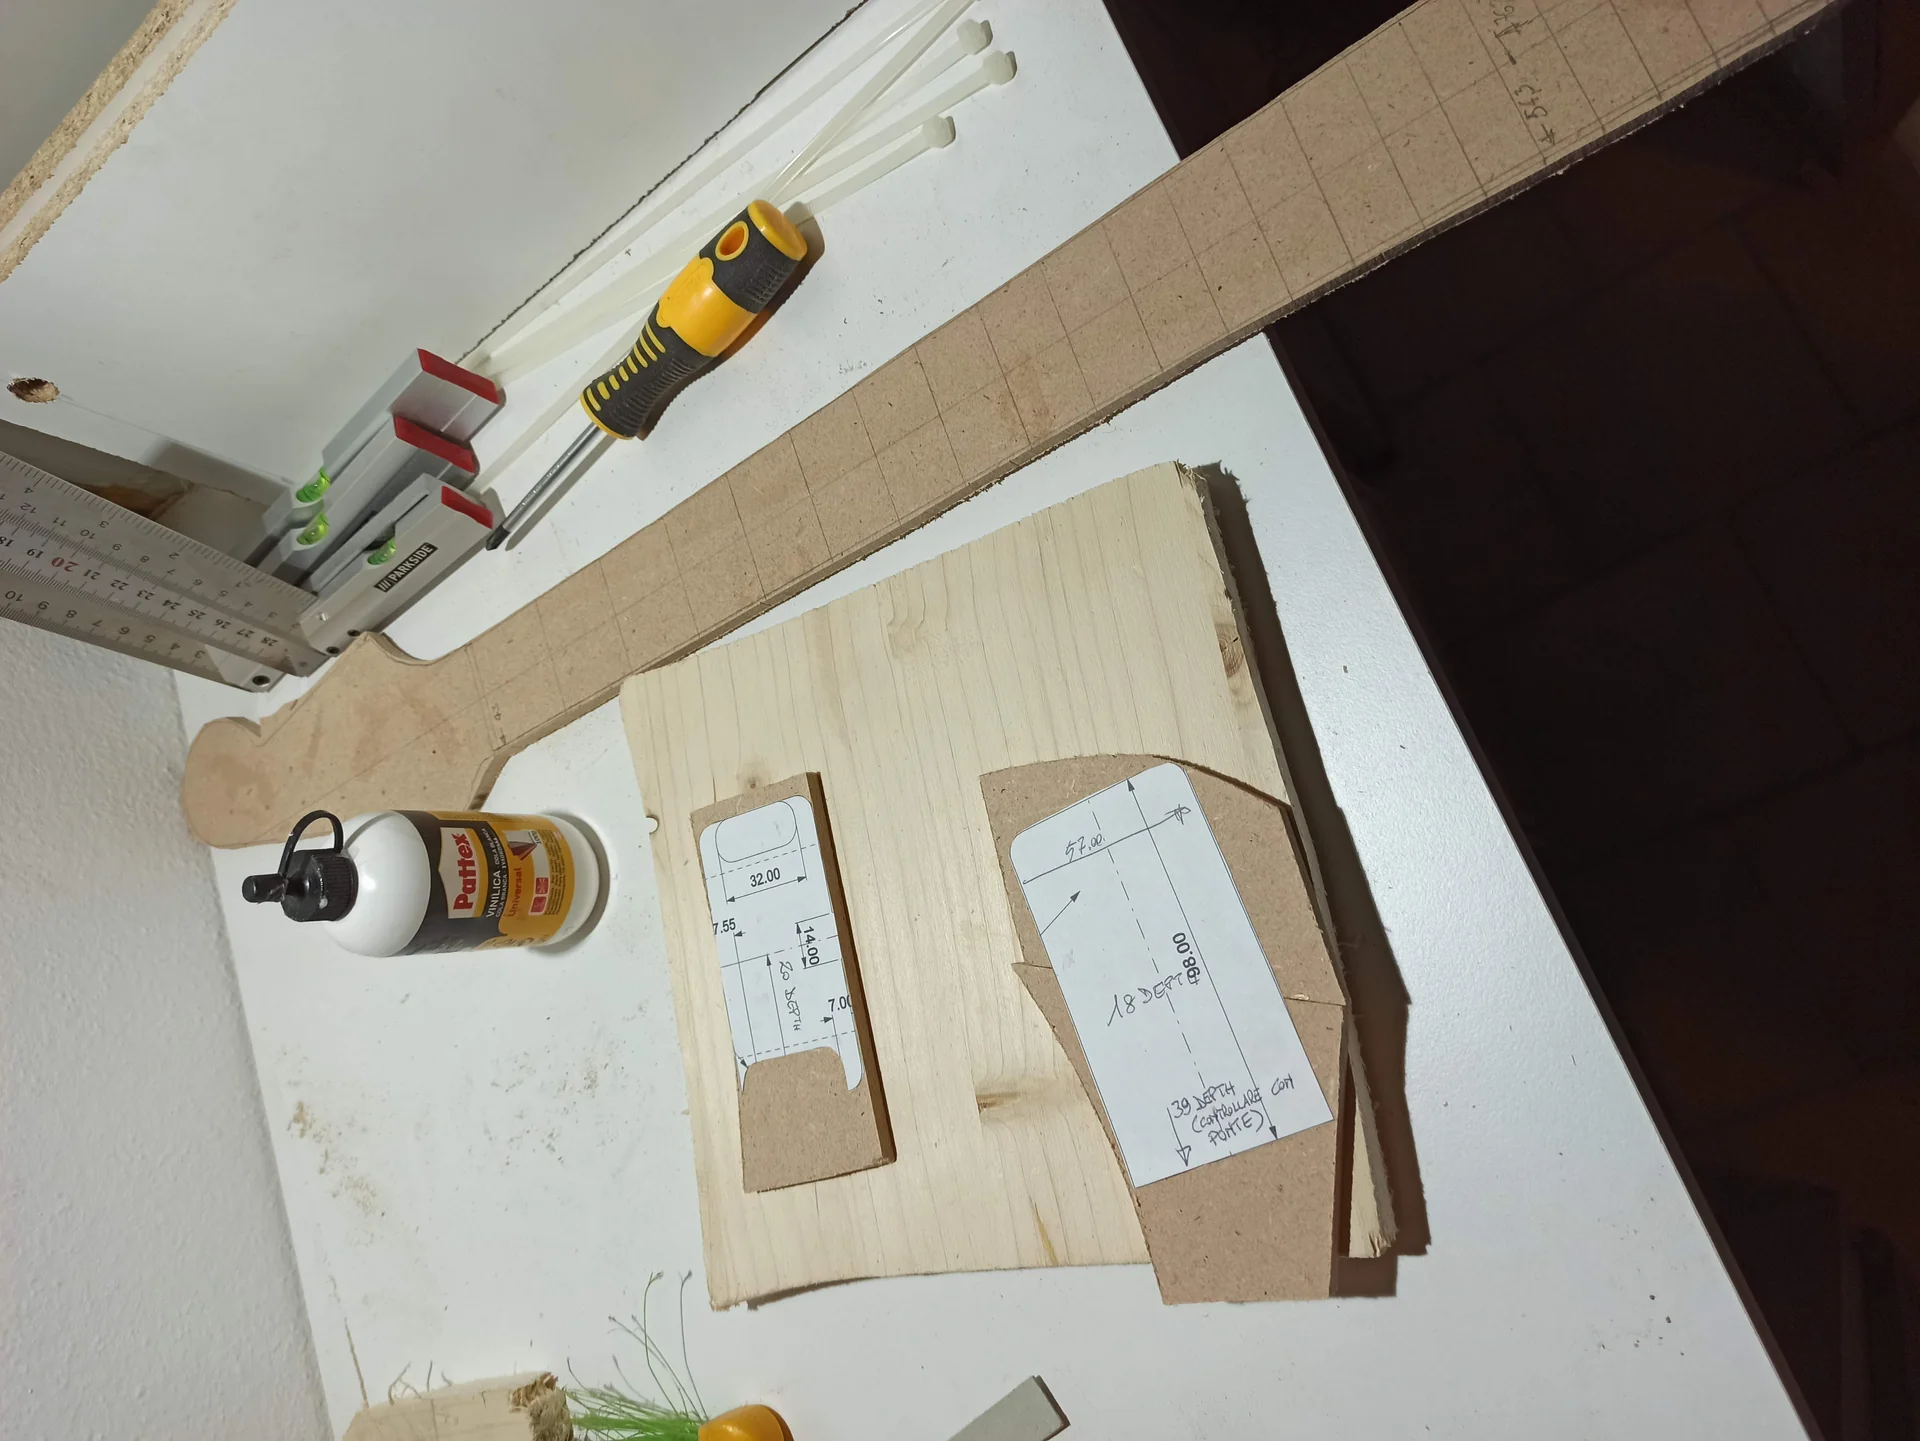
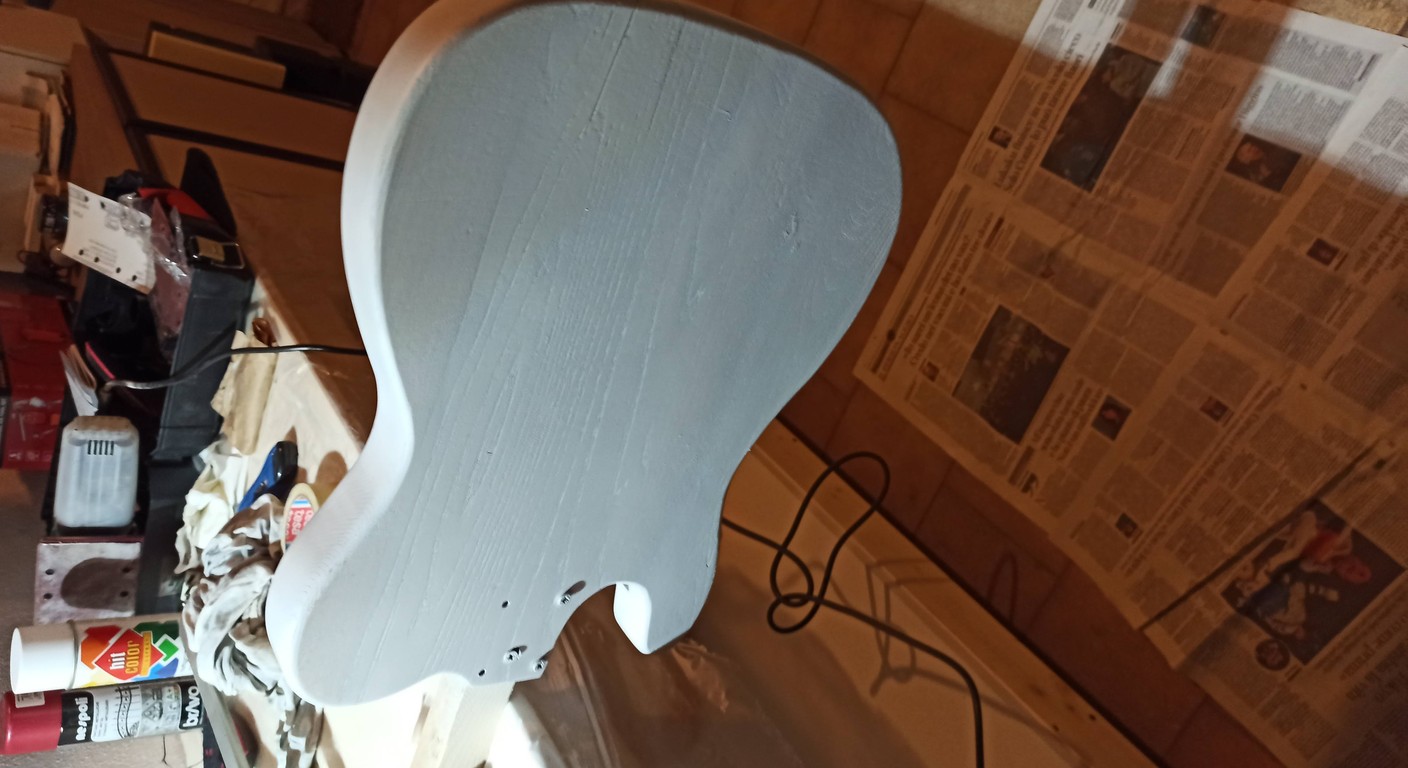
In this gallery: preparation, body, template and wood.
.biafax-photo-grid { display: grid !important; gap: 12px; margin: 24px 0; }
.biafax-photo-grid-3v { grid-template-columns: repeat(3, 1fr) !important; }
.biafax-photo-grid-2h { grid-template-columns: repeat(2, 1fr) !important; }
.biafax-photo-grid a { display: block; overflow: hidden; border-radius: 6px; line-height: 0; }
.biafax-photo-grid img { width: 100%; height: 100%; object-fit: cover; aspect ratio: 4 / 3; transition: transform 0.3s ease; }
.biafax-photo-grid a:hover img { transform: scale(1.03); }
.biafax-photo-grid br { display: none; }
.biafax-photo-grid-caption { text-align: center; font-style: italic; color: #555; margin: -12px 0 24px; }
.biafax-lightbox-overlay { position: fixed; inset: 0; background: rgba(0,0,0,0.92); display: flex; align-items: center; justify-content: center; z-index: 99999; cursor: zoom-out; }
.biafax-lightbox-overlay img { max-width: 92vw; max-height: 92vh; object-fit: contain; border-radius: 4px; }
@media (max-width: 768px) {
.biafax-photo-grid-3v { grid-template-columns: 1fr !important; }
.biafax-photo-grid-2h { grid-template-columns: 1fr !important; }
}
(function() {
if (window.biafaxGridLightbox) return;
window.biafaxGridLightbox = true;
document.addEventListener(‘click’, function(e) {
var a = e.target.closest(‘a[data-lightbox]’);
if (!a) return;
e.preventDefault();
var overlay = document.createElement(‘div’);
overlay.className = 'biafax-lightbox-overlay';
overlay.innerHTML = '‘‘';
document.body.appendChild(overlay);
overlay.addEventListener(‘click’, function() { overlay.remove(); });
document.addEventListener(‘keydown’, function handler(ev) {
if (ev.key === 'Escape') { overlay.remove(); document.removeEventListener('keydown', handler); }
});
});
})();
Now let's get to the heart of the construction. This is the most delicate part for a DIY hollow-body guitar, because it involves hollowing out the wood without compromising its structure.
Wood preparation
Start with your wood pieces for the top, back, and sides. If you don't have pre-cut panels of the right size, you'll need to glue two or more together to get the required width. Use good-quality wood glue (Titebond is a classic) and plenty of clamps. Let dry for at least 24 hours.
Once glued, plane the panels until they're perfectly flat and the desired thickness. This is essential for proper gluing of the top and bottom. If you have a thicknesser, great. Otherwise, you can use a router mounted on a sliding carriage or have a carpenter do it for you.
Cut the outer profile of the bottom following the template. This will be the basis for everything else.
Room Routing: This is where things get serious
This is the highlight. The resonating chambers are what makes a hollow body special.
1. Mark the rooms: Place the chamber template on the bottom (or on the piece of wood that will act as the base for the chambers, which is usually the bottom or a middle piece if you are using separate strips) and draw the outlines with a pencil.n2. Set the cutter: Mount a round-over bit with a bearing on your router (or Dremel with a router base). The height of the bit should match the depth of the chamber you want to create. Make several passes, gradually increasing the depth to avoid overstressing the motor and ensure a clean cut. 3. Empty: With patience and a steady hand, begin milling the chambers. Don't go too fast. Use light strokes. The goal is to leave a uniform edge and a consistent thickness for the interior walls.
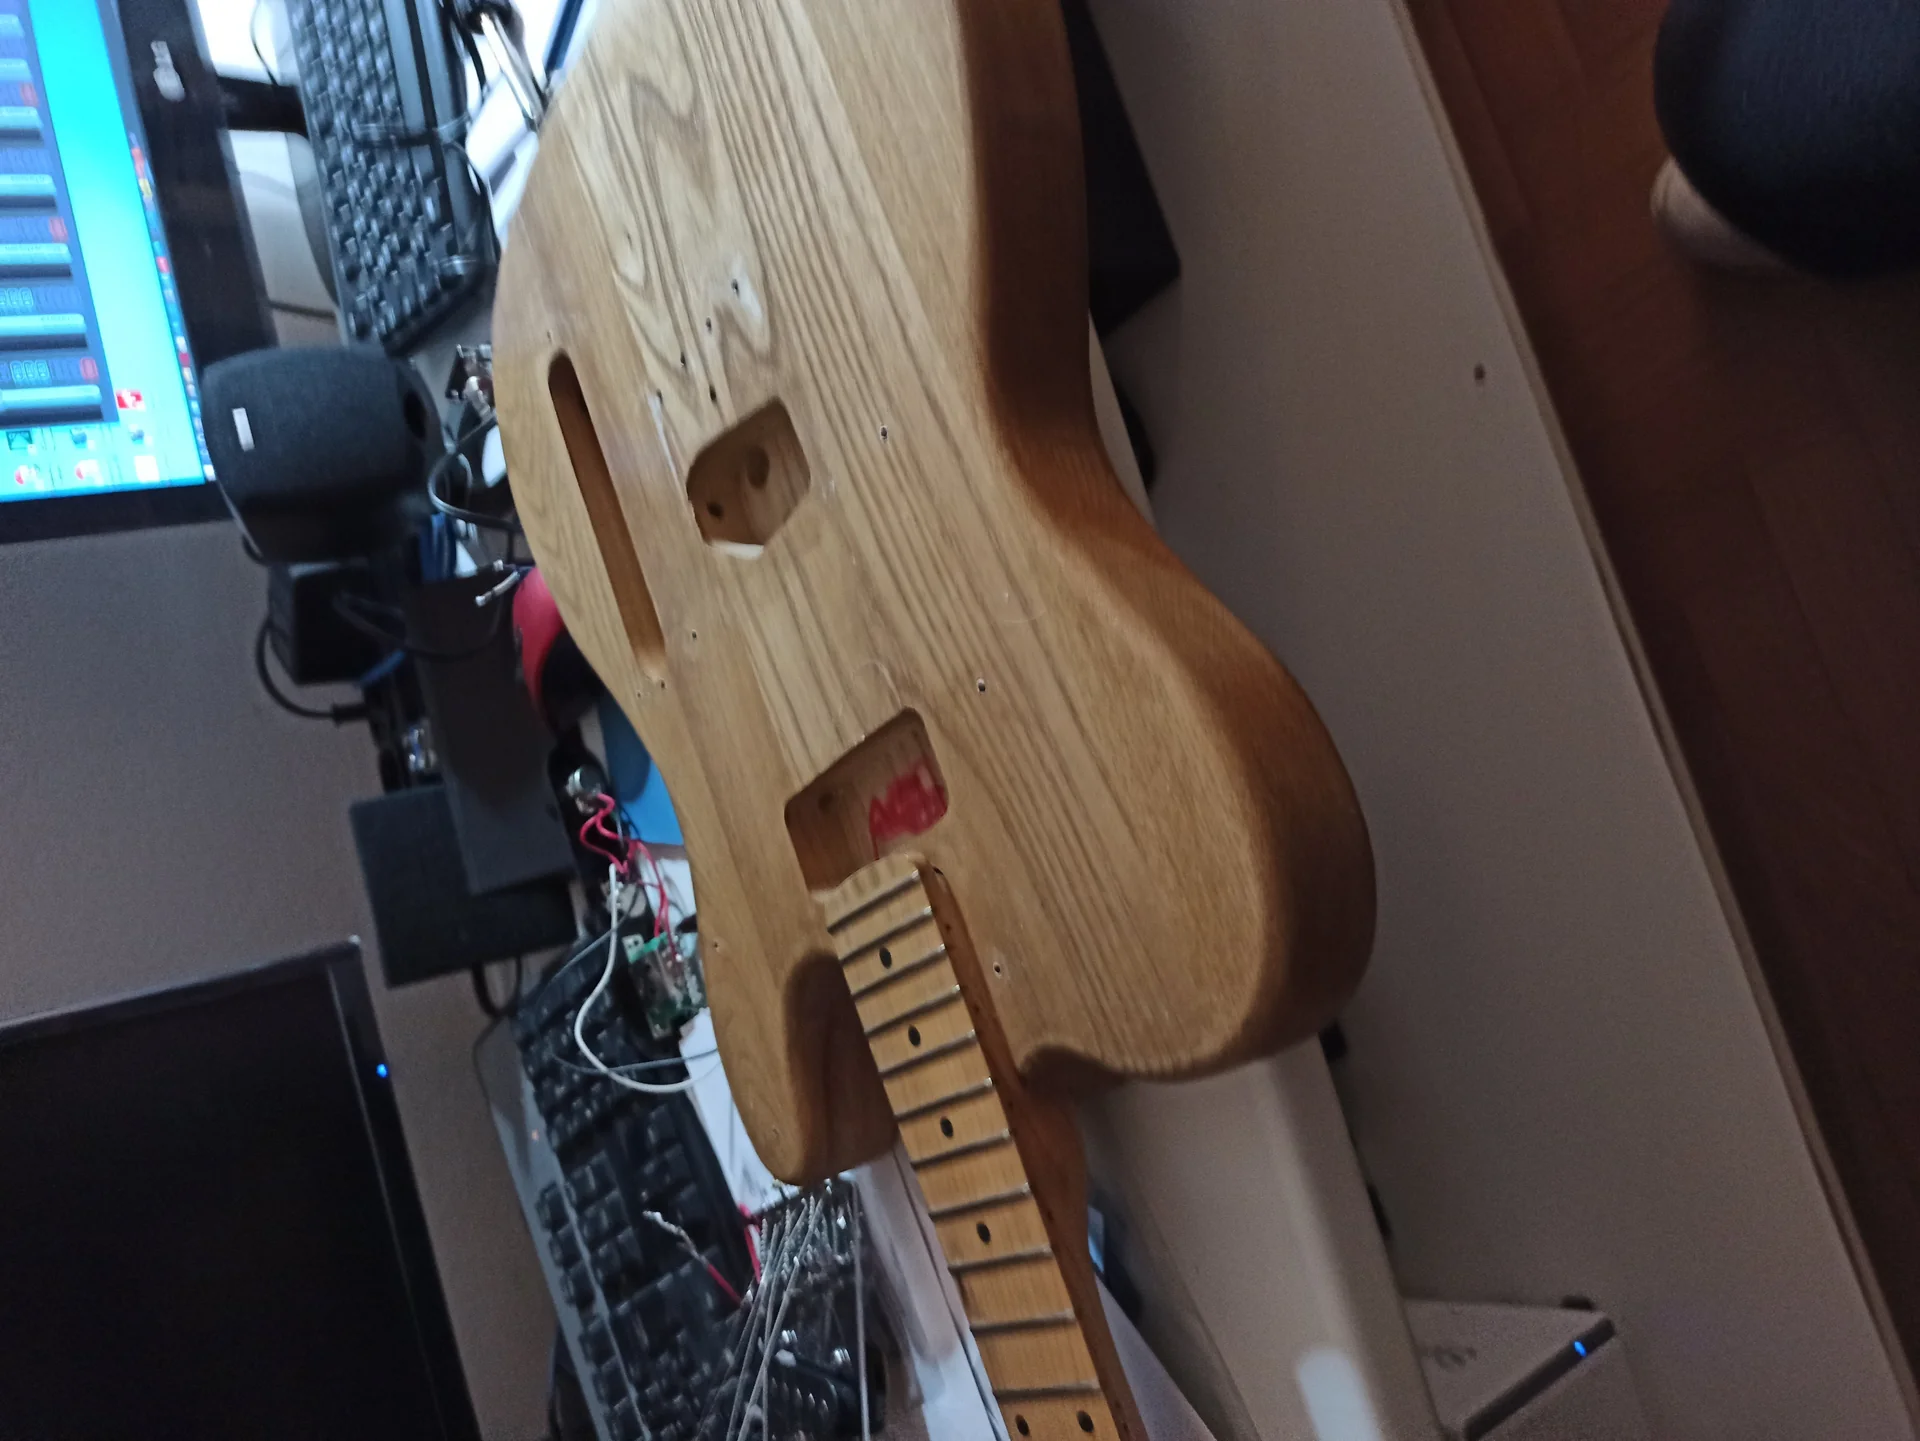
The central block: If you're making a semi-hollow, the center block must be precisely cut to accommodate the pickups and provide support for the bridge. Glue it securely to the bottom. Before to glue the top. This block is crucial for the stability of the bridge and to reduce feedback.
Bands: If you're not carving the chambers from a single piece, but using separate bands, you'll need to bend them. This is done with steam (steam bending) or dry heat (with a bending iron). It's an art that requires practice. I broke several of them the first few times. Prepare some MDF forms to hold the bands in place while they cool and stabilize.
Gluing the top
Once the chambers are milled and the center block is in place (if applicable), it's time to glue the top.
1. Prepare the surfaces: Make sure the top and bottom are perfectly clean and flat.n2. Apply the glue: Apply an even layer of glue to the edge of the chambers and the central block. Don't overdo it, but make sure there's enough glue for a strong hold. 3. Put the clamps on: This is the part that will make you sweat. You'll need LOTS of clamps. The more, the better. Apply even pressure around the entire perimeter and on the center block. Use wooden blocks between the clamps and the top to distribute the pressure and avoid marks. 4. Drying: Let it dry for at least 24-48 hours. Don't rush to remove the clamps.
Common errors in routing and gluing: Escaping cutter: If the cutter isn't securely fast or you're going too fast, you could damage the edge of the chambers. Go slowly.
Blowout: If the wood is thin and you go too deep or too fast, you could create a "hole" on the opposite side. Always use light strokes.
Glue that doesn't hold: If the surfaces are not flat or if you do not use enough clamps, the glue may not be perfect, leaving gaps that will affect resonance and stability.
Misalignment: Make sure the top and bottom are perfectly aligned before tightening the clamps. Use small pegs to guide them.
3. Handle and Joint: The Structural Heart
The neck is the soul of the guitar. A good joint is essential for stability, sustain, and action. For a DIY hollow-body electric guitar, the choice between a set-neck and a bolt-on neck has important implications.
Neck Choice: Purchased or Scratched?
For your first hollow-body project, I highly recommend purchasing a pre-made neck. Making a neck from scratch is a complex undertaking that requires specialized tools and a lot of experience. If you've already made one, go for it!
If you're purchasing, make sure the handle is compatible with the ladder you chose during the design phase. Also check the heel angle, which must match the angle of the body.
Joint: Set-neck vs Bolt-on for hollow body
Set-neck (glued): This is the most common choice for hollow and semi-hollow bodies. It offers better sustain and a cleaner aesthetic. It requires precise milling of the neck pocket in the body and flawless gluing. My first hollow body was a set-neck, and I glued it in with some awe.
Advantages: Better sustain, traditional look.
Disadvantages: More difficult to repair/replace, requires high precision.
Bolt-on (screwed): Less common for hollow-body guitars, but not impossible. It might be easier for a hobbyist, as it allows you to adjust the neck angle with shims and easily replace them.
Advantages: Easier to assemble and adjust, replaceable handle.
Disadvantages: It may have a slightly lower sustain, less traditional for this type of guitar.
For one DIY hollow-body guitar, If you opt for a set neck, the neck pocket must be milled into the center block or a specially reinforced area of the body. Use a pocket-milling template to ensure a perfect fit. The joint should be tight, with no play, but not so tight that it splits the wood when the neck is inserted.
Fretboard and fingerboard
If the neck is bare, you will need to glue the fingerboard and fret.n1. Keyboard gluing: Use wood glue and plenty of clamps (or blocks with sturdy rubber bands) for even pressure. Make sure there are no gaps. 2. Tapping: This is one of the most delicate operations. The fret slots must be the right width and depth. Insert the frets with a fret hammer or a fret press, making sure they are seated properly. Level the frets with a file, then crown and polish them.
Truss rod: Installation and adjustment
The truss rod is essential for the stability of the neck and for adjusting the curvature.
Installation: If the neck is unfinished, you'll need to mill the truss rod channel. Make sure it's centered and has enough room for adjustment.
Adjustment: Once the guitar is assembled and the strings are on, you'll need to adjust the truss rod to achieve the correct relief for the neck. This requires patience and a bit of experience. Never overtighten, as you could damage the neck.
How to avoid action problems:
The action (the height of the strings from the fingerboard) is determined by several factors:
Handle angle: If the angle is wrong, you will have too high or too low an action and you won't be able to correct it with the bridge alone.
Key Leveling: Unleveled keys will cause buzz and uneven action.
Nut and bridge height: These are the fine tuning points.
Always do dry runs before final gluing. Install the neck without glue, place the bridge and strings, and check the action. It's better to catch a mistake now than when it's too late.
4. Electronics and Hardware: The Sound You're Looking For
Now that the body and neck structure is solid, it's time to give voice to your DIY hollow-body guitar. This stage is crucial for the sound and interaction with the amplifier.
Routing for pickups and controls
The resonating chambers make routing a little more delicate. You can't just mill from behind like with a solid body.
Pick-up: The pickup routings should be done on the top, and you need to make sure they align perfectly with the center block (if present) or the reinforced areas of the body. Use templates with a copying router. Be careful not to damage the thinner top.
Controls (potentiometers, switches): These also need to be milled into the top. Remember that you'll need to feed the wires through the empty chambers. This means the holes must be large enough to accommodate the connectors or pickups themselves, or you'll need to work with very long wires and a "fishing" system to pull them out of the F holes (if present) or the potentiometer holes.
A trick from Mimmo: To install electronics in a hollow body, I use a piece of wire bent into a hook and attached some sturdy wires to the components (pickups, potentiometers). I run the wires through the holes and then "fish" the components out with the hook to position them. It's a painstaking job, but it works.
Pickup Selection: Resonance and Feedback
Hollow bodies are known for their warm, resonant sound, but also for their propensity for feedback at high volumes.
Vintage-style pickups: PAF-style or P90 humbuckers are excellent choices. They have a moderate output that enhances the body's acoustic qualities.
Wax potting: If your pickups aren't already waxed (wax potted), I recommend doing so. Waxing reduces microphonics and feedback by sealing the coils and preventing them from resonating with the body. You can also do this at home by heating paraffin wax and dipping the pickups in it.
Positioning: Experiment with the height of the pickups once they're installed. Hollow bodies can be very sensitive to this.
Wiring: Potentiometers, capacitors, shielding
The wiring is the same as a solid body, but with the added difficulty of working through the holes.
Potentiometers: Typically 500k for humbuckers, 250k for single coils. Choose good quality pots (CTS or Bourns) for longer life and a smooth response curve.
Capacitors: The most common values are .022uF for the bridge tone and .047uF for the neck tone, but experiment. Orange Drop capacitors are a popular choice.
Shielding: Shielding the cavities (if possible) and wiring with shielded cable reduces noise. On a hollow-body amp, it's more difficult, but you can at least shield the control compartment with copper tape.
Grounding: Make sure all components are properly grounded. Good grounding is essential for reducing hum.
Remember that if you have already done some work modification on electric guitars, Many of the soldering and wiring techniques will be the same. The only difference here is limited accessibility.
Installing the bridge and tuners
Bridge: If you've opted for a Tune-o-matic, you'll need to drill holes in the top for the pins. Be careful to drill straight and to the right size. If it's a trapezoid bridge, it attaches to the edge of the body.
Mechanics: Drill holes in the headstock for the tuning machines. Make sure they're aligned and there's no play.
Always check the alignment of the strings with the neck and bridge. Use a ruler to make sure everything is centered.
5. Finishing and Setup: The final touch
You're almost done! The finish will protect your instrument and give it the look you want. Setup is the final but crucial step to making it playable.
Preparation for finishing: Sanding and pore filling
This stage is boring, but you can't skip it.n1. Sanding: Start with a medium grit (120-180) and gradually progress to fine grits (320-400). Any scratches left by a coarser grit will be visible under the finish. Take your time with this step; it's the secret to a good finish. I usually use a sidelight to highlight any imperfections. 2. Fillerpore: Wood has pores that need to be filled to achieve a smooth surface. Apply a wood filler and let it dry. Then sand again with a fine-grit sandpaper to remove the excess.
Finish type: Nitro, polyurethane, oil
The choice of finish affects aesthetics, protection and, according to some, even sound.
Nitrocellulose finish (nitro): This is the traditional finish used on many vintage guitars. It "breathes" with the wood, wears naturally, and allows the wood to resonate better.
Advantages: Vintage aesthetic, allows the wood to vibrate.
Disadvantages: More delicate, it requires many coats and long drying times, difficult to apply without specific equipment (spray gun).
Polyurethane finish: More modern, durable, and easy to apply. Offers superior protection.
Advantages: Very resistant, easy to apply even with a spray can.
Disadvantages: It might be considered less “resonant” by some, more modern aesthetic.
Oil finish: Very thin, it feels natural to the touch. It offers less protection, but is easy to repair.
Advantages: Natural feel, easy to apply and repair.
Disadvantages: Less protective, requires periodic maintenance.
For my first DIY hollow-body guitar, I used a clear polyurethane finish, sprayed on, because it was easier and more forgiving. I applied several light coats, sanding lightly between each coat.
Binding Application: The Real Nightmare, But It Can Be Solved
The binding is that strip of plastic or wood that runs along the edges of the body and fingerboard. It's aesthetically beautiful, but it's also the part that made me swear the most.n1. Channel milling: You need to mill a precise channel along the edge of the body, the width and depth of the binding. Use a binding-specific cutter. This is delicate work, especially on the corners. 2. Binding curvature: The binding, especially the plastic one, must be bent with heat (heat gun) to follow the shape of the body.n3. Gluing: Use binding glue (such as acetone-based glue for plastic binding) and tape to hold it in place while it dries. You'll need a lot of tape! You need to be quick and precise.
Advice from Mimmo: Don't try to get it perfect on the first try. Binding is difficult. Get some extra material to test. And be patient. If you make a small mess, you can sand it down and redo it.
Final setup: Action, intonation, pickup height
Finally, yours hollow-body electric guitar It's ready to play! But first, a good setup is a must.n1. Truss rod adjustment: String the guitar, tune it, and let the wood settle for a few hours. Then, using a capo at the first fret and pressing the string at the 12th fret, check the neck curvature at the 7th fret. Adjust the truss rod until it is