
Assembling an Electric Guitar: 7 Steps to a Top Sound
I still remember my first guitar built from scratch. A disaster, I'll tell you right now. The neck was crooked, the electronics buzzed like an angry beehive, the frets cut my fingers. I set out with the idea of saving money, but instead I learned the hard way that building a guitar electric It's an art, but also a science. And above all, it's made of patience and mistakes. Lots of mistakes.
But you know what? Despite everything, I loved that guitar. Because it was... my. Every flaw was the sign of an afternoon spent learning, every adjustment was a small victory. And if I could do it, knowing as much about electrical engineering as I did about quantum physics, you can do it too. Without spending a fortune on professional luthier tools, but with the right amount of attention and a few tips that, trust me, would have been very useful.
In this article, I will guide you through the seven essential steps to’assembly of your electric guitar. Don't expect perfection on the first try—that comes with practice—but I'll give you all the information you need to avoid the most common mistakes and achieve a sound you'll be happy with. My goal isn't to make you a luthier overnight, but to give you the confidence to get started and the knowledge to understand what you're doing, step by step. Ready? Let's get hands-on.
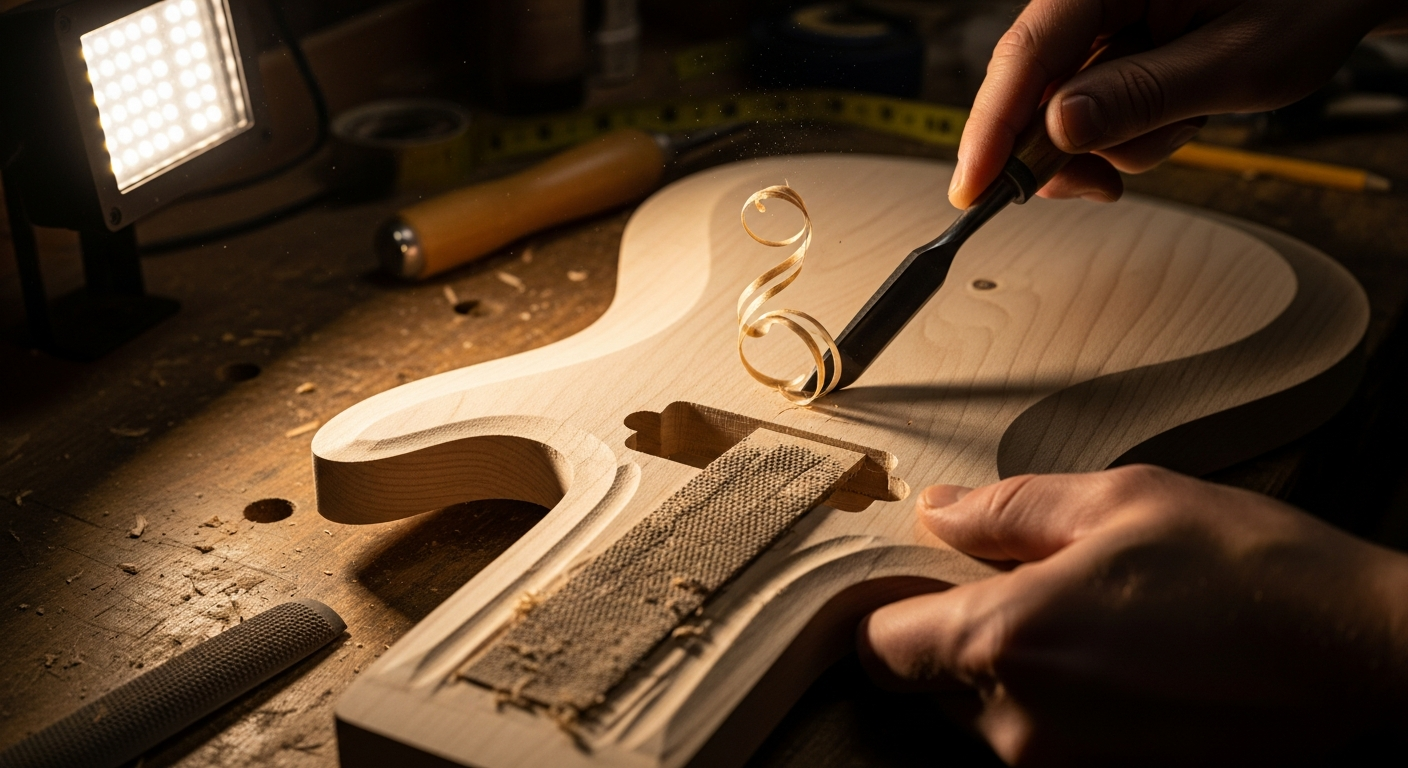
1. Inspection and Preparation of the Body and Neck: The Foundation of Everything
.biafax-photo-grid { display: grid !important; gap: 12px; margin: 24px 0; }
.biafax-photo-grid-3v { grid-template-columns: repeat(3, 1fr) !important; }
.biafax-photo-grid-2h { grid-template-columns: repeat(2, 1fr) !important; }
.biafax-photo-grid a { display: block; overflow: hidden; border-radius: 6px; line-height: 0; }
.biafax-photo-grid img { width: 100%; height: 100%; object-fit: cover; aspect ratio: 4 / 3; transition: transform 0.3s ease; }
.biafax-photo-grid a:hover img { transform: scale(1.03); }
.biafax-photo-grid br { display: none; }
.biafax-photo-grid-caption { text-align: center; font-style: italic; color: #555; margin: -12px 0 24px; }
.biafax-lightbox-overlay { position: fixed; inset: 0; background: rgba(0,0,0,0.92); display: flex; align-items: center; justify-content: center; z-index: 99999; cursor: zoom-out; }
.biafax-lightbox-overlay img { max-width: 92vw; max-height: 92vh; object-fit: contain; border-radius: 4px; }
@media (max-width: 768px) {
.biafax-photo-grid-3v { grid-template-columns: 1fr !important; }
.biafax-photo-grid-2h { grid-template-columns: 1fr !important; }
}
(function() {
if (window.biafaxGridLightbox) return;
window.biafaxGridLightbox = true;
document.addEventListener(‘click’, function(e) {
var a = e.target.closest(‘a[data-lightbox]’);
if (!a) return;
e.preventDefault();
var overlay = document.createElement(‘div’);
overlay.className = 'biafax-lightbox-overlay';
overlay.innerHTML = '‘‘';
document.body.appendChild(overlay);
overlay.addEventListener(‘click’, function() { overlay.remove(); });
document.addEventListener(‘keydown’, function handler(ev) {
if (ev.key === 'Escape') { overlay.remove(); document.removeEventListener('keydown', handler); }
});
});
})();
In this gallery: milling, neck, truss, preparation and table.
.biafax-photo-grid { display: grid !important; gap: 12px; margin: 24px 0; }
.biafax-photo-grid-3v { grid-template-columns: repeat(3, 1fr) !important; }
.biafax-photo-grid-2h { grid-template-columns: repeat(2, 1fr) !important; }
.biafax-photo-grid a { display: block; overflow: hidden; border-radius: 6px; line-height: 0; }
.biafax-photo-grid img { width: 100%; height: 100%; object-fit: cover; aspect ratio: 4 / 3; transition: transform 0.3s ease; }
.biafax-photo-grid a:hover img { transform: scale(1.03); }
.biafax-photo-grid br { display: none; }
.biafax-photo-grid-caption { text-align: center; font-style: italic; color: #555; margin: -12px 0 24px; }
.biafax-lightbox-overlay { position: fixed; inset: 0; background: rgba(0,0,0,0.92); display: flex; align-items: center; justify-content: center; z-index: 99999; cursor: zoom-out; }
.biafax-lightbox-overlay img { max-width: 92vw; max-height: 92vh; object-fit: contain; border-radius: 4px; }
@media (max-width: 768px) {
.biafax-photo-grid-3v { grid-template-columns: 1fr !important; }
.biafax-photo-grid-2h { grid-template-columns: 1fr !important; }
}
(function() {
if (window.biafaxGridLightbox) return;
window.biafaxGridLightbox = true;
document.addEventListener(‘click’, function(e) {
var a = e.target.closest(‘a[data-lightbox]’);
if (!a) return;
e.preventDefault();
var overlay = document.createElement(‘div’);
overlay.className = 'biafax-lightbox-overlay';
overlay.innerHTML = '‘‘';
document.body.appendChild(overlay);
overlay.addEventListener(‘click’, function() { overlay.remove(); });
document.addEventListener(‘keydown’, function handler(ev) {
if (ev.key === 'Escape') { overlay.remove(); document.removeEventListener('keydown', handler); }
});
});
})();
Ok, the body and neck have been inspected and approved. Now it's time to start shaping your homemade guitar, assembling all the hardware. Here we're talking about the bridge, tuners, and strap locks. Each component has its role, and its installation requires precision.
The Bridge: The Heart of Intonation
The bridge is one of the most critical elements. It's where the strings transmit their vibration to the body and where action and intonation are controlled. There are various types: hardtail (fixed), tune-o-matic (typical of Les Pauls), and tremolo (Stratocaster-style, Floyd Rose). Each has its own challenges.
For a fixed bridge or a Tune-o-Matic, the most important thing is its position. The distance between the nut and the bridge must correspond to the guitar's scale length. If your guitar has a 25.5-inch scale (like a Fender) or 24.75-inch scale (like a Gibson), that's the reference measurement. The starting point for the bridge is the saddle of the high E string. Measure precisely from the edge of the nut (headstock side) to the point where the string rests on the saddle.
Alignment: Once you've found the measurement, you need to center the bridge. Use a long ruler or, if you're a stickler like me, a string stretched from the nut to the center of the neck, passing through the center of the bridge. If the bridge is crooked, you'll have problems with the string alignment on the neck and with intonation. I've seen people drill holes by eye and end up with a bridge that made the guitar look cross-eyed. Don't rush it.
Drilling: Mark the locations for the screws or mounting pins. Use an awl to make a small pre-drilled hole so the drill bit doesn't slip. Then, and this is ESSENTIAL, use drill bits with a diameter slightly smaller than the body of the screw, but the same diameter as its "core" (the part without the thread). For the Tune-o-Matic pins, 10mm or 11mm bits are often used, but check the specifications for your bridge. Wrap some tape around the drill bit to mark the maximum depth, so you don't drill through the body from end to end (yes, that happened to me the first time, luckily it was the electronics compartment!). If you have a drill press, it's easier; otherwise, go straight and steady.
The Tuners: Tuning Stability
The mechanics are relatively simple to assemble, but good alignment makes a difference aesthetically and functionally.
Assembly: Insert the bushings into the holes in the headstock. Then, insert the tuning machines and secure them with the locking screws or nuts, depending on the model. If the tuning machines have a screw on the back to prevent them from rotating, use a small template or ruler to align them all perfectly before drilling the small pilot holes for those screws. Again, use an awl and a drill bit of the appropriate diameter. Tighten gently to avoid damaging the wood. Locking tuning machines are a godsend for tuning stability, but standard ones, if of good quality, are also fine.
Strap Lock: Don't Drop Your Guitar!
It may seem trivial, but strap locks (or shoulder strap buttons) are important. Make sure they're securely attached to the body. Use the provided screws, and if you feel the wood isn't holding well (perhaps the hole is a little large), you can fill it with a toothpick and white glue, let it dry, and then re-drill. It's better to prevent a nasty fall than to cure a dented body!
I still remember the time when, excited to have finished assemble the guitar, I picked it up by the strap, and the button on the back popped off. The guitar was miraculously saved because I caught it on the fly. From that day on, I've always triple-checked these details.
3. Electronics: Pickups, Potentiometers, and Wiring – The Heart of the Sound
Here we are at the real brain of your guitar: the electronics. This is the part that scares hobbyists the most, and I admit it was my nightmare at first. Bad soldering, mysterious buzzing, bad connections that produced only silence. But with a little practice and the right schematics, you'll see that it's not that difficult. This is where your DIY guitar comes to life with sound.
Pickups: The Voice of the Instrument
Before soldering, let's physically mount the pickups. Whether single-coil or humbucker, they're usually attached to the body or pickguard with screws and springs. The springs adjust the pickups' height relative to the strings, a crucial aspect for balancing volume and tone. Don't overtighten them now; we'll fine-tune them later.
Pickup Types: If you choose humbuckers, you'll get a fuller sound and less background noise (humbucker stands for "hum eliminator"). Single-coil pickups, like those found on Stratocasters, have a brighter, more defined sound, but are more susceptible to hum, especially when used with electronics. Your choice depends on the sound you're looking for and the genre of music you want to play.
Wiring: Following the Diagram is Law
This is where patience pays off. You'll need a soldering iron, good-quality solder (I use the resin-cored type, 60/40 or 63/37), wire cutters, needle-nose pliers, and a multimeter.
Electrical Diagrams: The first rule is: follow the schematic! Every pickup, every potentiometer, every switch has its place. Don't make anything up. Pickup manufacturers like Seymour Duncan, DiMarzio, or Fender offer detailed schematics for almost every imaginable configuration. They're your bible. For example, you can find plenty of reliable schematics at Seymour Duncan Wiring Diagrams. Use them!
Welding:n1. Cleaning: Make sure the terminals to be soldered are clean and free of oxide.n2. Right Heat: The soldering iron must be hot (300-350°C is a good range). Heat the terminal and the wire simultaneously, then touch them with solder. The solder should flow quickly and create a clean, shiny connection. If the solder is dull and "cold," it won't make good contact and may peel off. 3. Ground: A good grounding system is essential to avoid hum. All metal components (bridge, mechanics, potentiometers) and shields must be connected to the common ground.
Potentiometers, Switches and Jacks: Potentiometers (Pots): These are variable resistors that control volume and tone. They come in different values (250kOhm, 500kOhm, 1MOhm) and curves (linear, logarithmic). Generally, 250kOhm is used for single coils and 500kOhm for humbuckers, but again, the schematic will tell you which one to use.
Switches (Selectors): They allow you to choose which pickup to activate. They can be 3-way (Telecaster, Les Paul) or 5-way (Stratocaster). The connections are delicate and must be precise.
Output Jack: The point where you'll connect the cable to the amplifier. It has two contacts: one for the signal (tip) and one for ground (sleeve).
Shielding:
This is a step that many skip, but it can make a huge difference. It involves lining the inside of the electronics and pickup compartments with copper tape or conductive paint. This creates a "Faraday cage" that shields the electronics from electromagnetic interference, dramatically reducing hum. Make sure all parts of this shielding are grounded.
Intermediate Test: Before closing everything with the pickguard or back cover, grab your multimeter. Check the continuity of the solder connections and make sure there are no short circuits. A quick test with an amplifier, touching the pickup poles with a screwdriver (it should make a pop), will give you an idea of whether the circuit is alive. Once I finished the wiring and tried to turn on the amp, hearing only a faint hiss, I realized I'd made a mistake with a ground solder connection. I redid everything, and when I heard the clean sound, it was incredibly satisfying.
Helpful tips: Organize your wires: Try to keep your wiring neat and tidy. This not only makes troubleshooting easier, but also reduces the risk of interference.
Don't overdo it with the solder: too much solder doesn't mean better soldering, but just a mess that can cause short circuits.
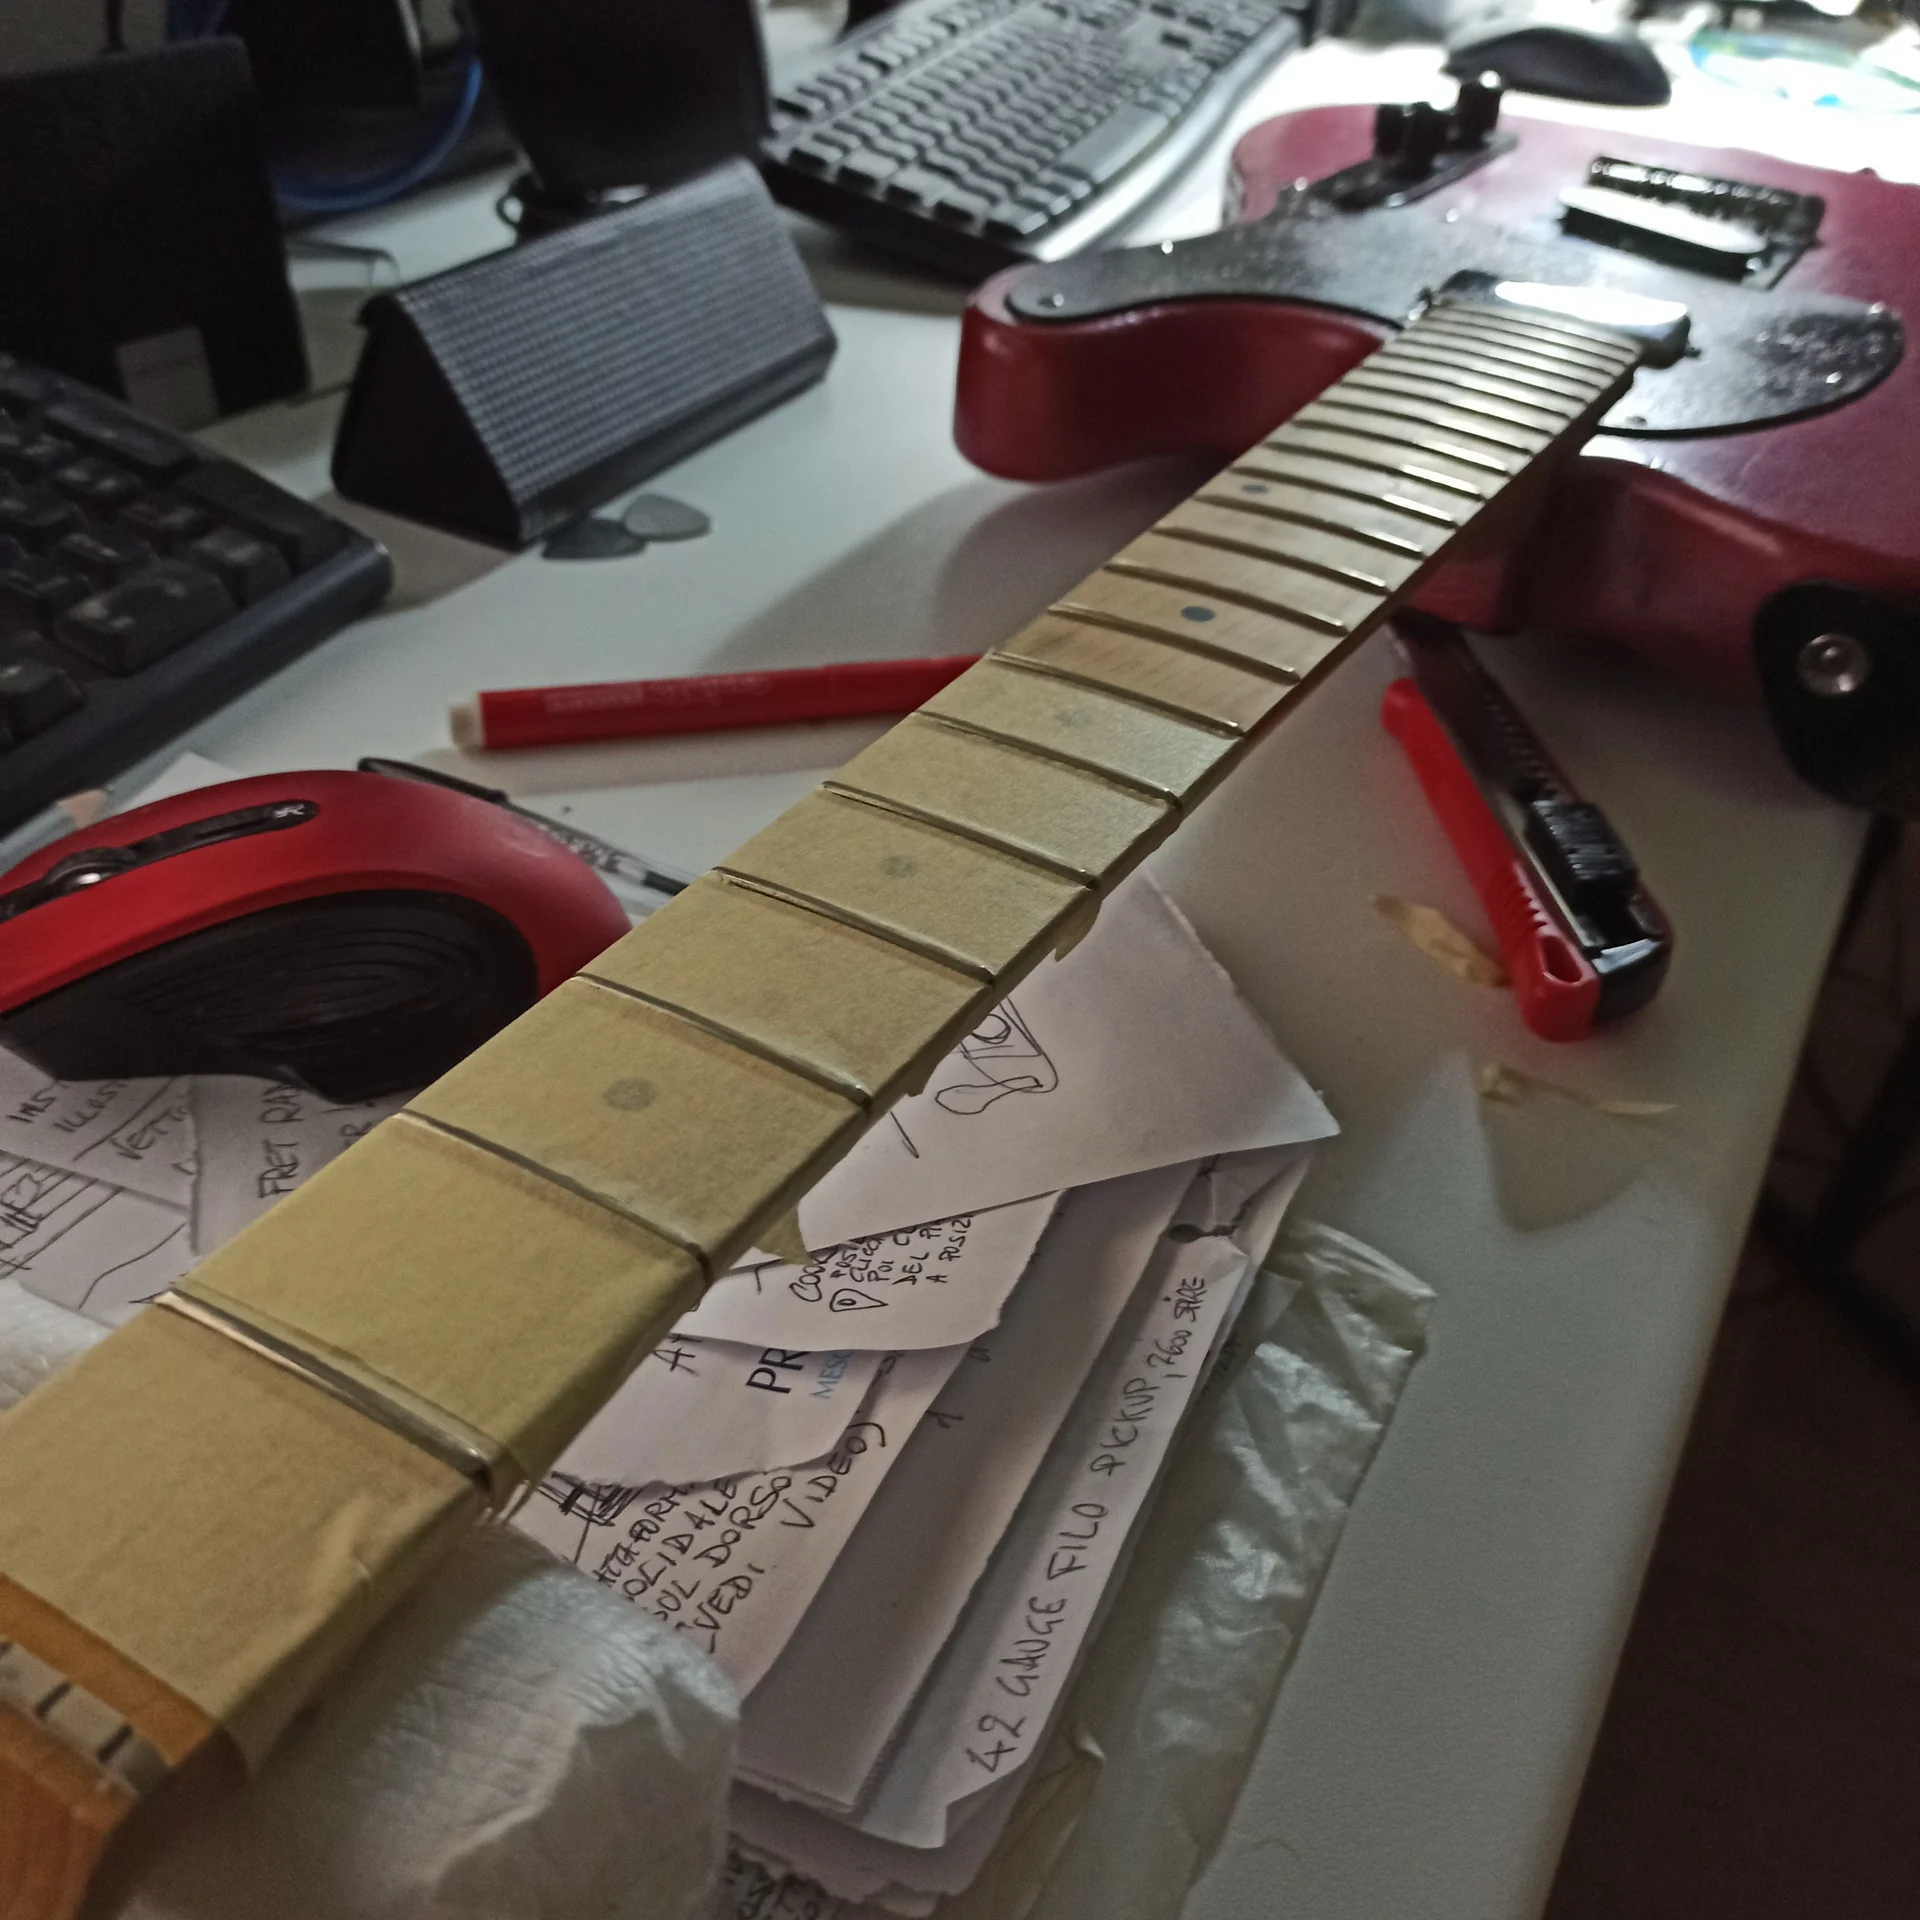
4. Mounting the Handle: The Point of No Return (or almost)
We've done the inspections, mounted the hardware, and wired the electronics. Now it's time to join the body and the neck, the point where your guitar to assemble begins to take its final shape. This step is crucial for the instrument's playability and intonation.
The pain point here is twofold: perfect alignment and precise drilling for the neck screws. If the neck isn't aligned, the strings won't pass through the center of the fretboard, and the guitar will be uncomfortable, if not impossible, to play. If the holes are incorrect, you risk stripping the screws or, worse, ruining the wood of the neck or body.
Handle Alignment: Hawkeye
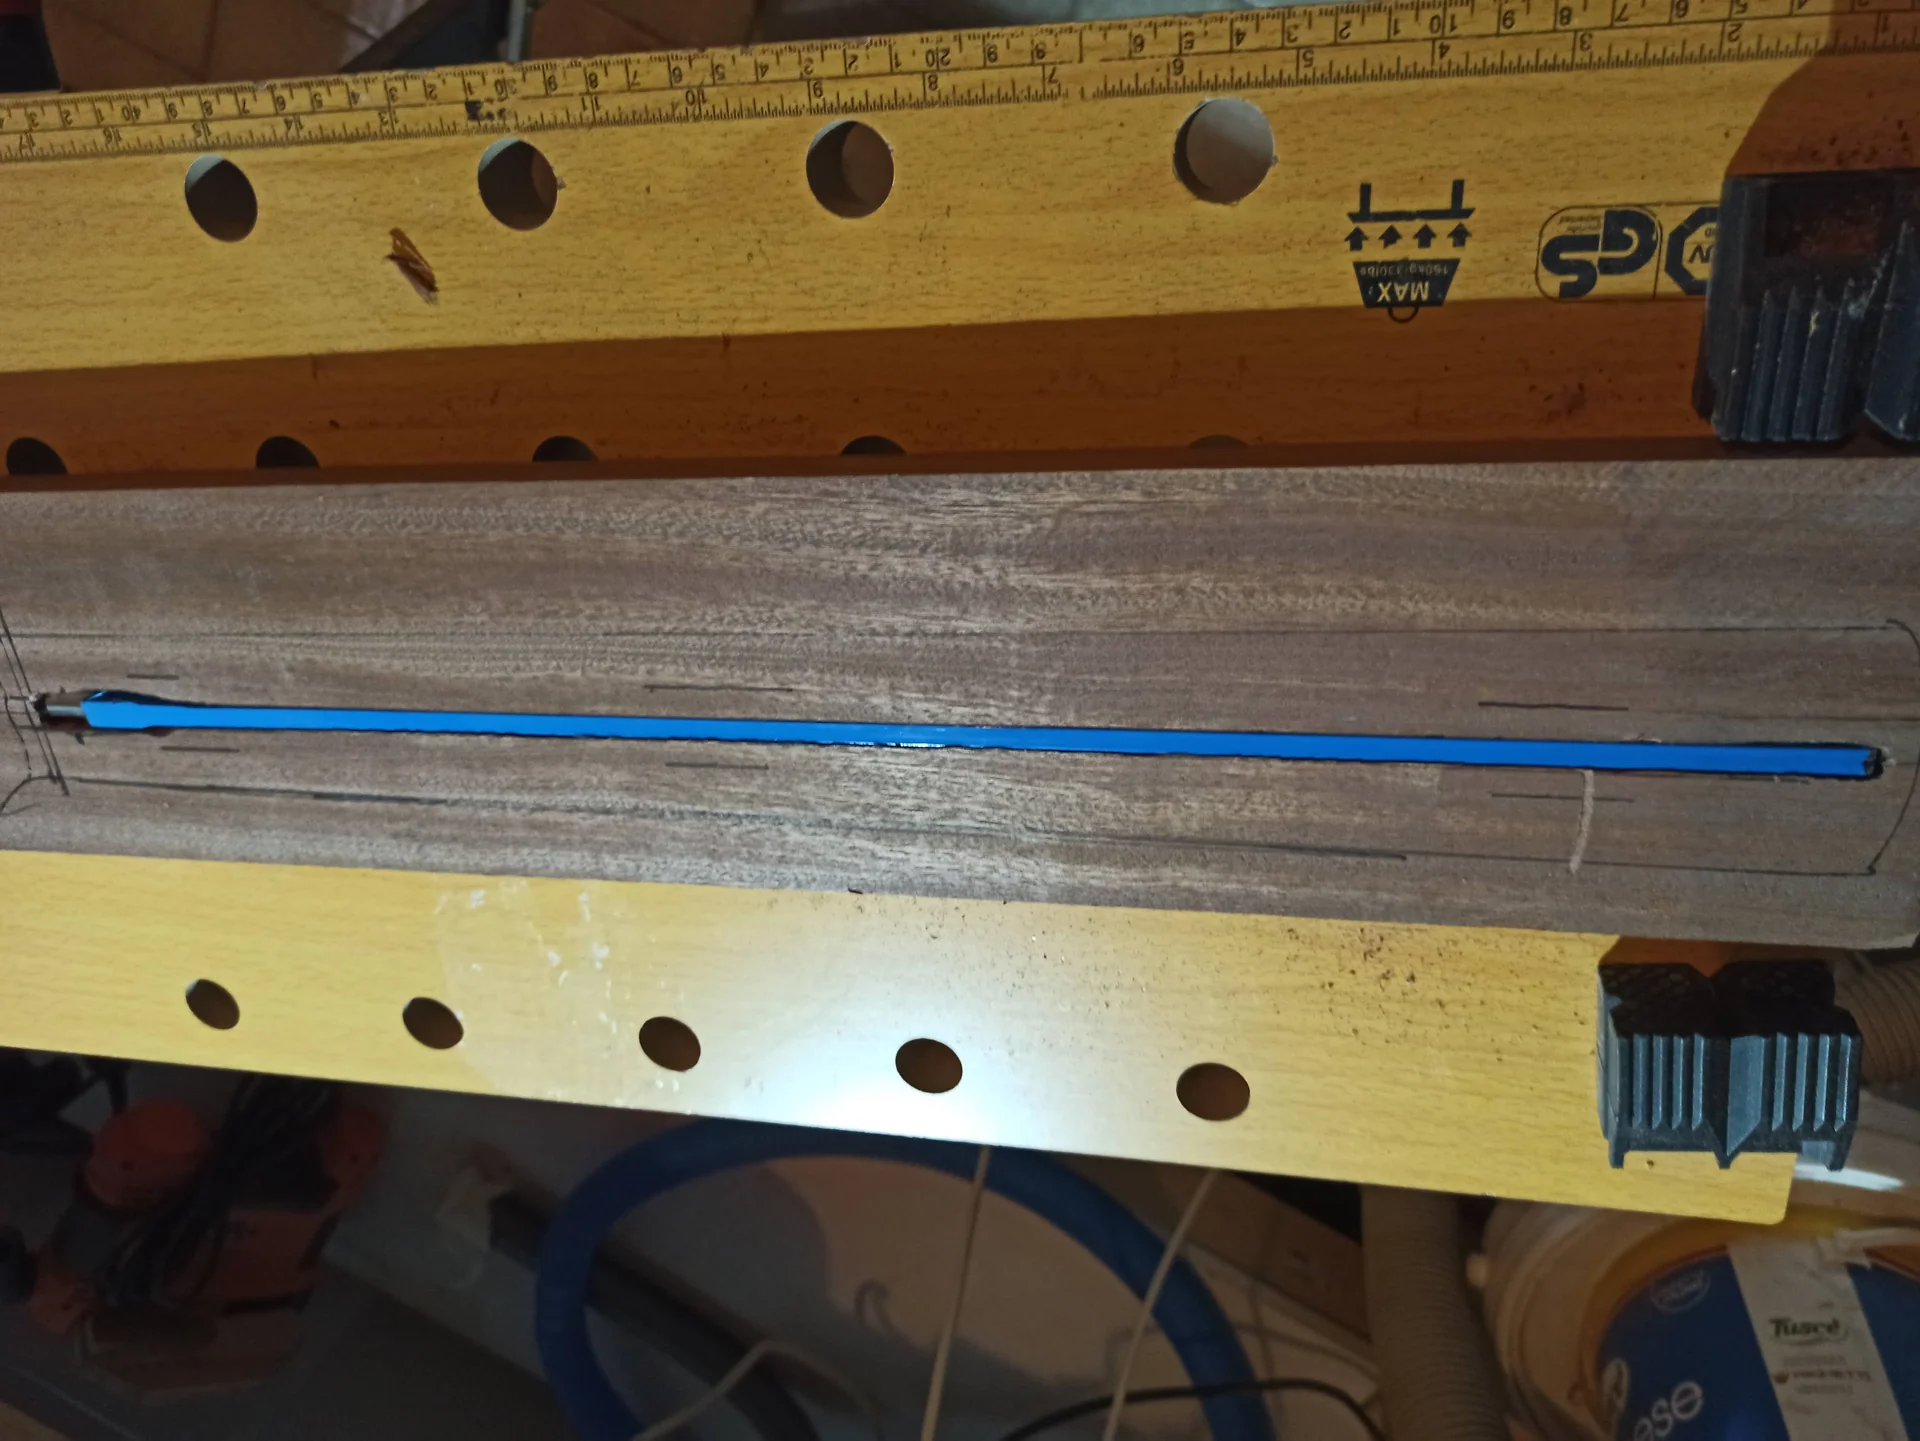
Place the neck in the neck pocket. Don't screw anything in yet. The neck should be centered and straight. How do you check? There are several methods: 1. Rope method: The simplest. Hold a string (or even a thin piece of wire) taut from the nut to the bridge, aligning it with the saddle of the high E string. The string should run straight along the edge of the fingerboard. Do the same with the low E string. Adjust the neck until both strings are perfectly aligned. 2. Ruler method: Place a long ruler on the neck, extending it to the bridge. Make sure the ruler is parallel to the edges of the neck and points exactly to the center of the bridge. 3. “Sight” method: Look at the guitar from above, as if you were playing it. The human eye is good at perceiving asymmetries. Adjust the neck until it feels perfectly straight and centered.
Once you are sure of the alignment, hold the handle still with carpenter's clamps (with rubber pads to avoid damaging the wood) or ask a friend to hold it still.
Drilling Handle Screws: Precision Comes First
This is the most delicate moment. The neck screws must fit perfectly into the pre-drilled holes in the body and then, through the body, into the neck.
1. Pilot Holes in the handle: If the handle doesn't already have holes, you'll need to drill them. Use a drill bit with a diameter slightly smaller than the body of the screw, but Not to the thread. For example, if the screw has a diameter of 4mm, but the thread is deep, you could use a 3mm or 3.5mm bit. If the bit is too large, the screw won't grip. If it's too small, the screw may break or strip. 2. Depth: Mark the screw depth on the drill bit with masking tape. Don't drill too deep, or you might damage the truss rod (the metal core that runs along the neck). 3. Lubrication: An old carpenter's trick: rub a little soap or beeswax on the threads of the handle screws. This will help them enter the wood more easily without forcing or overheating, reducing the risk of stripping. 4. Screwing: Insert the screws and tighten them gradually, crosswise. Don't overtighten just one screw at once. Tighten the first one a little, then the second, then the third, and so on, until they're all snug. This ensures even pressure on the handle.
When I assembled my first Telecaster, I was so nervous that I overtightened a neck screw with my drill driver. The result? The screw head was stripped. I had to use pliers to remove it, damaging the surrounding wood a bit. Since then, I've always used a hand screwdriver for final tightening and have been much more careful.
Truss Rod: A First Look
Once the neck is assembled, you may want to make an initial adjustment to the truss rod. This isn't the final adjustment, but it does provide a slight concave curvature (relief) to the neck, which is essential to prevent the strings from buzzing on the frets. Typically, you tighten it (clockwise) to straighten the neck and loosen it (counterclockwise) to increase the curvature. For now, a slight adjustment to test its functionality is sufficient.
This is the time when your construction guitar It's really starting to sound like a musical instrument. Take a moment to admire your work.
5. Stringing and First Rough Setup
Your assembled electric guitar It's almost ready to sing! We've attached the body and neck, and the electronics are in place. Now, before we get to the finer details, we need to give it a voice: the strings.
Choosing and Mounting Strings
Caliber: String gauge is a personal choice and depends on your playing style. A lighter gauge (e.g., 0.09-0.42) is easier to bend, while a heavier gauge (e.g., 0.10-0.46 or more) offers more sustain and a fuller sound, but requires more finger strength. Start with a standard gauge and then experiment.
Stringing:n1. Pass the strings: Insert the strings into the bridge (or through the body, depending on the model).n2. To the mechanics: Pass the string through the hole in the corresponding tuning machine. Leave a little slack (about the distance between two tuning machines for thick strings, a little less for thin strings). 3. Locking (if not locking): Fold the string over itself and wrap it neatly around the tuning peg, facing downward. Make sure the wraps don't overlap and that the string is securely held. 4. Locking Mechanics: If you use locking tuners, it's even easier. Insert the string, pull it taut, lock the mechanism, and then tune. No need to wind it a thousand times.
Tuning: Tune your guitar. Don't worry if the strings fall out of tune immediately at first; that's normal. They need to "break in" and settle in. Give them a gentle tug after tuning, then retune. Repeat this process a couple of times.
Action and Intonation: The First Adjustments
Now that the guitar is strung and standing, we can do a rough setup. This will give you a general idea of how it sounds and allow you to identify any major issues.
Action (String Height):
Action is the height of the strings relative to the fretboard. If it's too high, the guitar will be uncomfortable to play. If it's too low, the strings will fret out.
Adjust the height of the bridge saddles. Many bridges have small screws on each saddle that allow you to raise or lower them. Start with a medium action.,
it's too high
It's too low. You can fine-tune it later.
Intonation (Coarse):
Intonation is the accuracy of notes across the fretboard. A guitar that's out of tune will sound out of tune, even if it's in tune.
Tune your guitar.
Play the open string and check the tuning.
Then, press the same string at the 12th fret (the octave) and play.
If the note at the 12th fret is sharp compared to the open string, the bridge saddle must be moved back (lengthening the string).
If it is flat, the saddle must be advanced (shortening the string).
* Many bridges have a screw on the back of each saddle to adjust its position. For now, make a rough adjustment, without going crazy.
The Nut:
An often overlooked but crucial point for playability is the height of the strings at the nut. The strings should be just above the first frets. If they are too high,